On this page
To trigger an action for a digital document signature, button creation is the initial step. It streamlines the workflows by allowing users to directly launch the eSign process from a Salesforce record. It automates the process of sending record data for signing.
Creating a custom button in Salesforce for Sign Made Easy is a simple but important setup step. This button acts as the starting point for sending documents for eSignature directly from any record, so users can initiate the signing process with just one click instead of navigating through multiple screens. It streamlines the process of eSignature in Salesforce to modernize your workflow.
By adding the button to the right object and placing it on the page layout, you make eSignature actions easily accessible for your team. The process only takes a few minutes, and once it’s done, everyone can trigger the eSigning process from the record they are working on.
Therefore, in this guide, we will dig deep into each step of creating a custom button in the Salesforce digital signature tool – Sign Made Easy. The custom button creation is essential to enable workflow automation and integration of external functionality directly within Salesforce.
Let’s start with the quick steps now!
Steps to Create a Custom eSignature Button in Sign Made Easy
Before starting with the steps, it is important to understand its efficiency and existence. In Sign Made Easy, the custom button gives users a quick way to start the signing workflow directly from a Salesforce record.
Consequently, they don’t have to jump through multiple screens or menus. It simply makes the entire process faster and more seamless for anyone working in Salesforce.
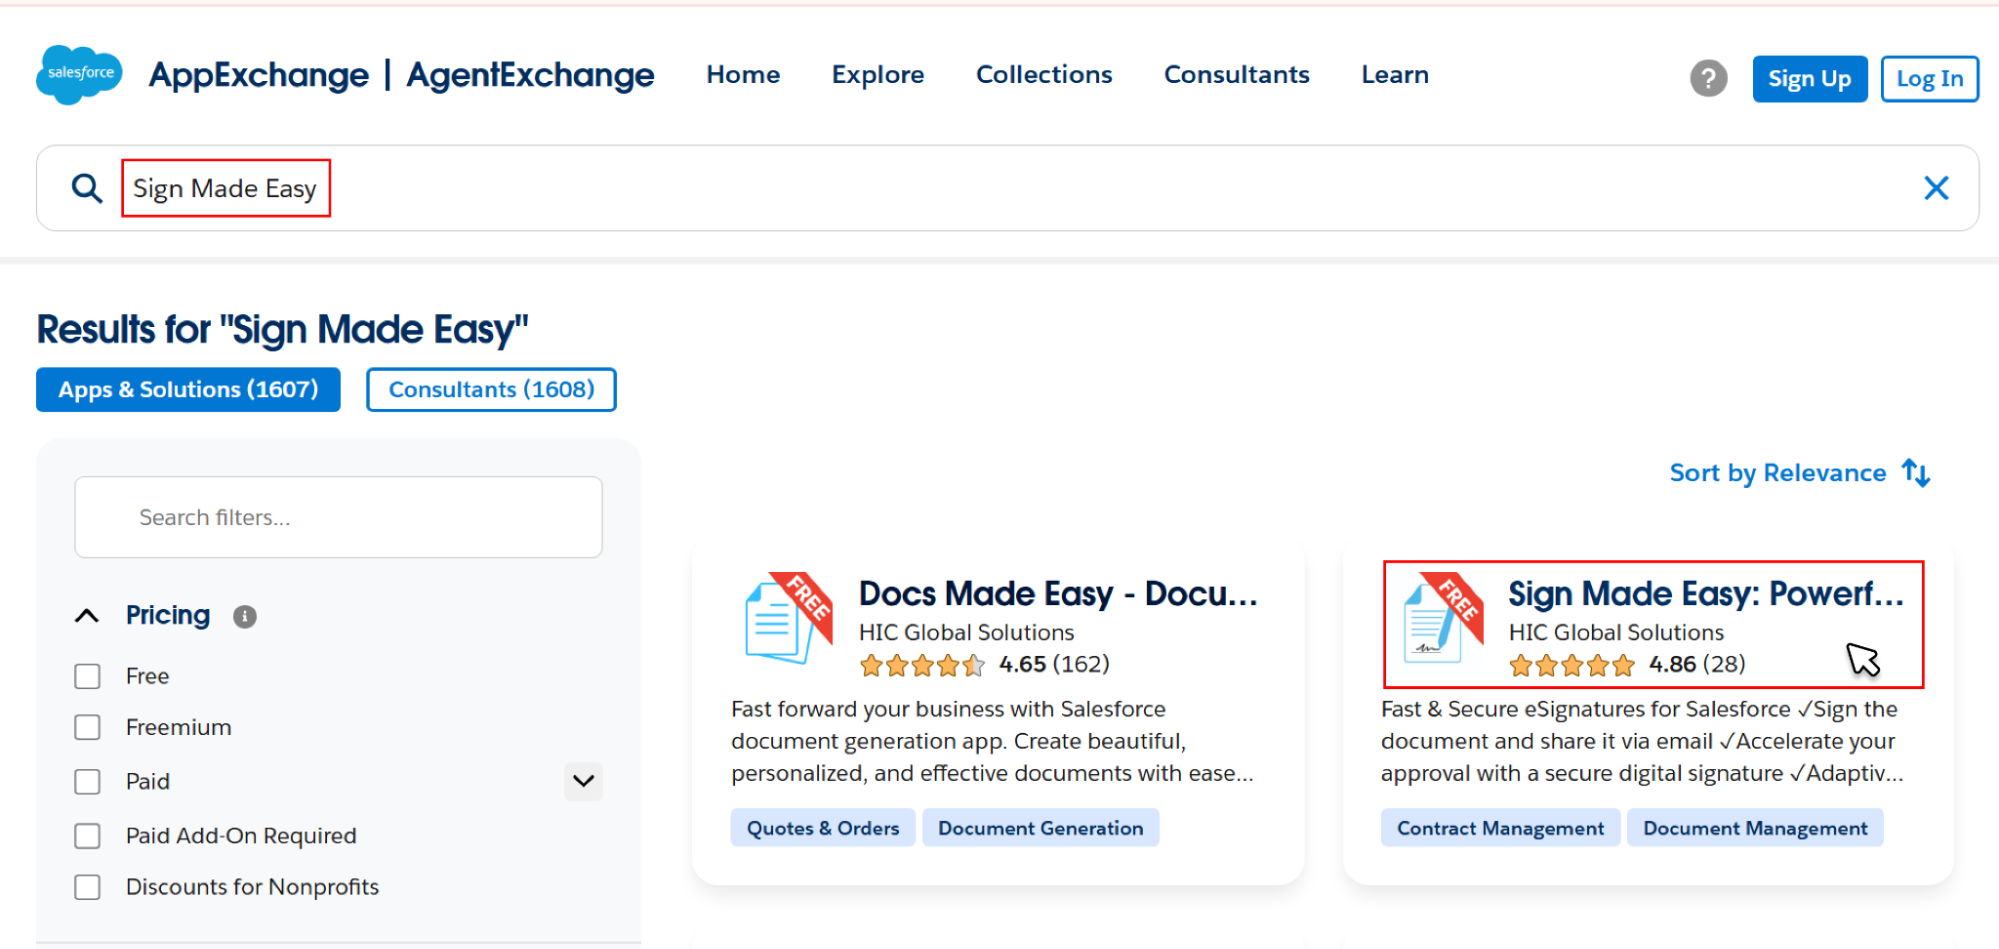
Step 1: First, you need to launch Sign Made Easy in your Salesforce org by installing it from Salesforce AppExchange.
Step 2: After installing the app, click on Org Configuration, then click on the Configure SME button below.
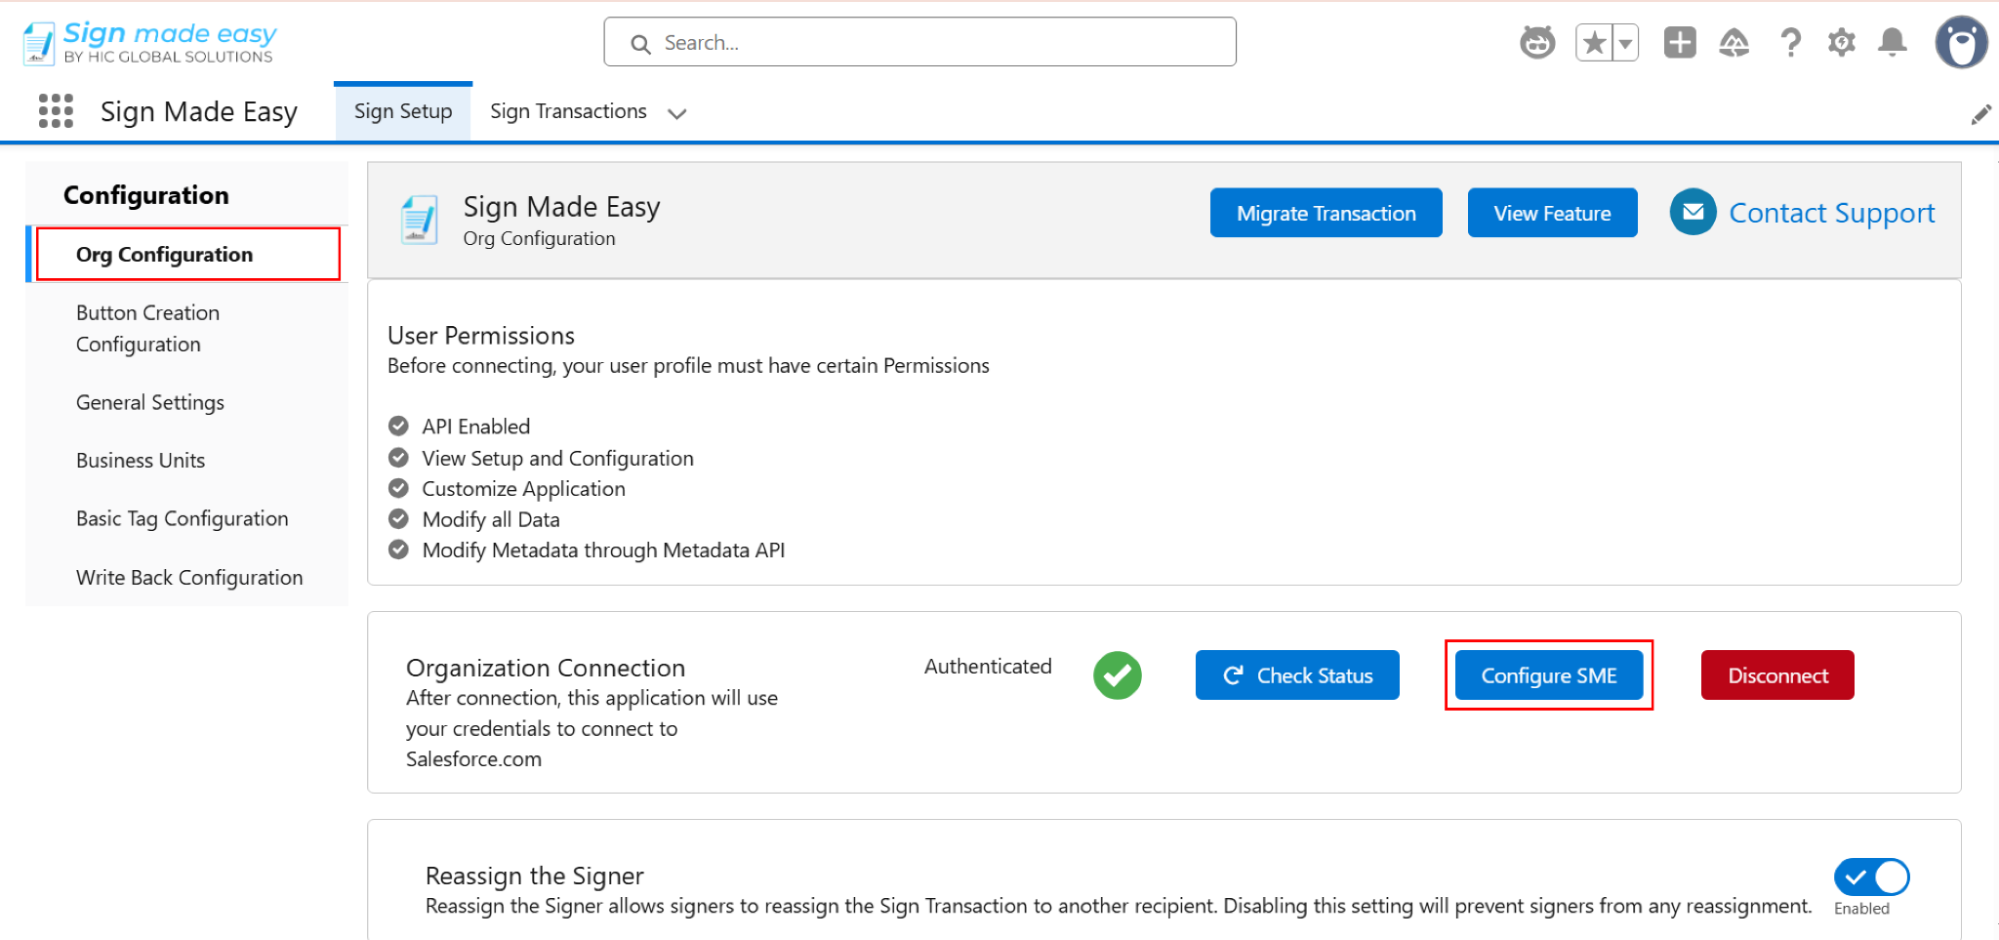
Step 3: After that, click on Button Creation Configuration.

Step 4: Now you have to begin by selecting the Salesforce object from which you want your signing process to start.
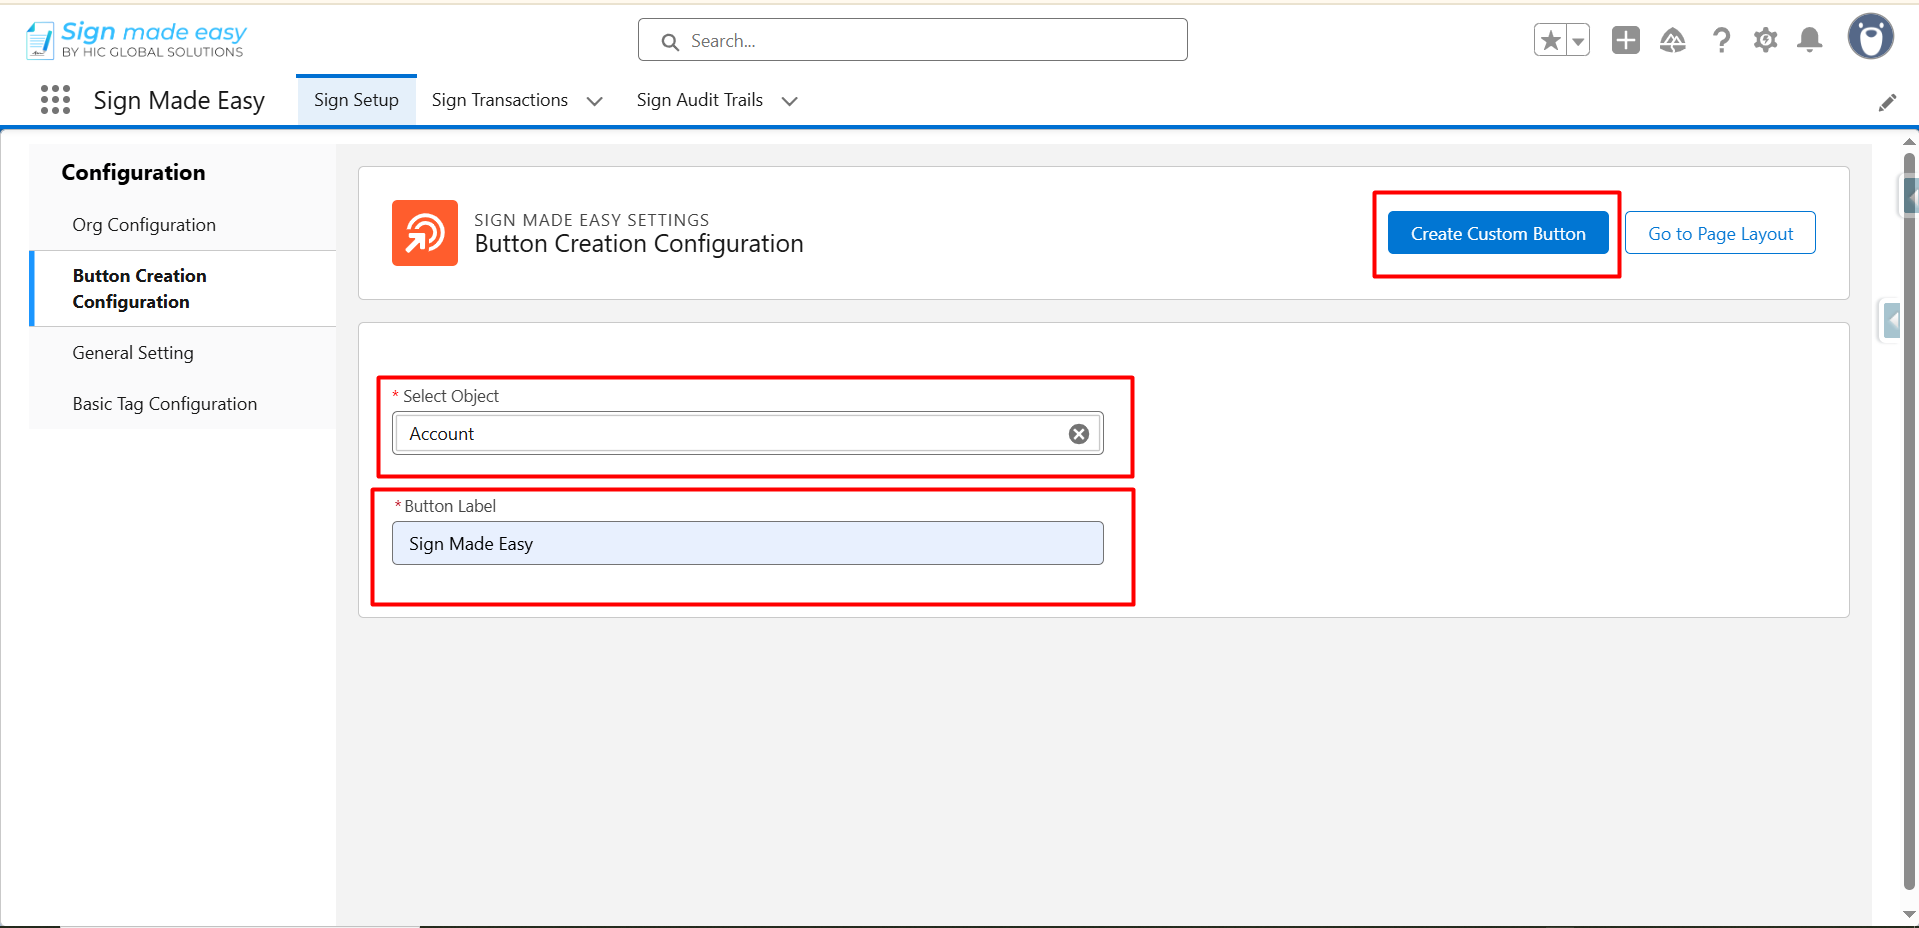
After choosing the object (for instance: Account, Asset, Opportunity, etc.), enter your preferred button name. Click Create Custom Button, which prepares the button for use.
Note: Once the button is created, remember to add it to the page layout so users can actually see and access it while working on records. Without placing it on the layout, the button won’t appear for anyone.
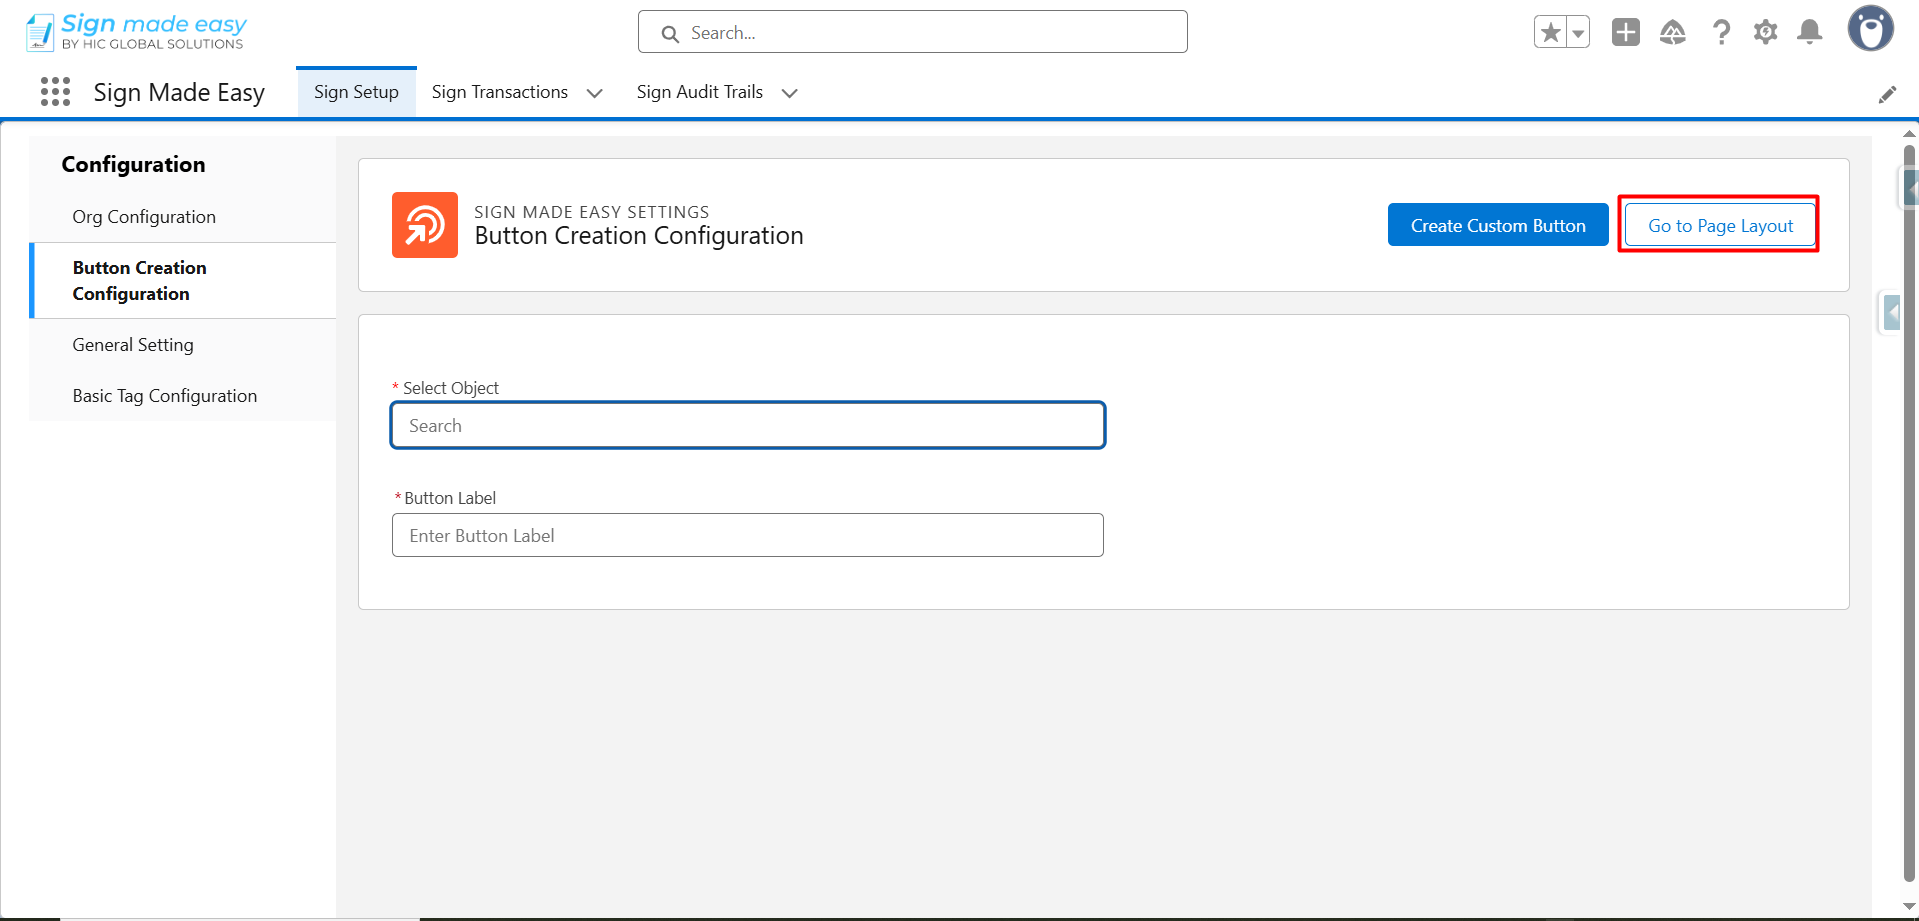
Step 5: Next, click the Go to Page Layout button, which automatically directs you to the layout settings of the object you selected. This saves time because you don’t have to manually search for the layout inside Salesforce.
From here, you will be able to place the button exactly where you want it on your record page.
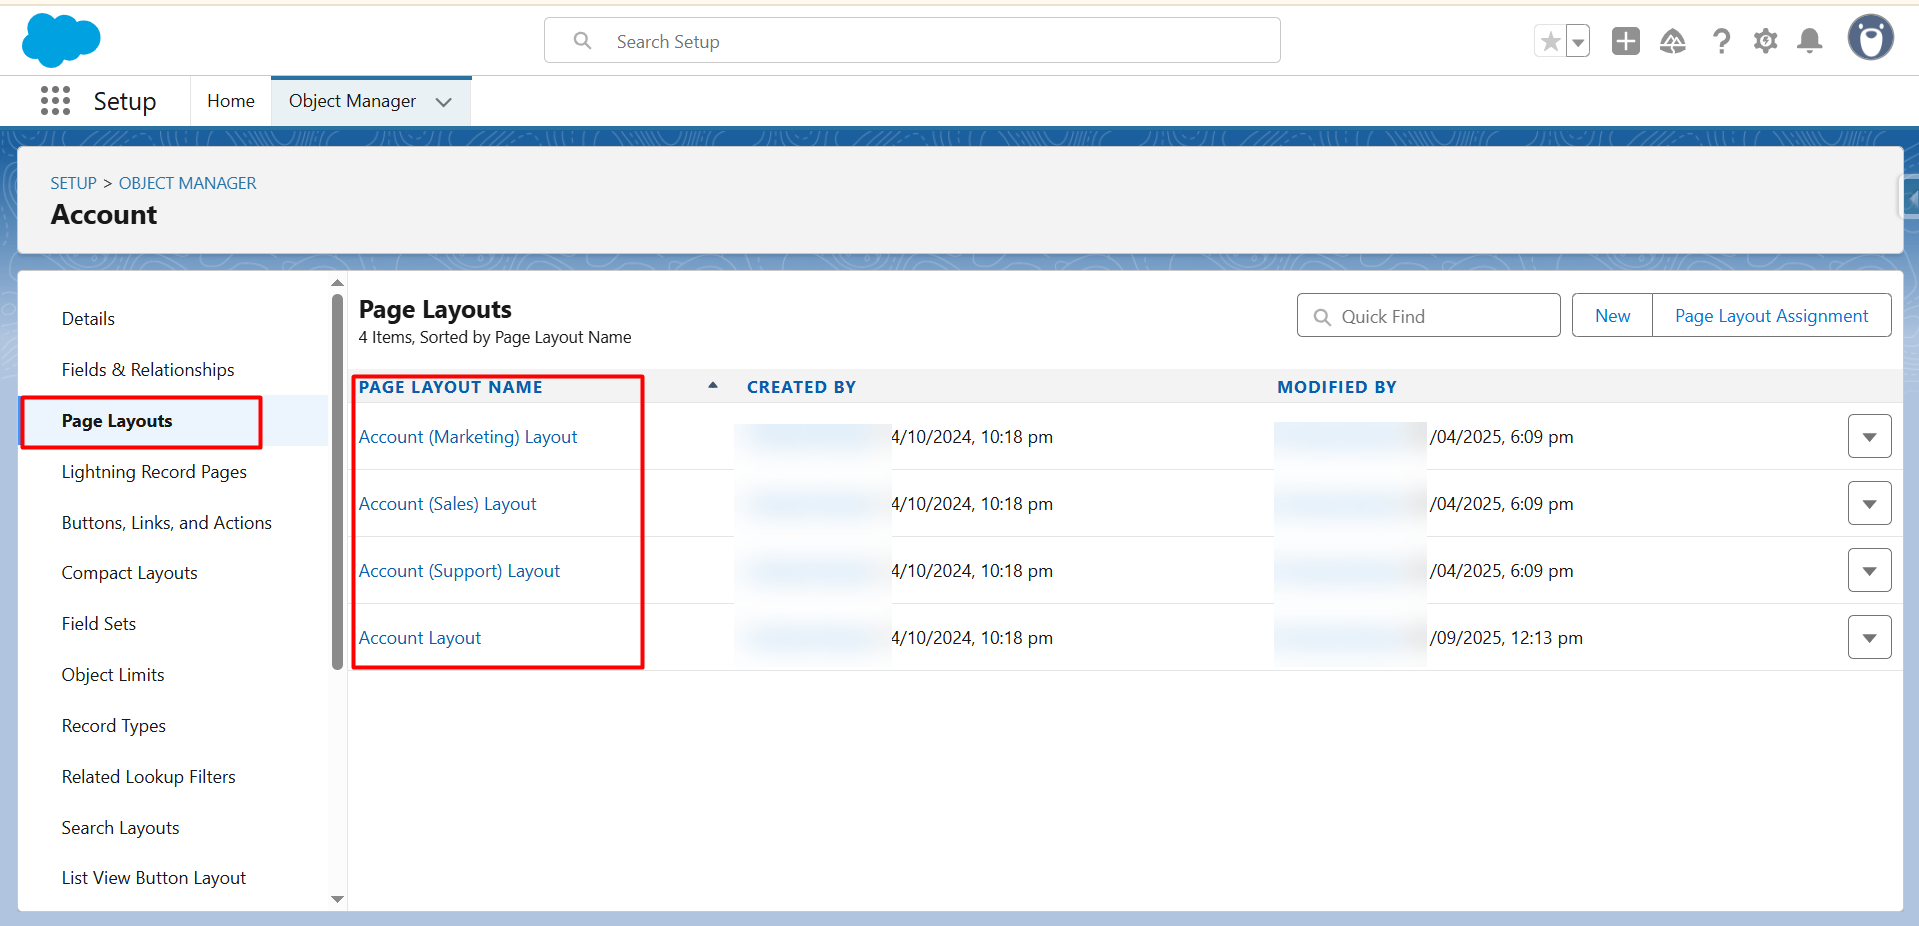
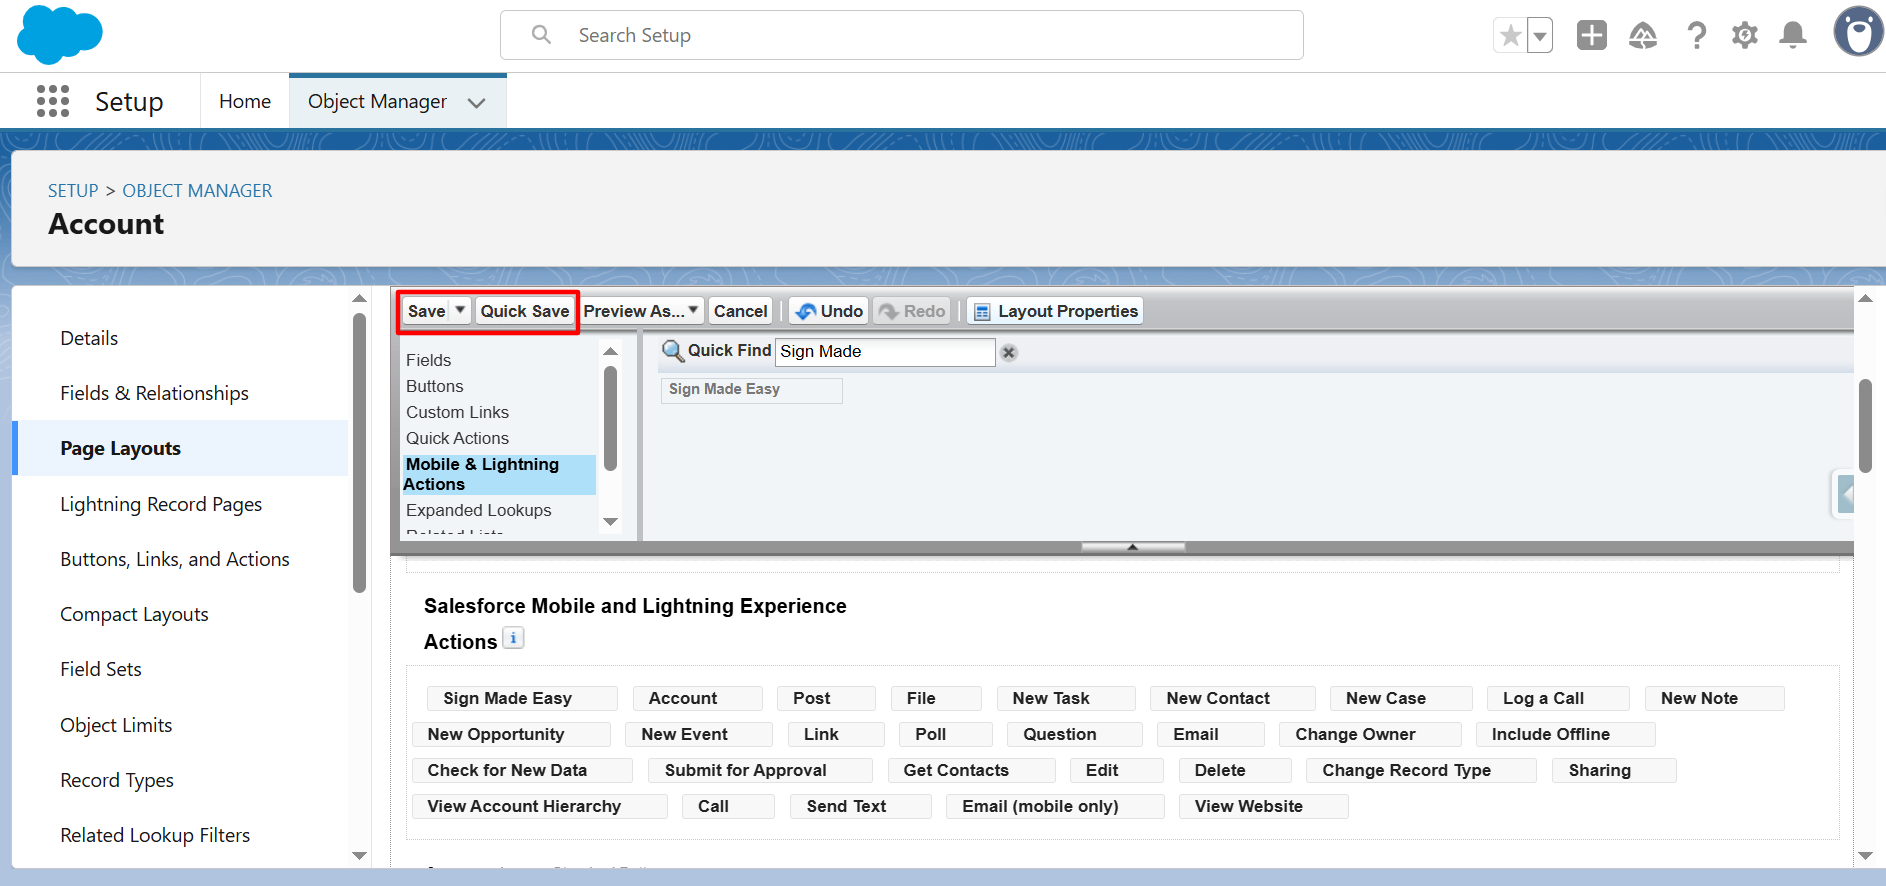
Step 6: Choose the layout where you want the SME custom button to appear and scroll to the Mobile & Lightning Actions section.
Step 7: Use the Quick Find box to locate your button quickly and drag it into the Salesforce Mobile and Lightning Experience Actions area.
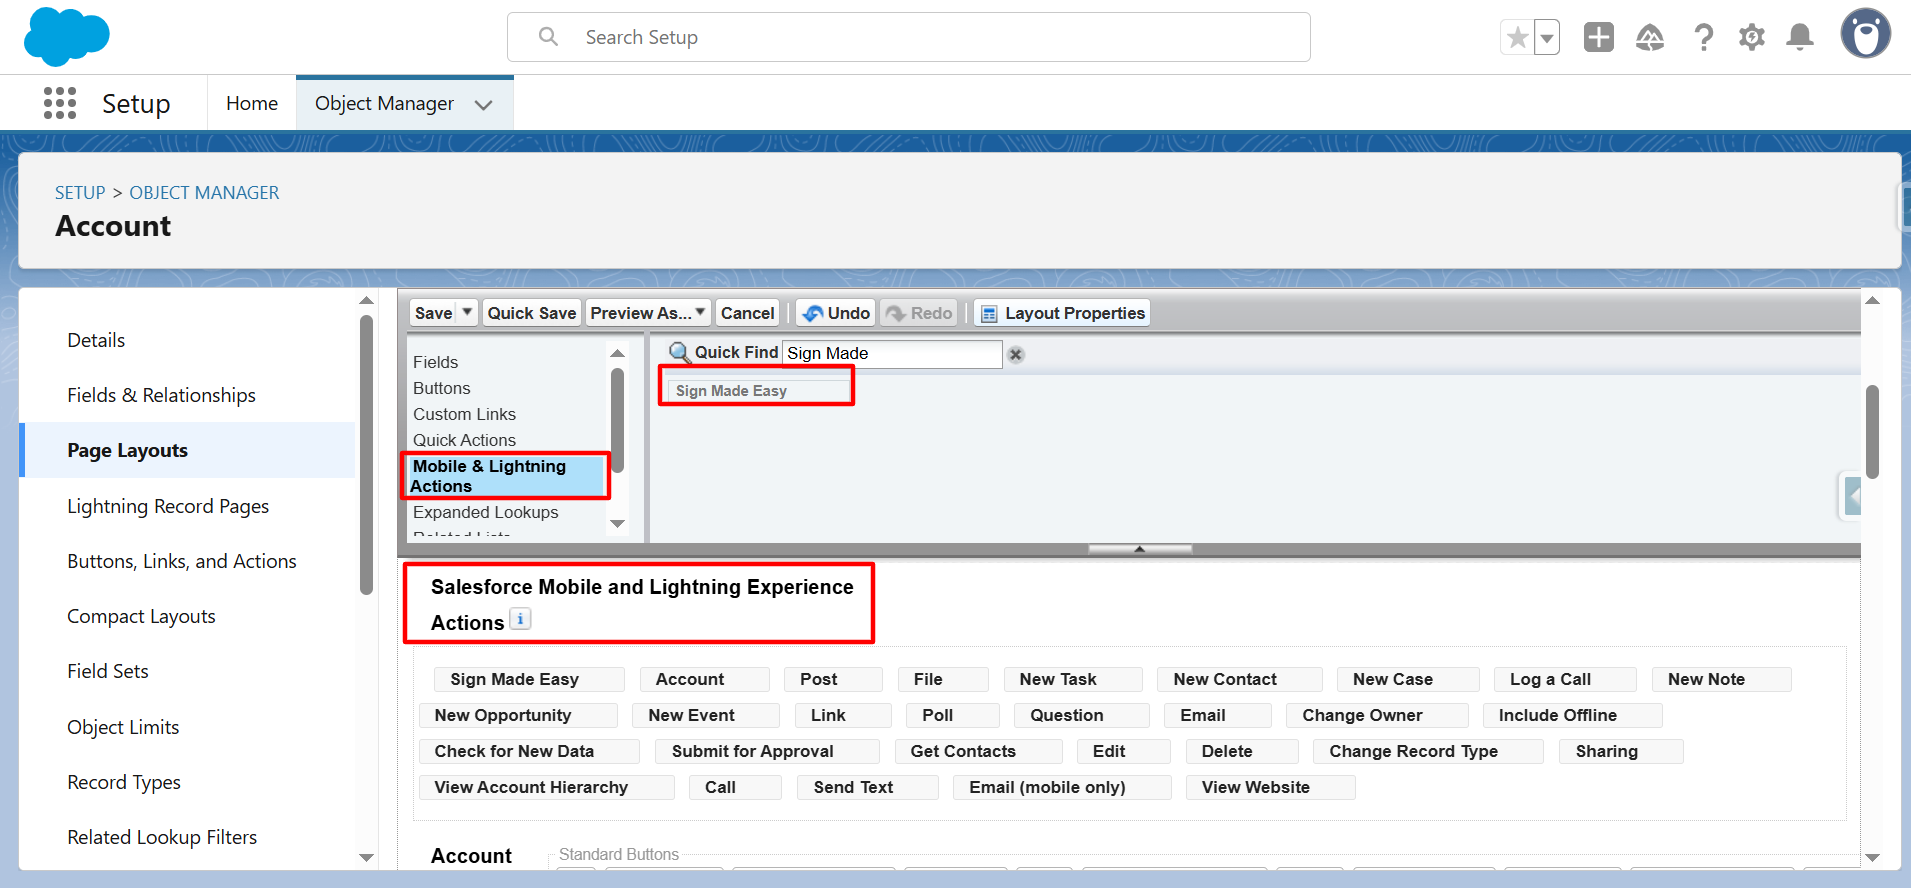
Step 8: Once the button is placed, click Save or Quick Save to make the changes live. After saving, the button becomes immediately available on the page layout.
Note: Your Sign Made Easy button is created, and users can start using it to send documents for signature directly from their Salesforce records.
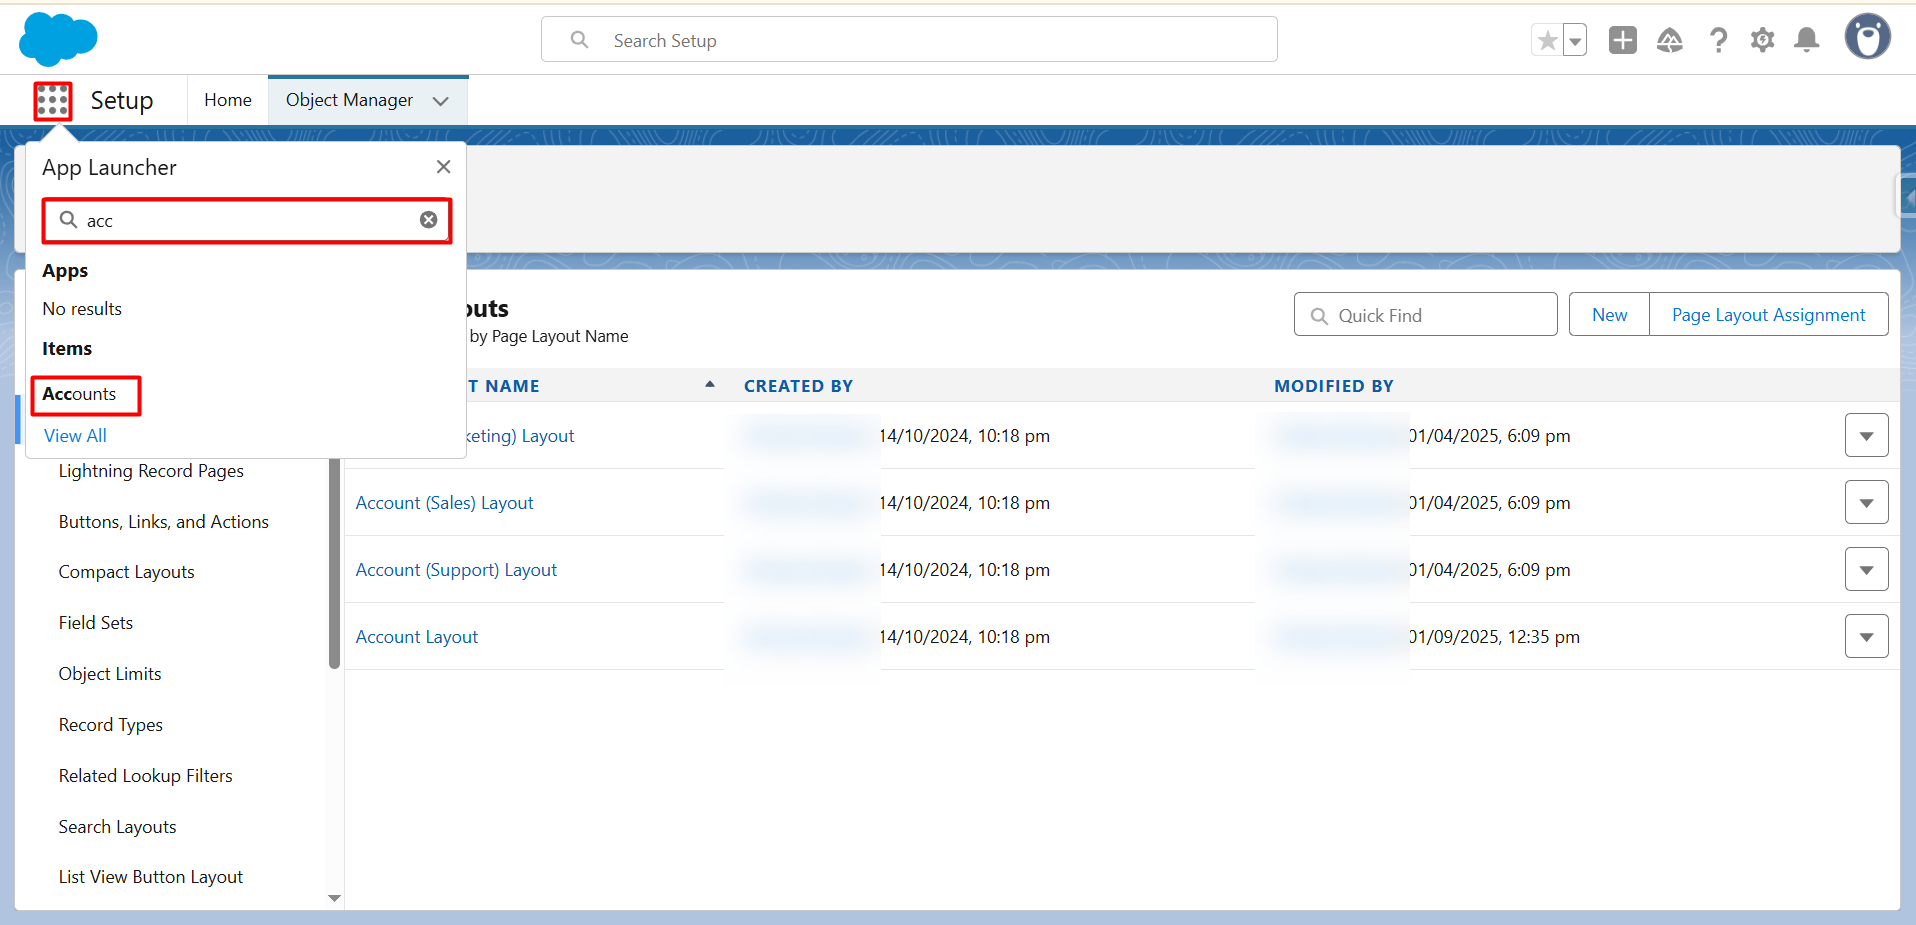
Step 9: To access the button, go to the App Launcher, search for the object where the button was added.
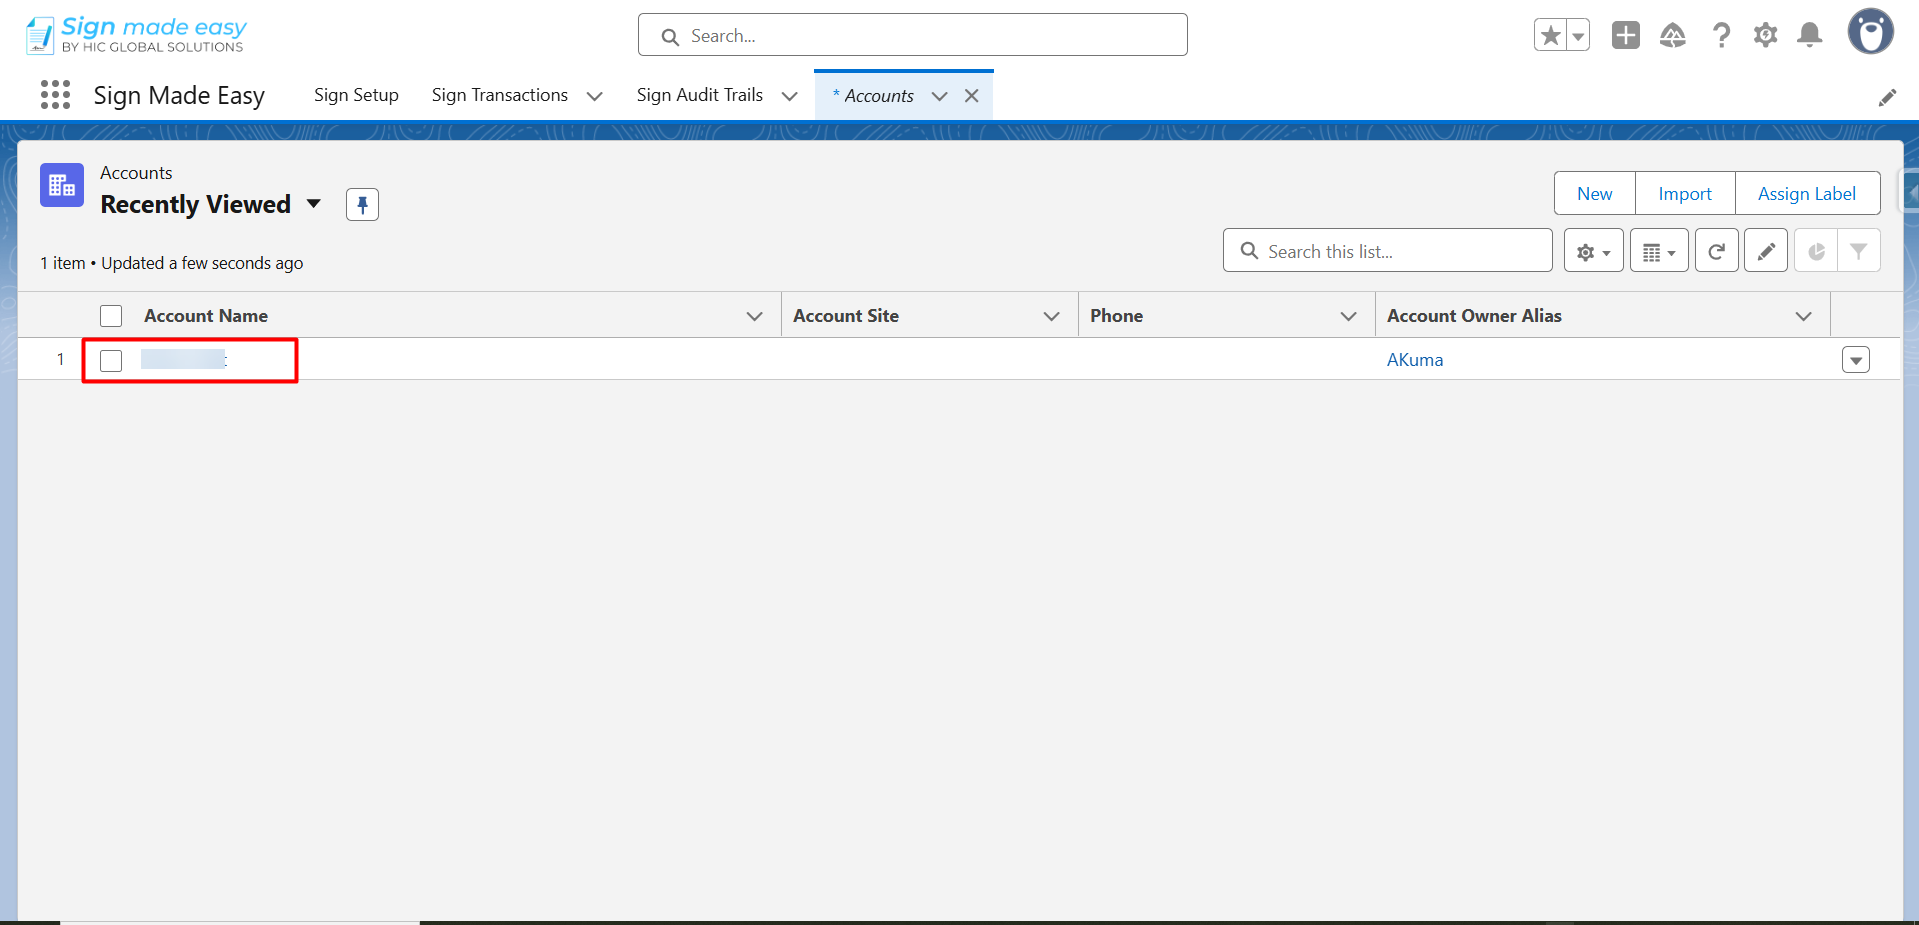
Step 10: Now, open any record.
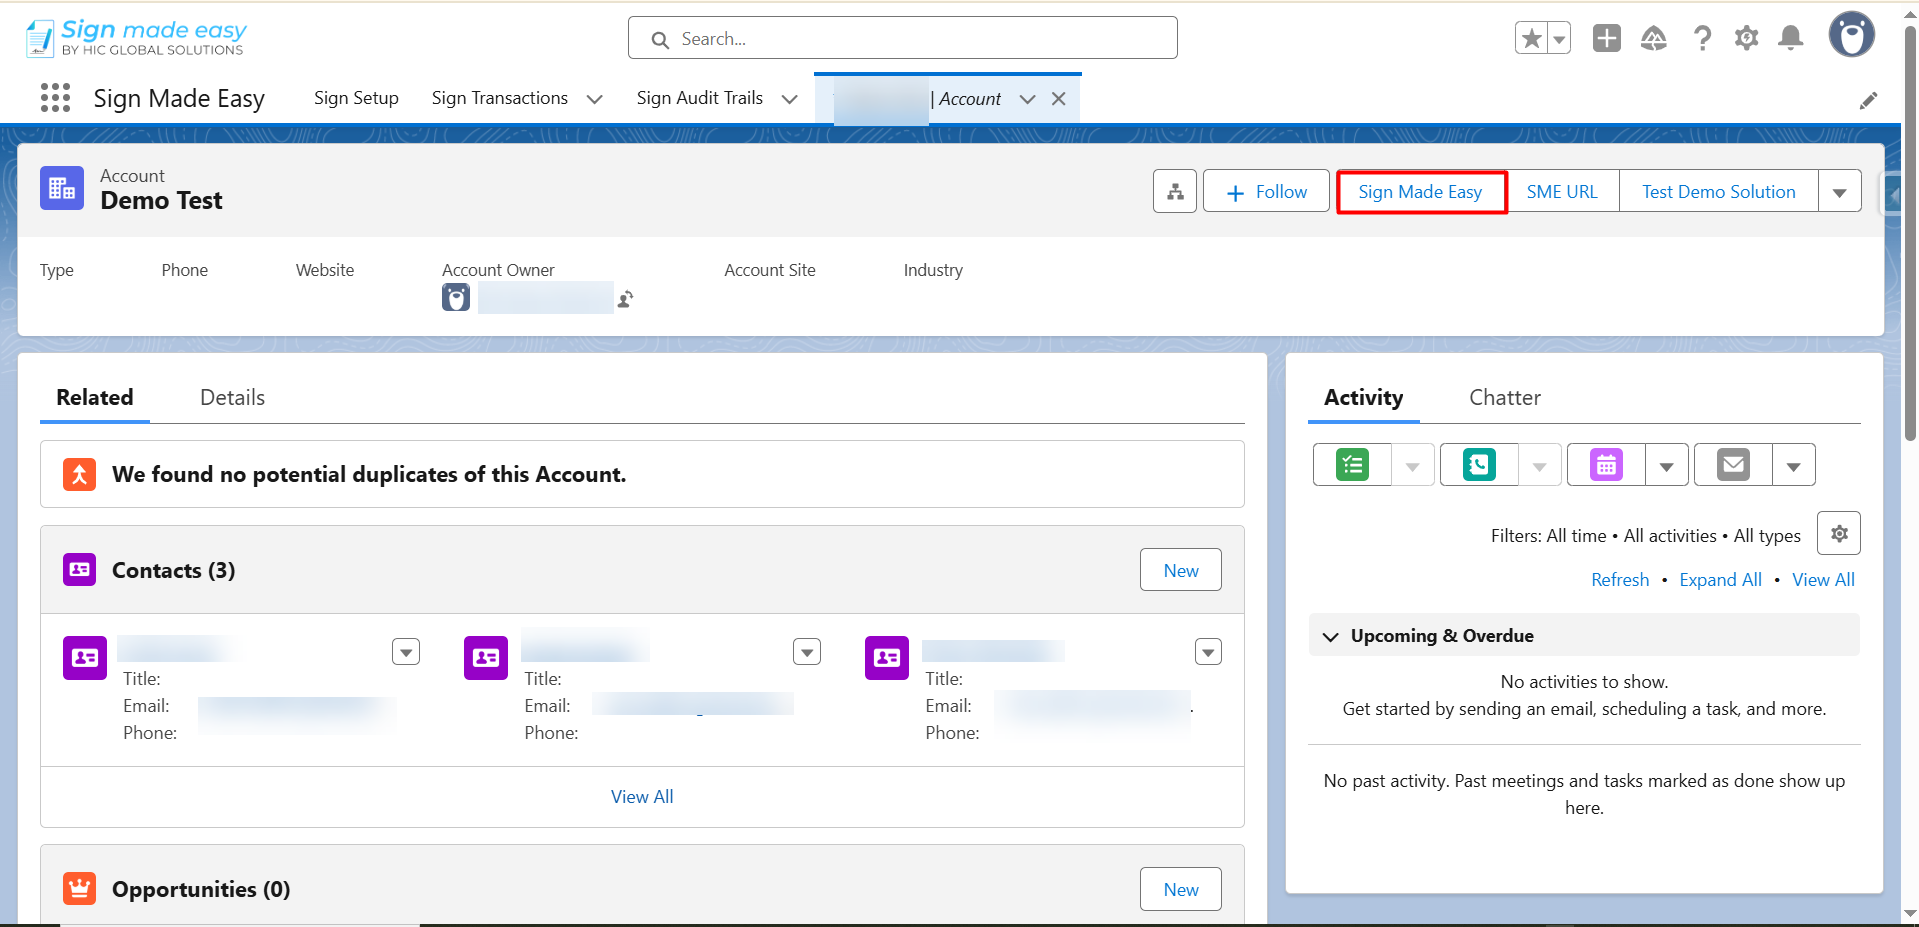
Step 11: Finally, inside the record page, you will now see the Sign Made Easy custom button ready for use with your given label name.
Conclusion
Setting up the Sign Made Easy button is a small step that makes a big impact in everyday Salesforce work. Once the button is added to the right object and layout, users can send documents for signature instantly without searching for anything or switching screens.
After creating the custom button in Sign Made Easy – the Salesforce electronic signature tool – you can leverage powerful features such as AI Summarization, Custom Lookups, Sign Templates, Form Fields, BGM Transactions, and more.
With the button in place, your team can start using Sign Made Easy exactly as intended – quick, accessible, and seamlessly integrated into the record. To explore more, unlock the pro features of the eSignature for Salesforce solution and get in touch with our support team now!