On this page
Automating document workflows is no longer optional for organizations using Salesforce, it’s essential for speed, accuracy, and scalability. With a powerful eSignature solution for Salesforce, businesses can eliminate manual steps and automatically send documents for signature the moment a record meets specific conditions.
This is where Salesforce Flow combined with Sign Templates transforms traditional processes into intelligent, automated signing workflows.
By connecting your Salesforce data model with an automated signing process, you can ensure that agreements, approvals, and contracts are generated and sent instantly directly from Salesforce, without manual intervention. This not only improves efficiency but also ensures data consistency and compliance across your organization.
In this guide, you’ll learn how to send documents for eSignature through automation using Record-Triggered Flows. Check out the steps now.
Prequisite
- Ensure that the Sign Template is created on the same object on which you are creating the flow.
- Ensure that the SME Pro package is installed and that the user has Pro User
Step-by-Step Guide to Send Documents for eSignature through Automation
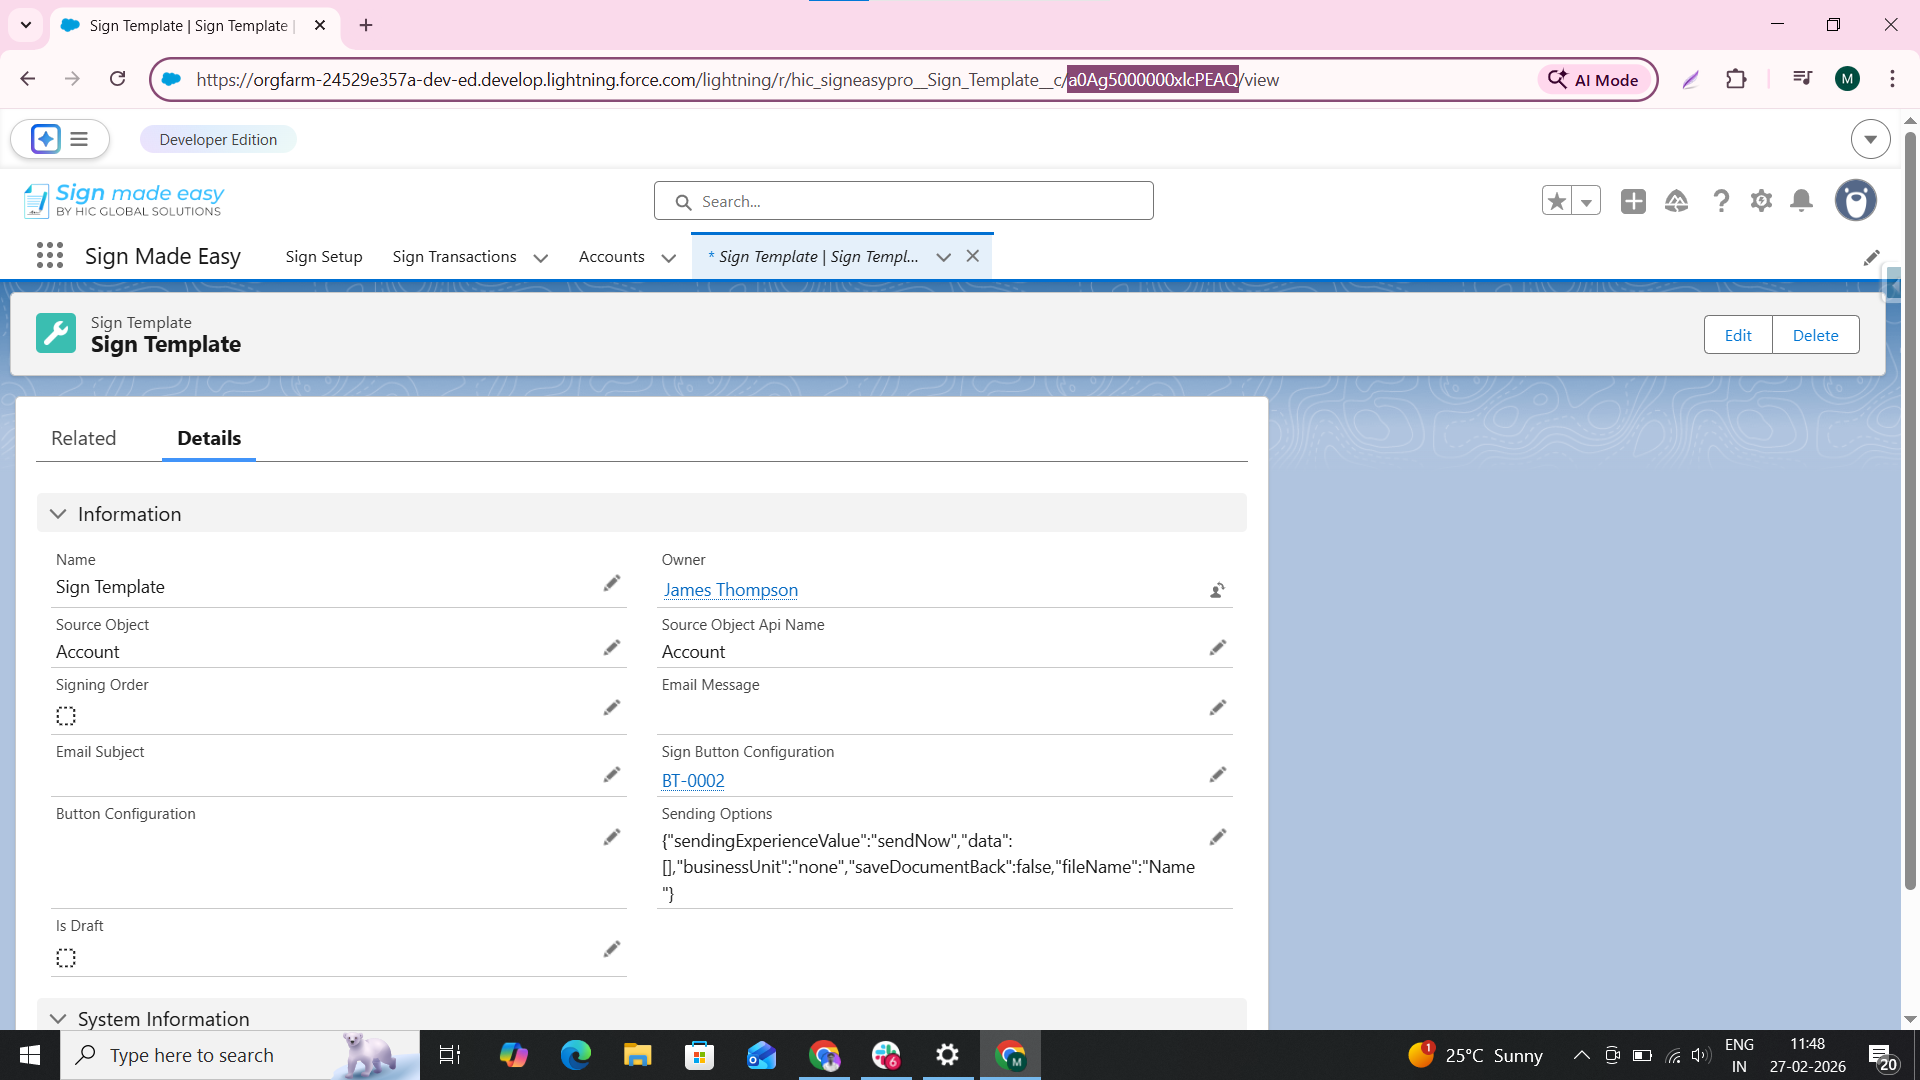
Step 1: Use an existing Sign Template or create a new one. If you haven’t created a template yet, click here.
Step 2: Copy the Sign Template ID.
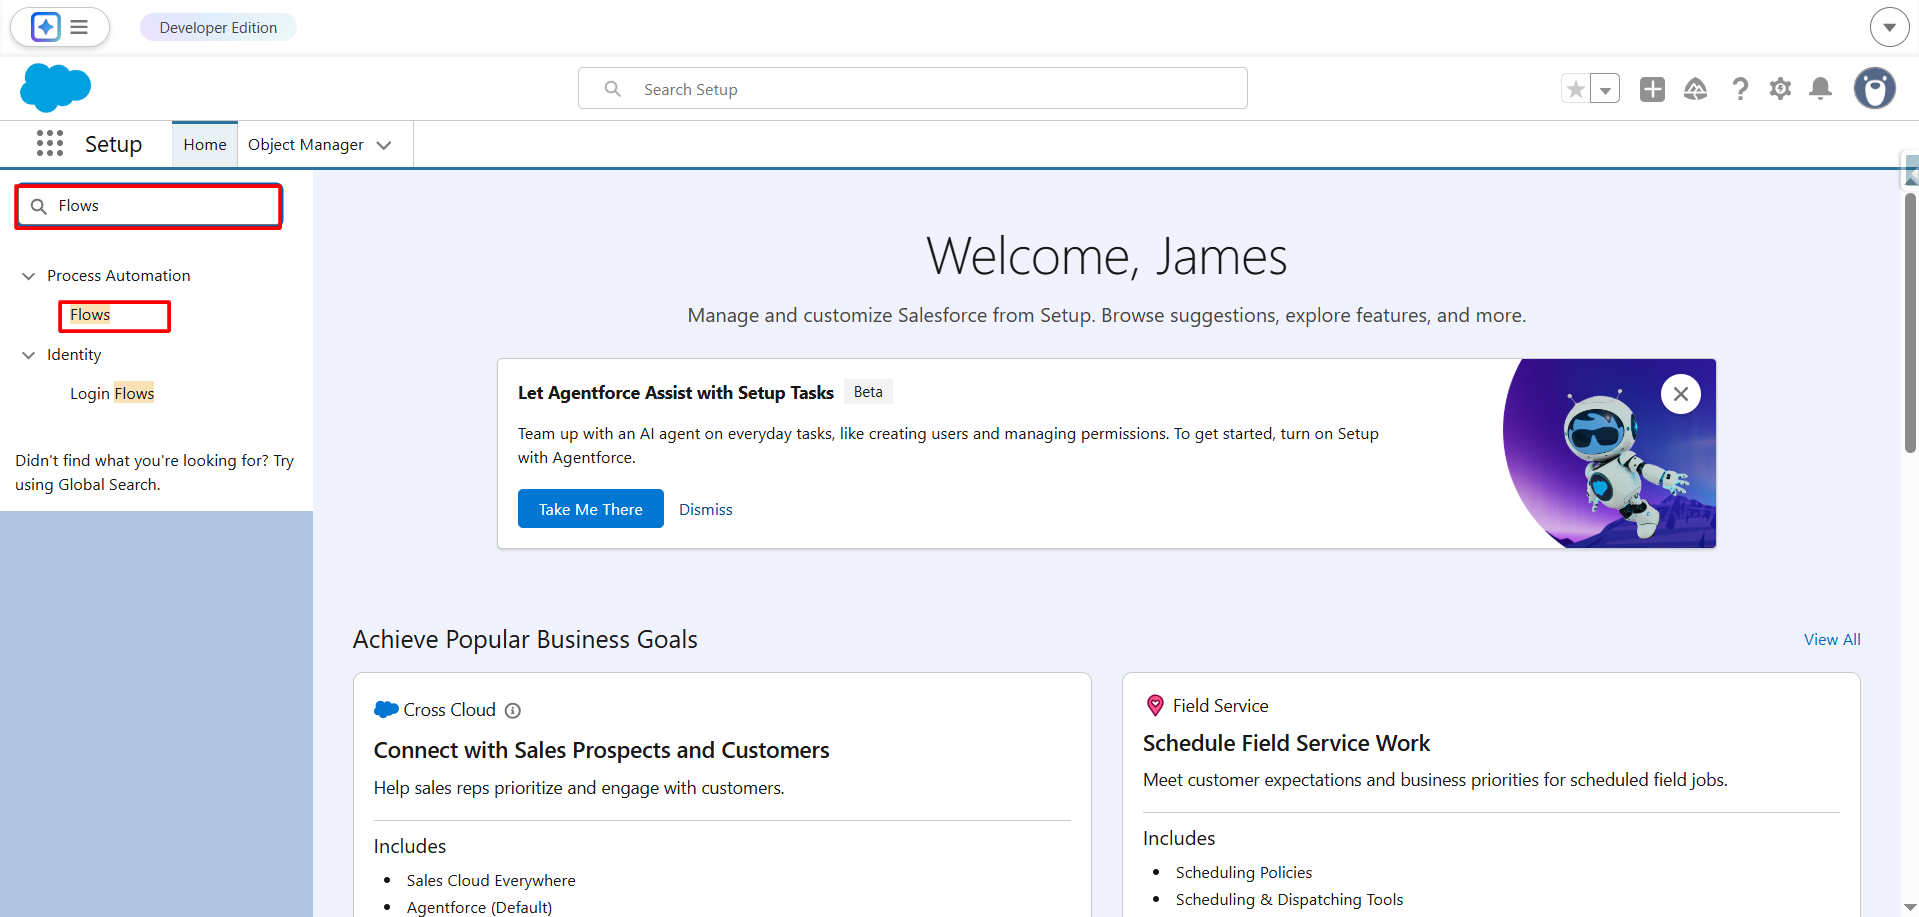
Step 3: Type “Flows” in the Quick Find search bar, then select it to open the Flow Setup page.
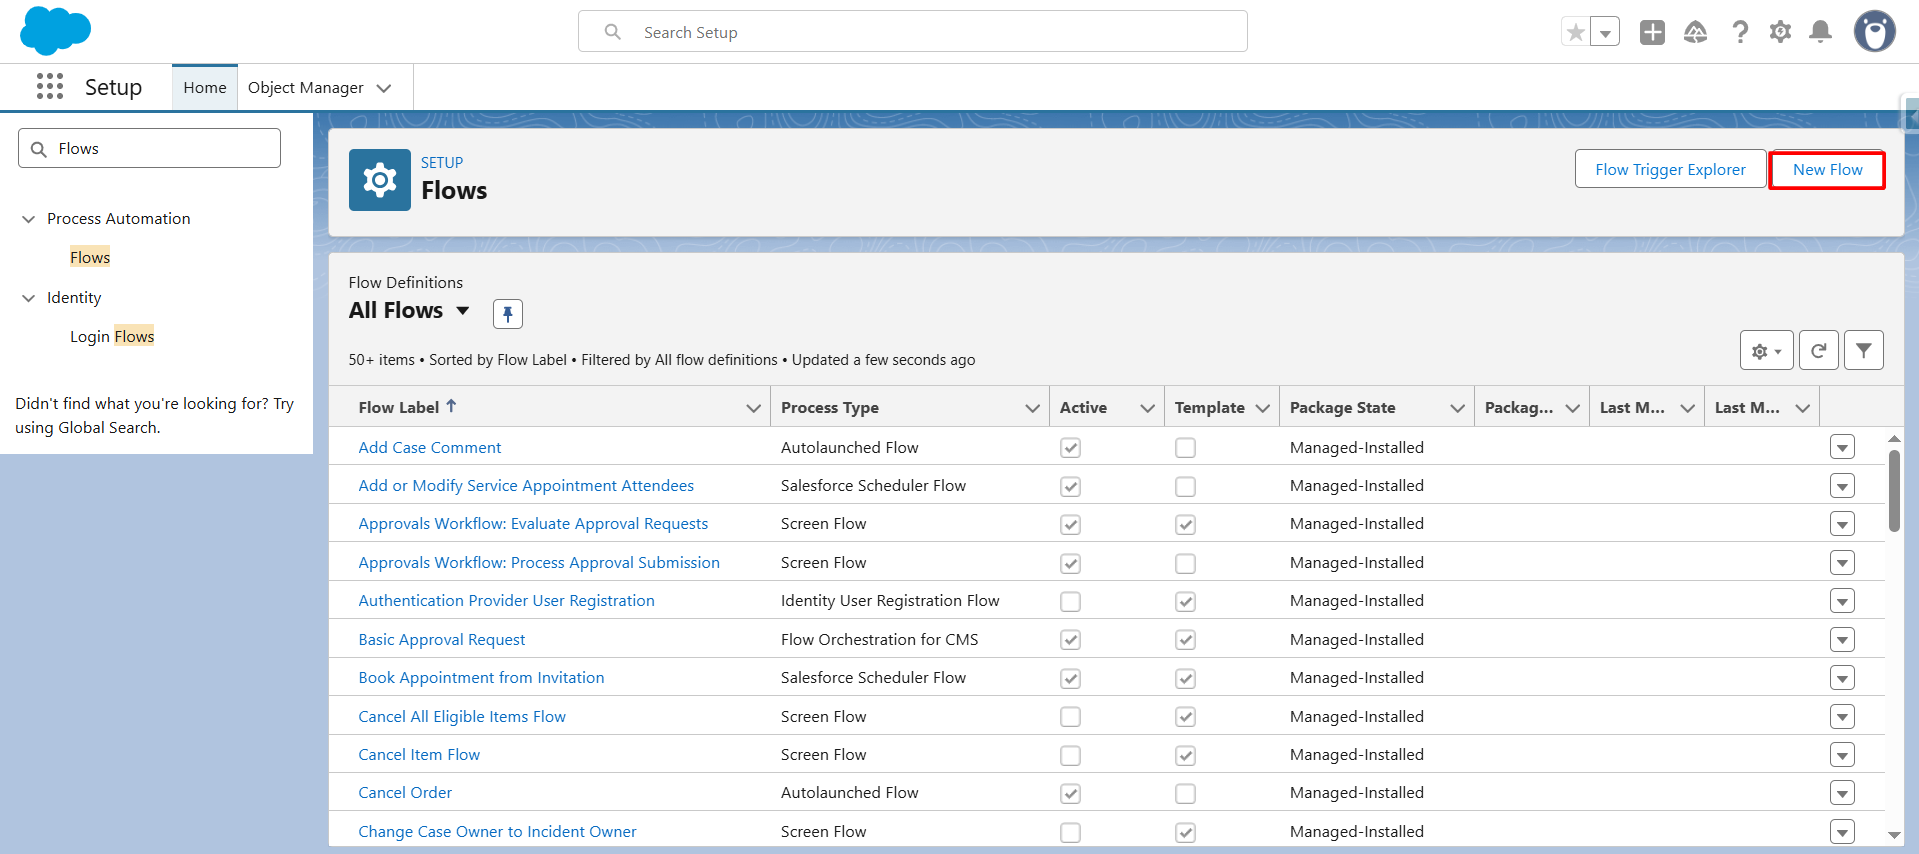
Step 4: On the Flow Setup page, click the “New Flow” button to create a new flow.
Step 5: Select “Record Trigger Flow”.
A Record-Triggered Flow in Salesforce is a type of automation that runs automatically when a record is created, updated, or deleted.

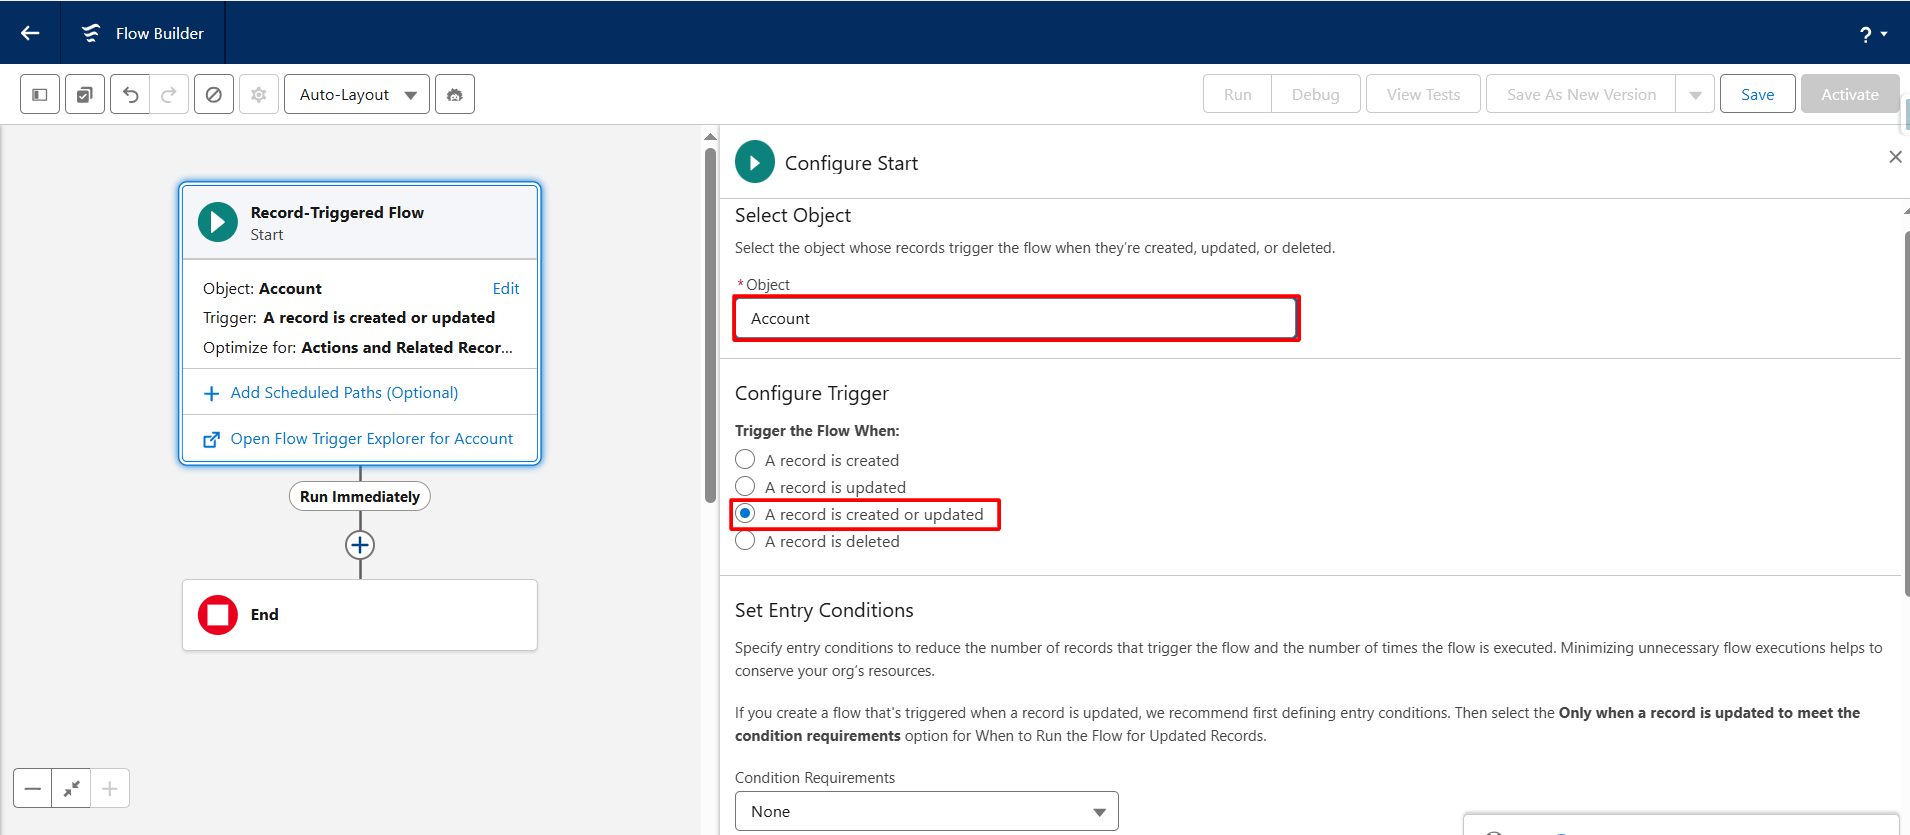
Step 6: Choose the appropriate object, then configure when the flow should trigger (e.g., when a record is created, updated, or deleted according to your business requirements).
Note:
- Choose the appropriate object (e.g., Account, Opportunity, or a custom object).
- Define when the flow should trigger (e.g., record creation, update, or deletion).
- Configure entry conditions based on your business requirements.
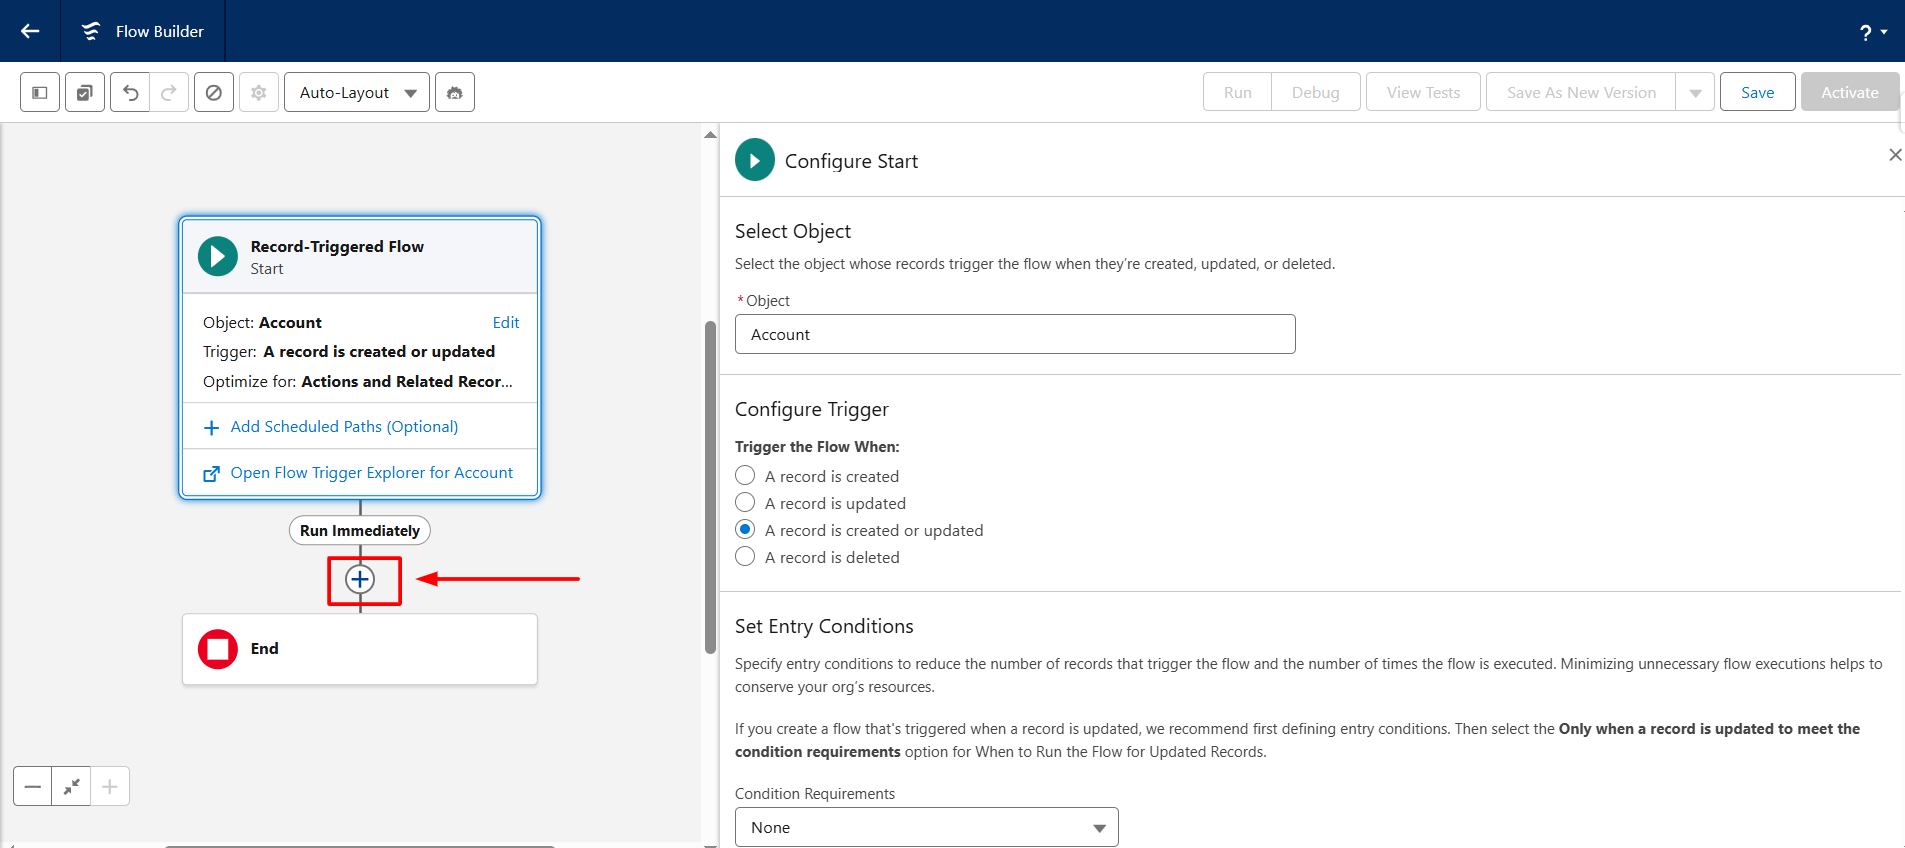
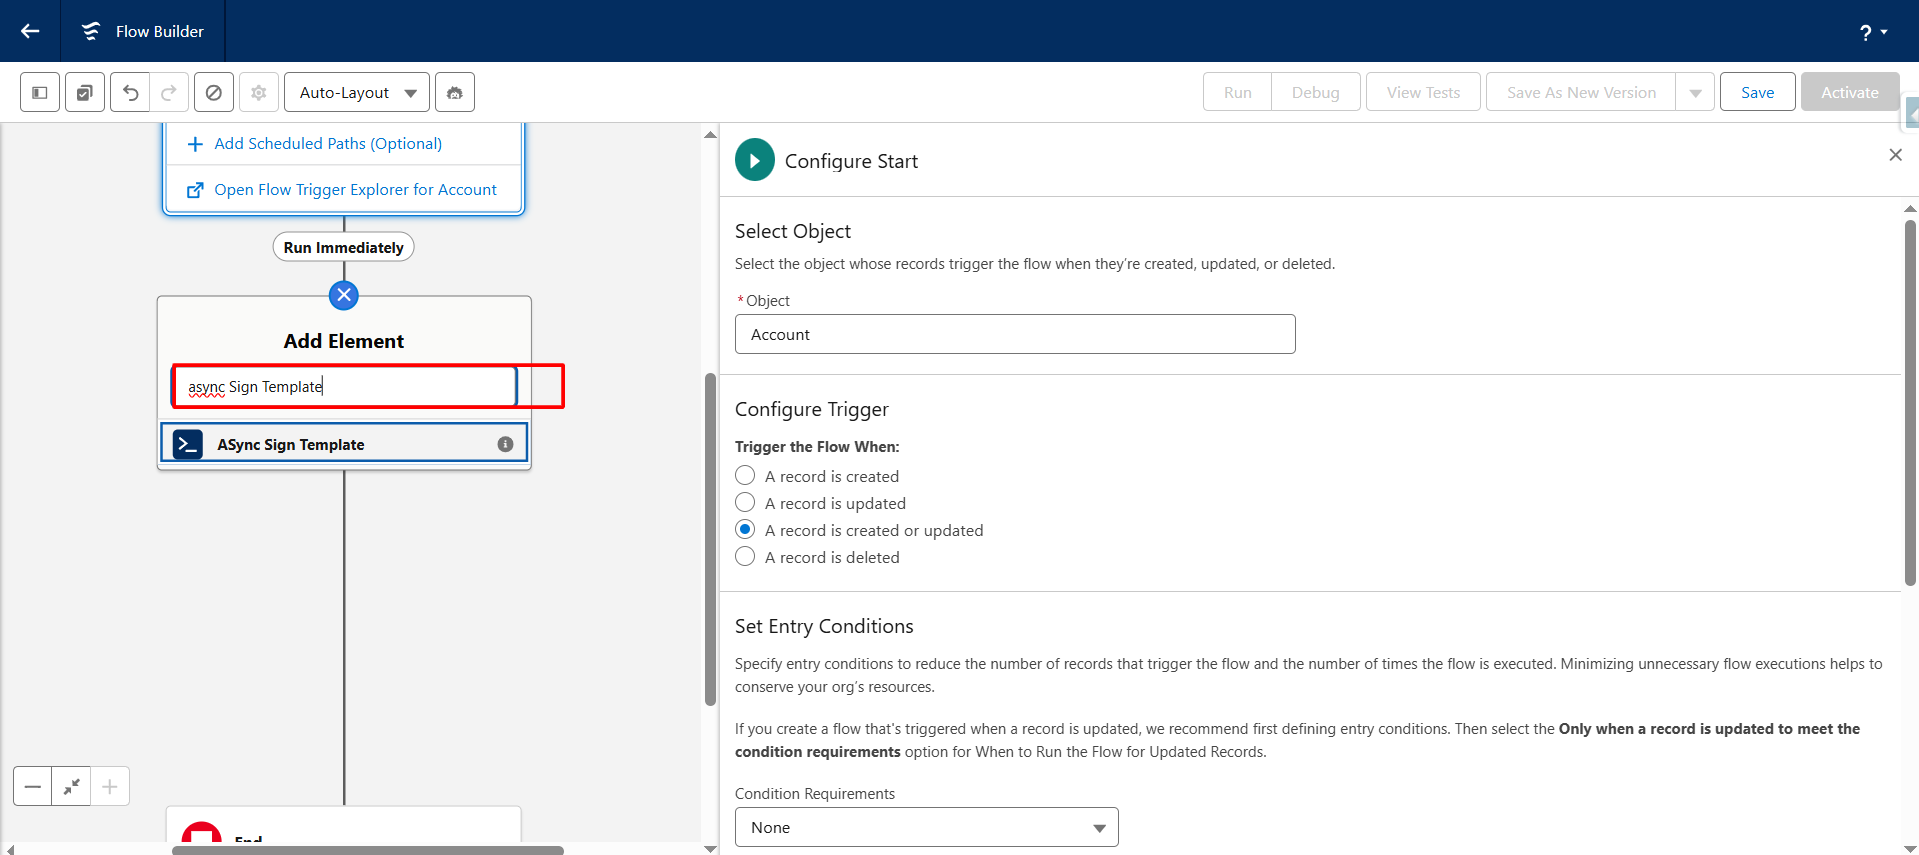
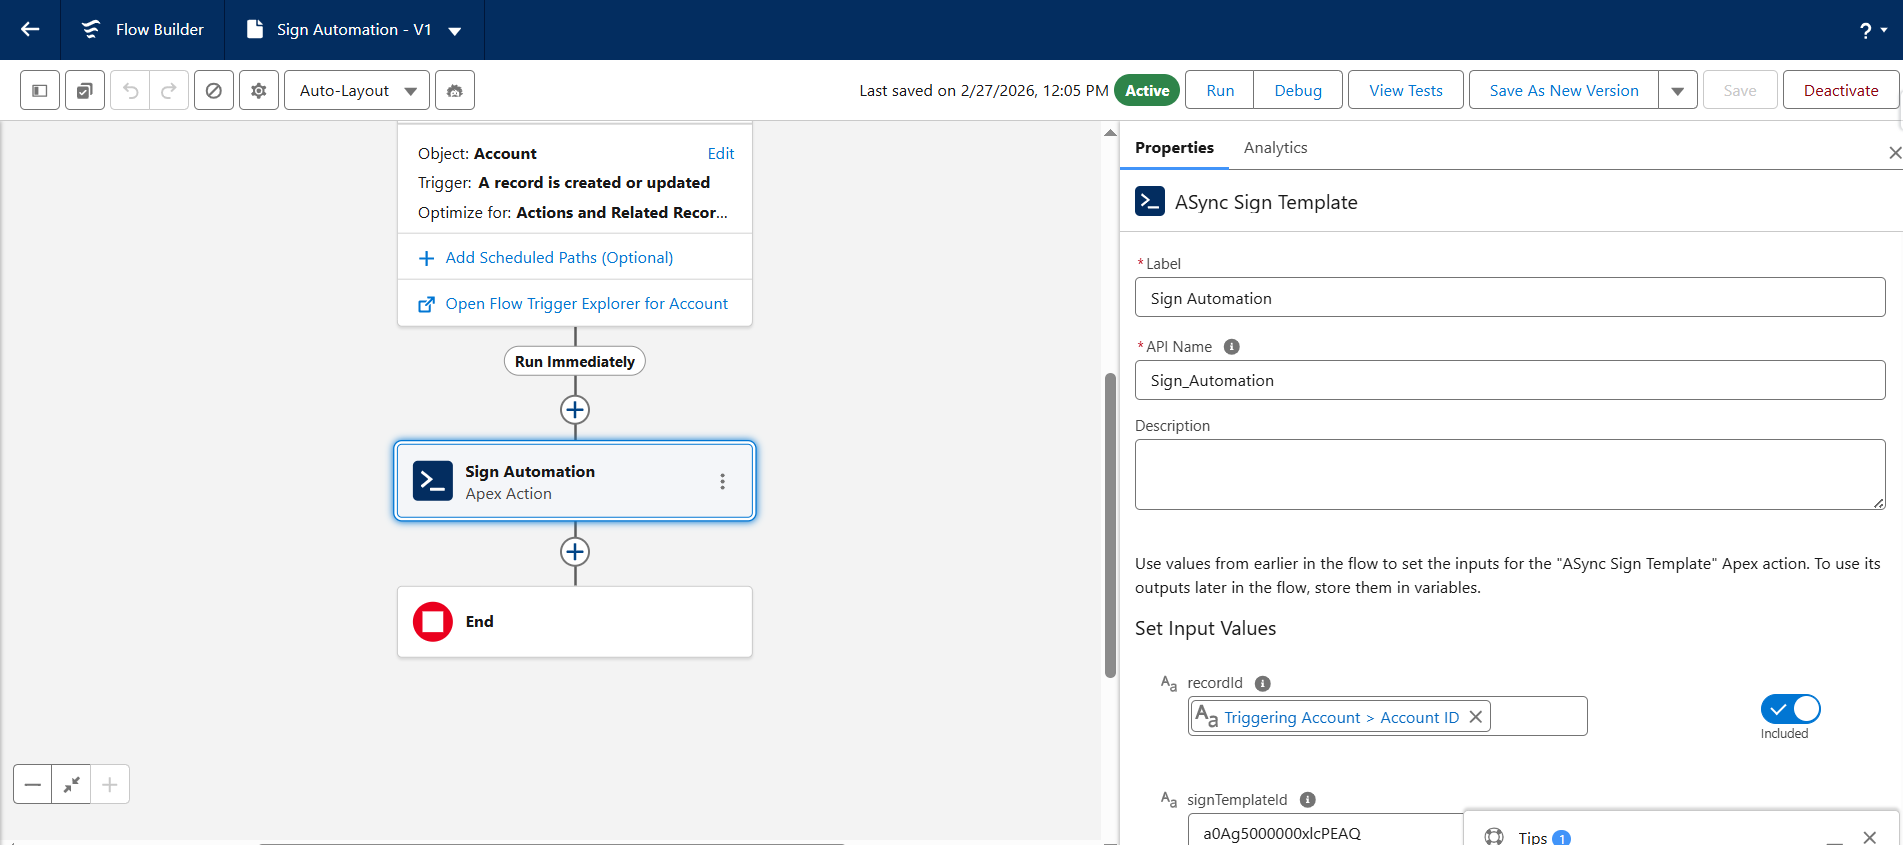
Step 7: Click “Add Element” in the Flow Builder, then search and select “Async Sign Template.”
Step 8: Enter the Label and API Name for the Async Sign Template element.
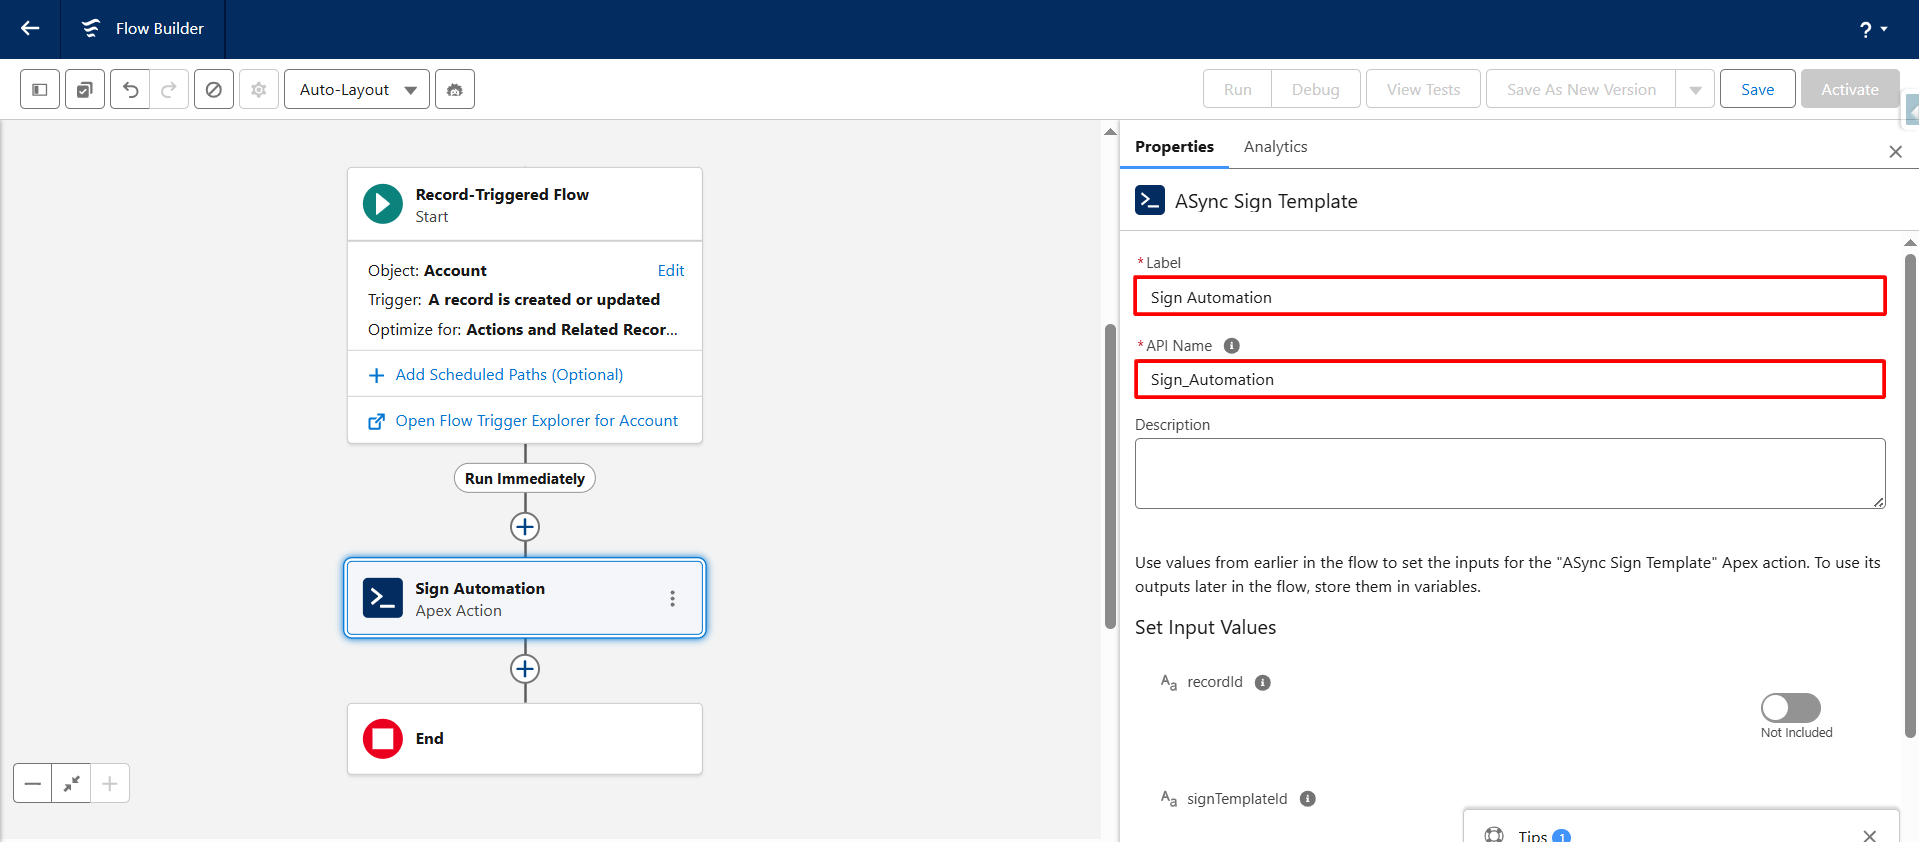
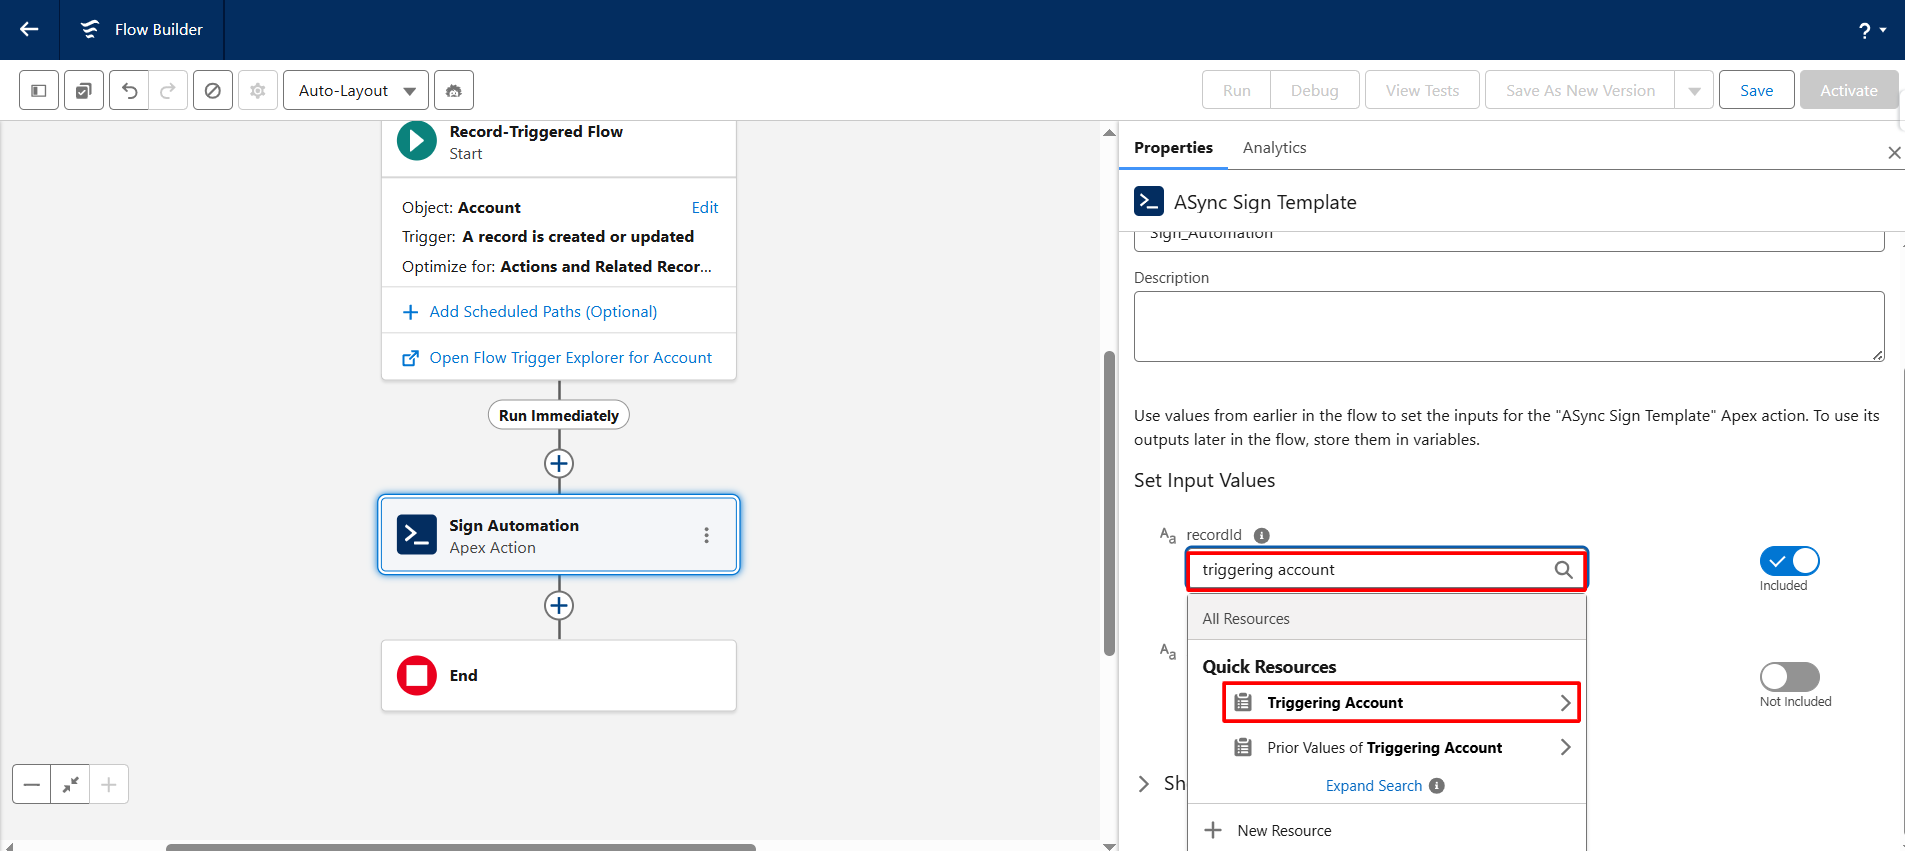
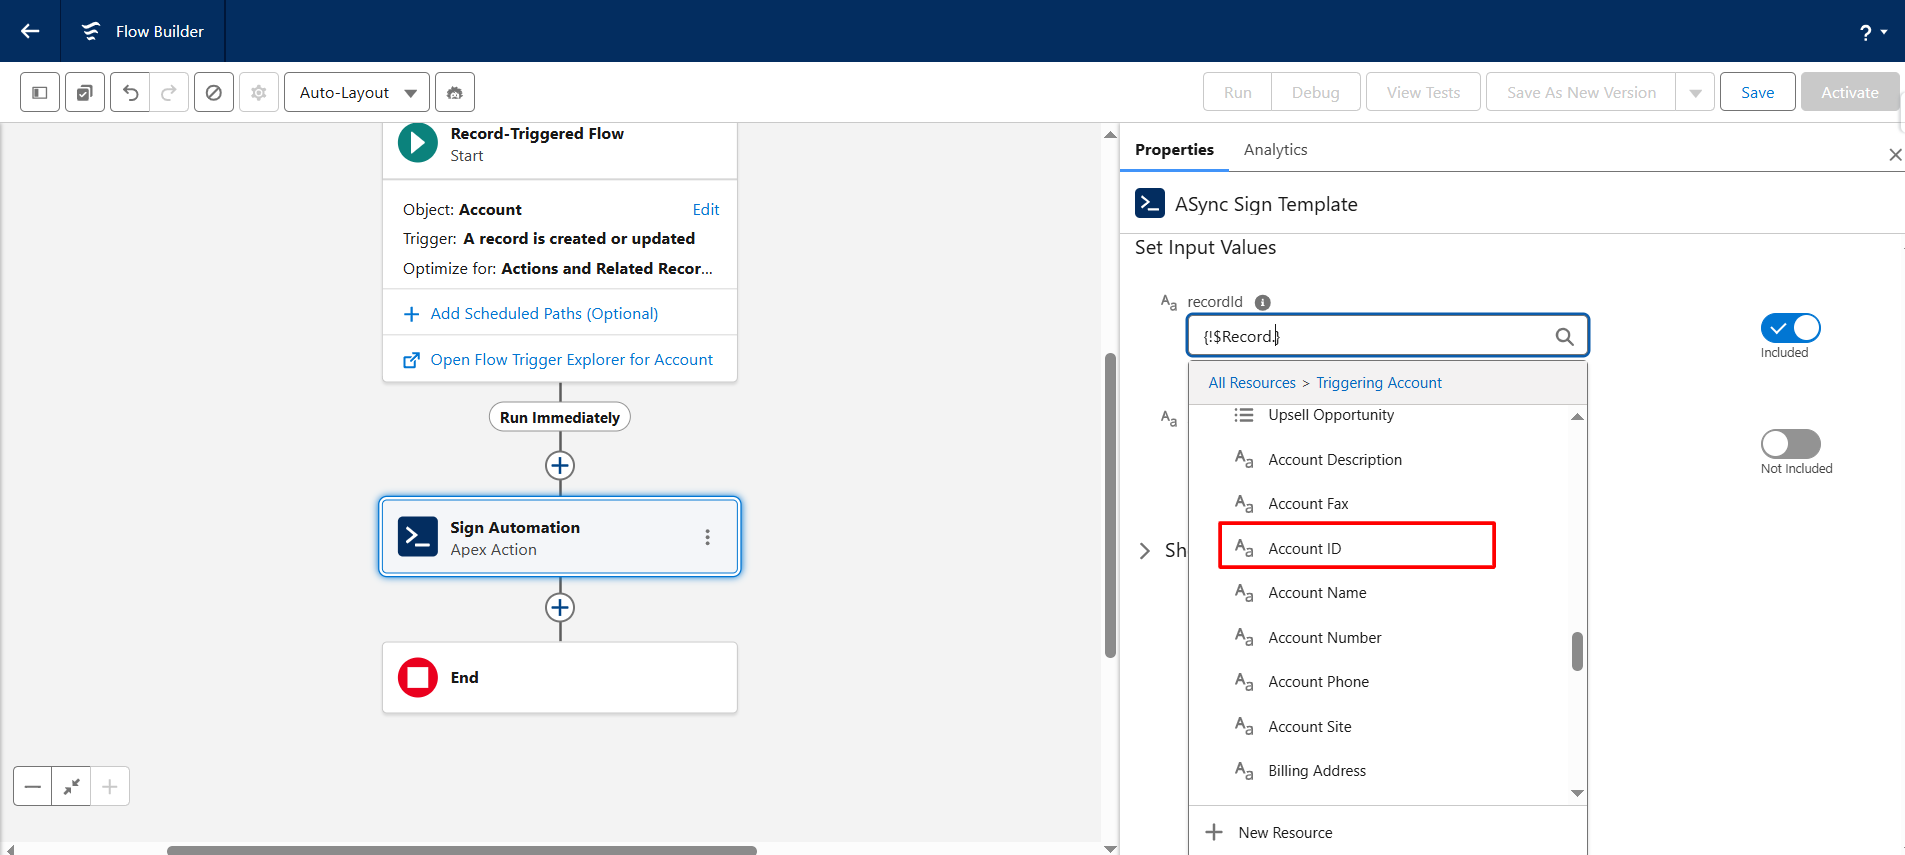
Step 9: In the Record ID field, search for the triggering record and select the appropriate object ID field.
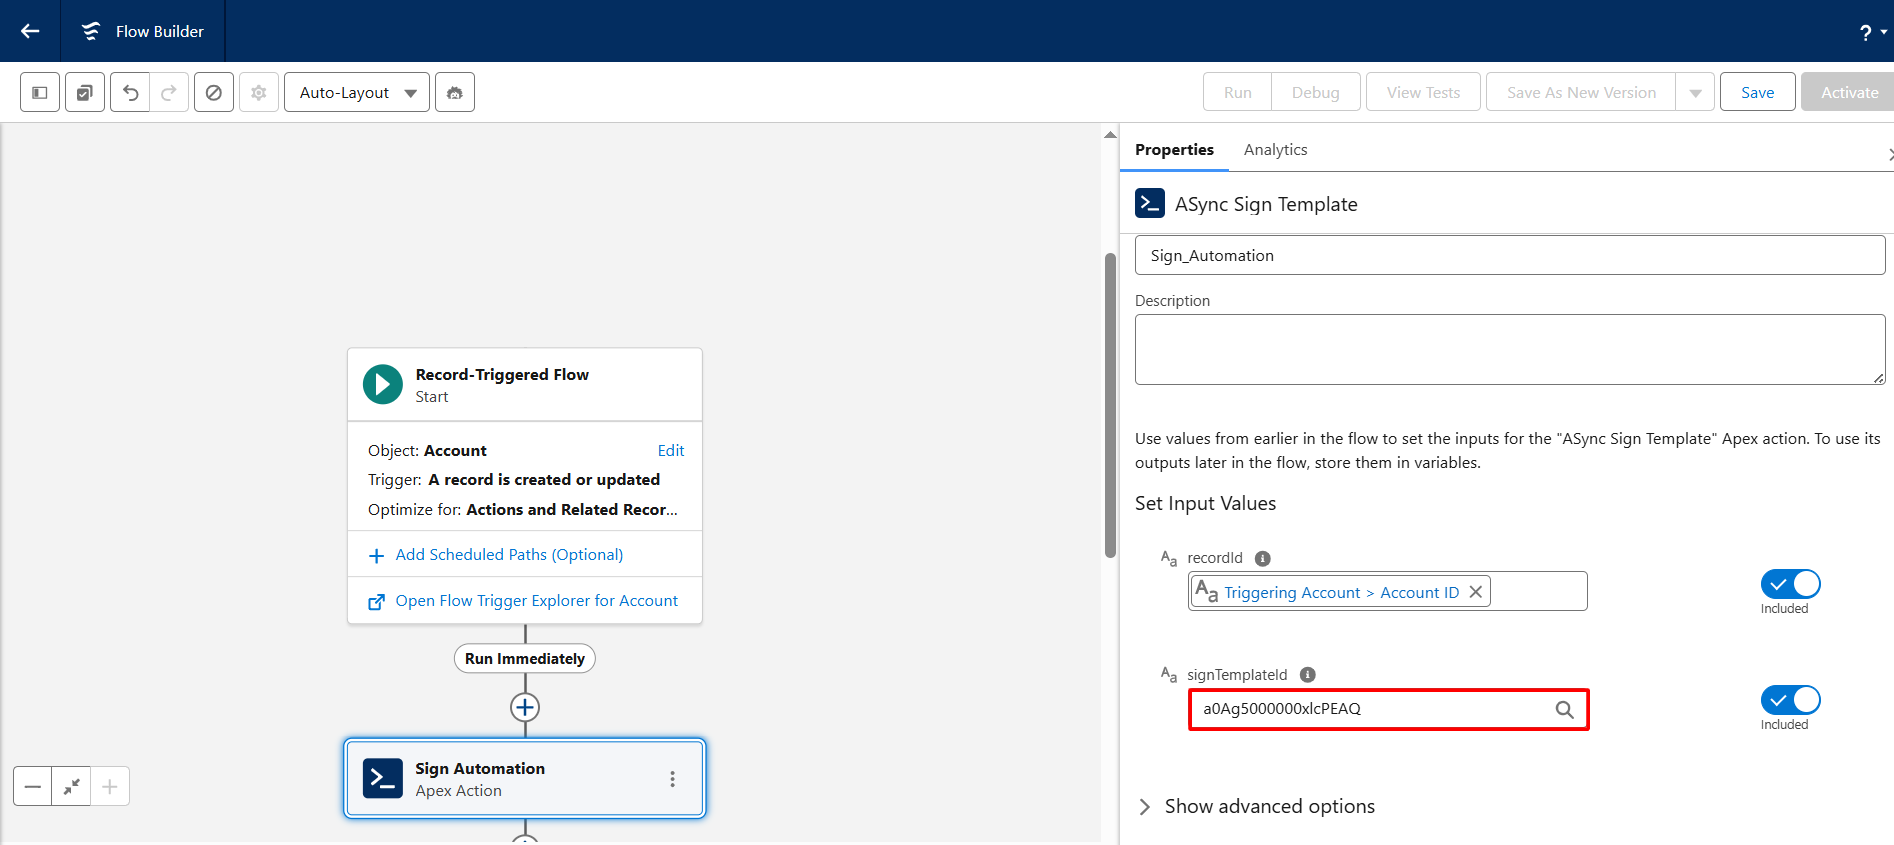
Step 10: Enter the Sign Template ID that you copied in Step 2.
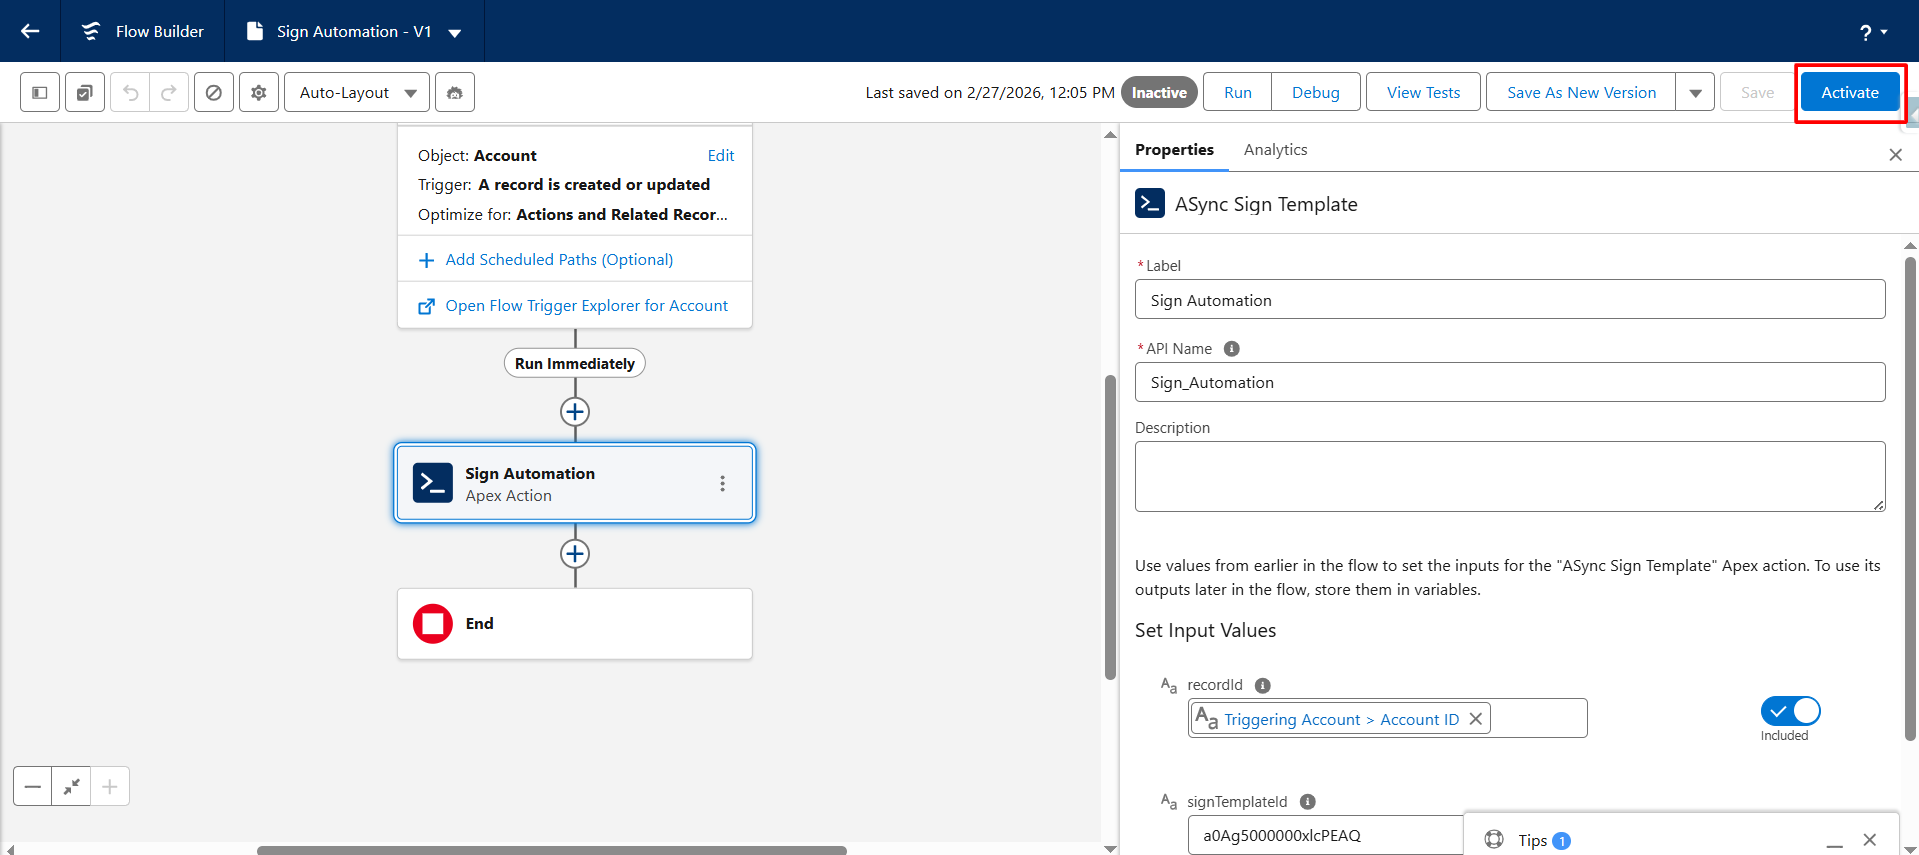
Step 11: Click Save, then enter the desired Flow Label and API Name for your flow.

Step 12: Click the Activate button to activate the flow.
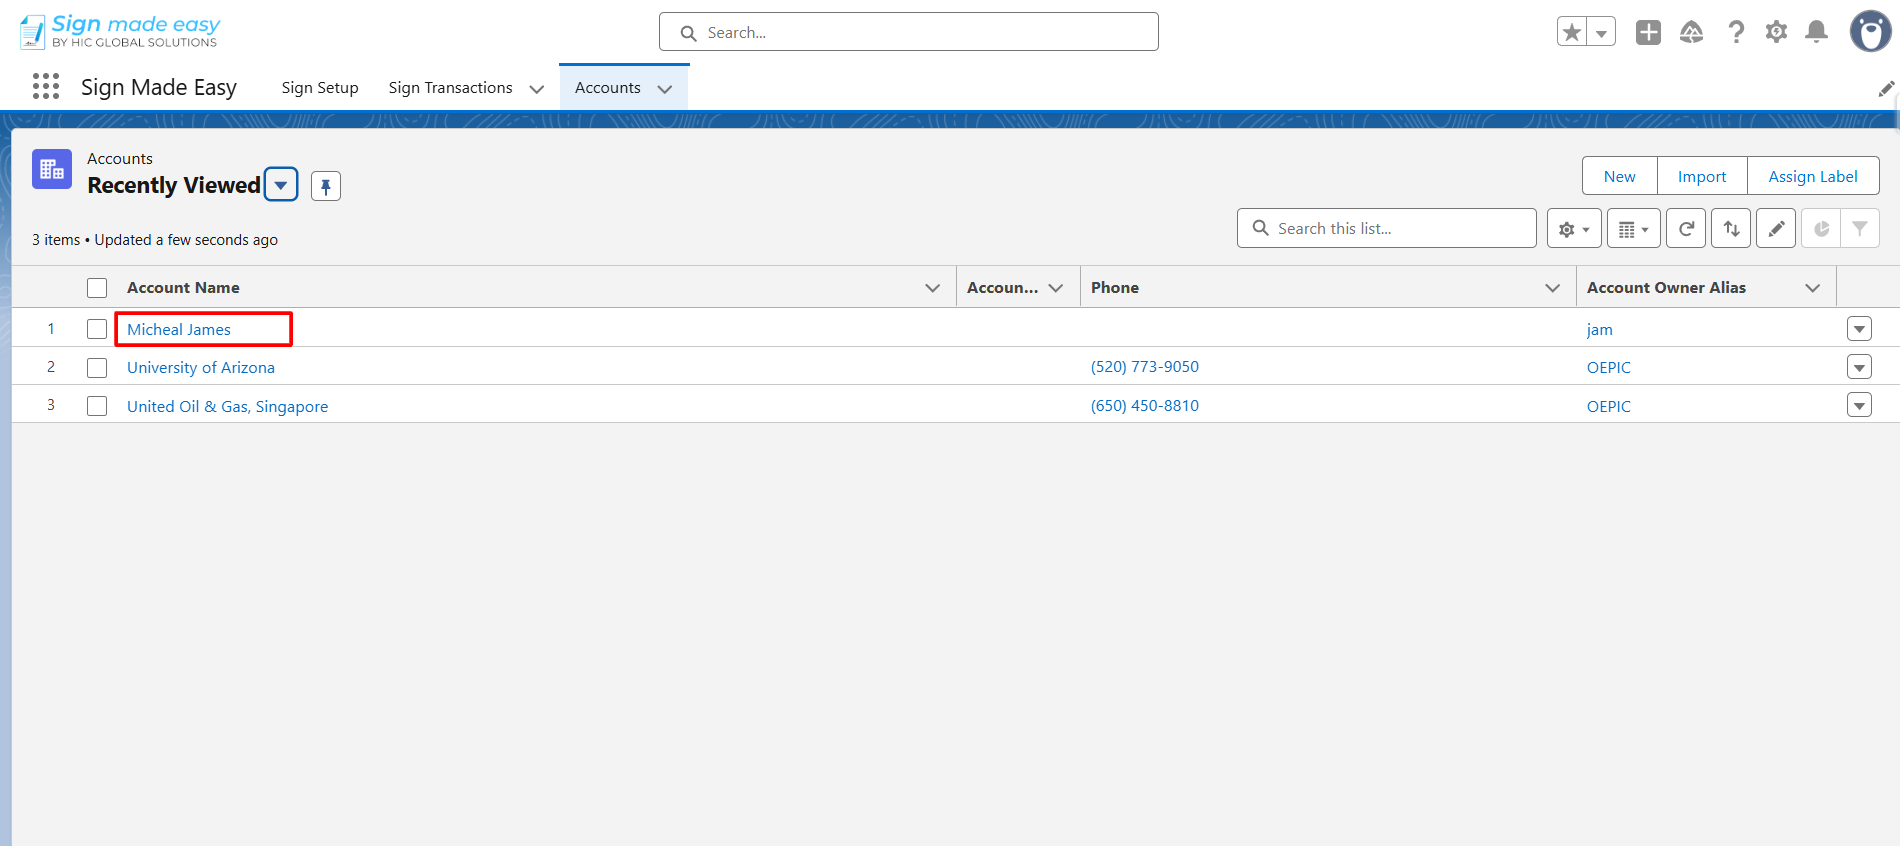
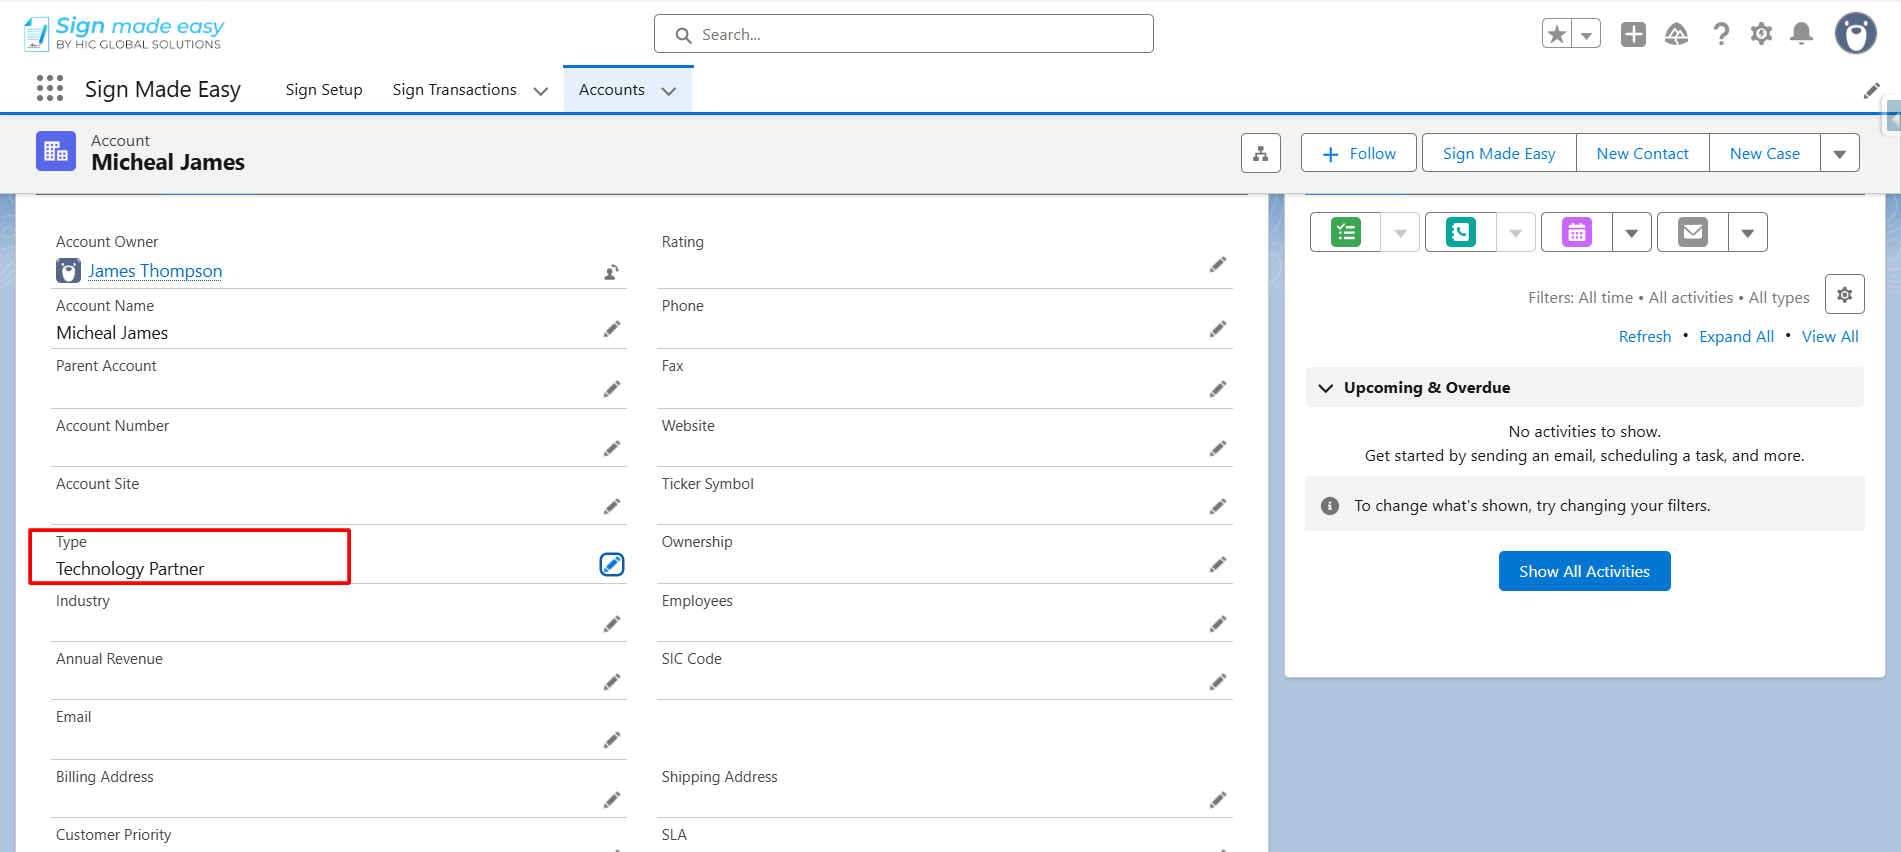
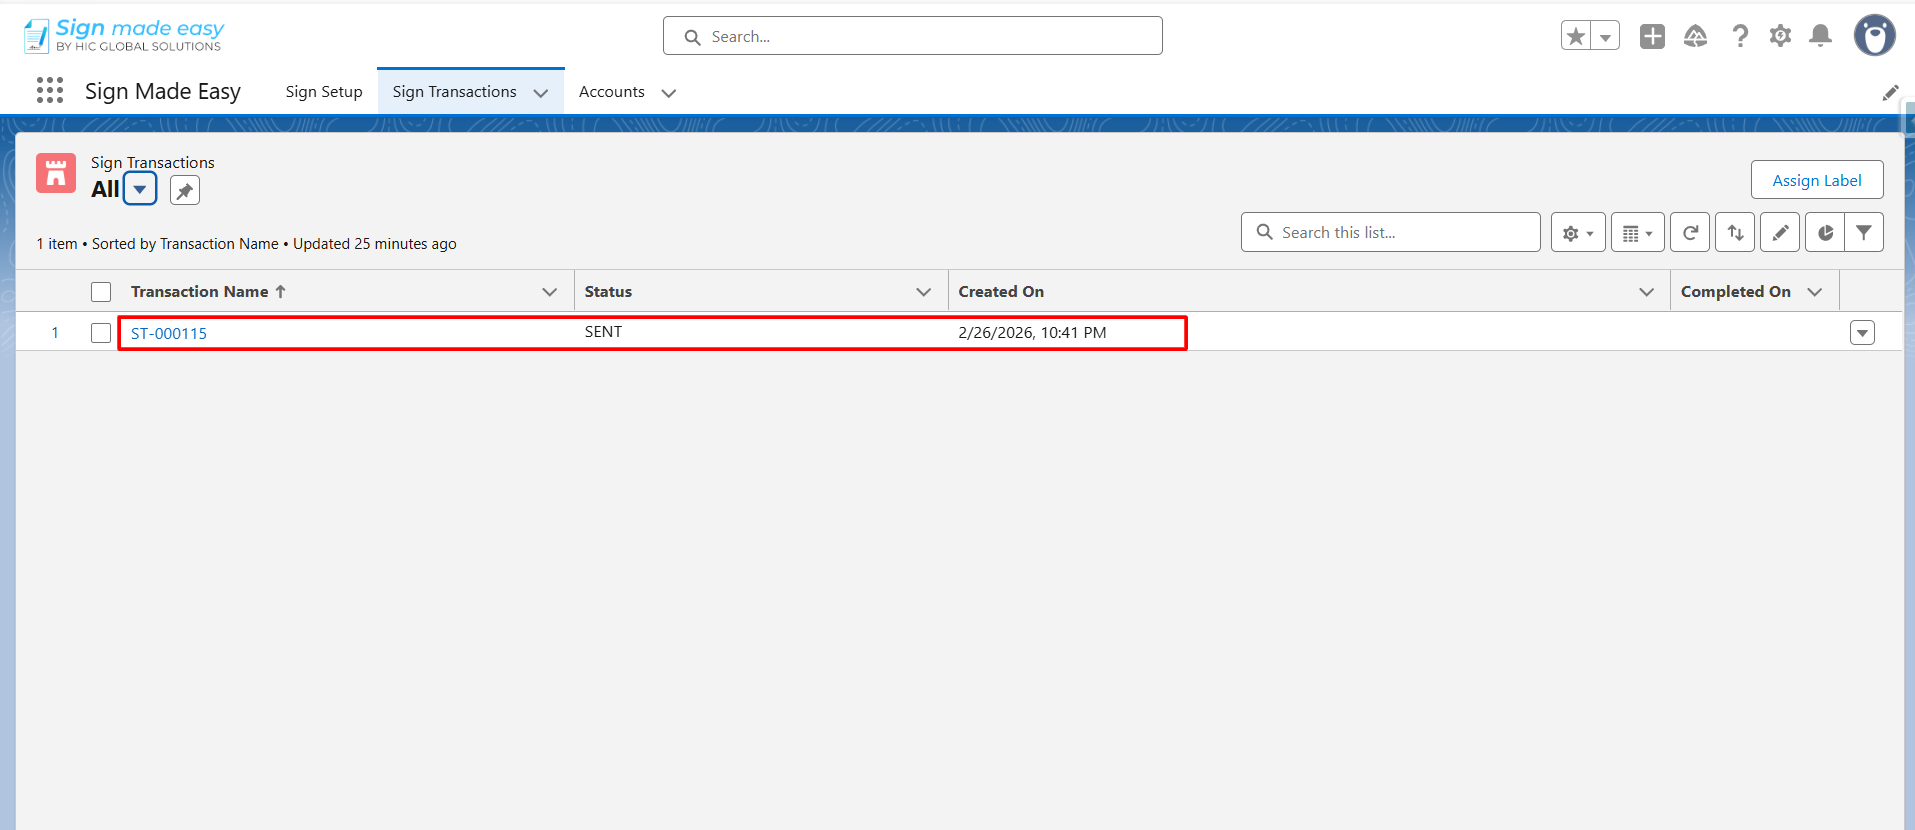
Step 13: Open the record and update it. Once the record is updated and saved, a new Sign Transaction will be automatically created and record saved in Salesforce.
Conclusion
Automating eSignature for Salesforce Flow allows organizations to turn their CRM into a fully connected document execution system.
By leveraging Sign Templates and Record-Triggered Flows, businesses can initiate signing workflows automatically based on real-time data changes, ensuring faster turnaround times and reduced manual effort.
With the right Salesforce eSignature solution every document sent, signed, and stored becomes part of your CRM ecosystem, improving visibility, accuracy, and compliance. As automation continues to drive digital transformation, integrating eSignature workflows within Salesforce ensures your business stays efficient, scalable, and future-ready.