
On this page
Modern businesses rely on eSignature for Salesforce to automate approvals and close deals faster, but not every recipient should be allowed to sign every document. This is where pre-sign validation becomes critical for compliance, control, and governance.
Using Salesforce eSignature validation with Disable Sign (DS) and Disable Sign Message (DSM) parameters, organizations can dynamically control who is allowed to sign a document before the signing process even begins. This guide walks you through a step-by-step approach to enforcing signing rules using Salesforce formula fields and Sign Made Easy button parameters, ensuring a secure and rule-driven electronic signature workflow.
Before diving into the steps, let’s understand this:
Disable Sign
A flag (checkbox) that prevents a recipient from signing the document. When enabled, that recipient can still view the envelope but won’t be able to apply a signature.
Disable Sign Message
A custom message is shown to the recipient when they attempt to sign, but signing is disabled. This explains why they can’t proceed with signing (e.g., “You are not authorized to sign this document”).
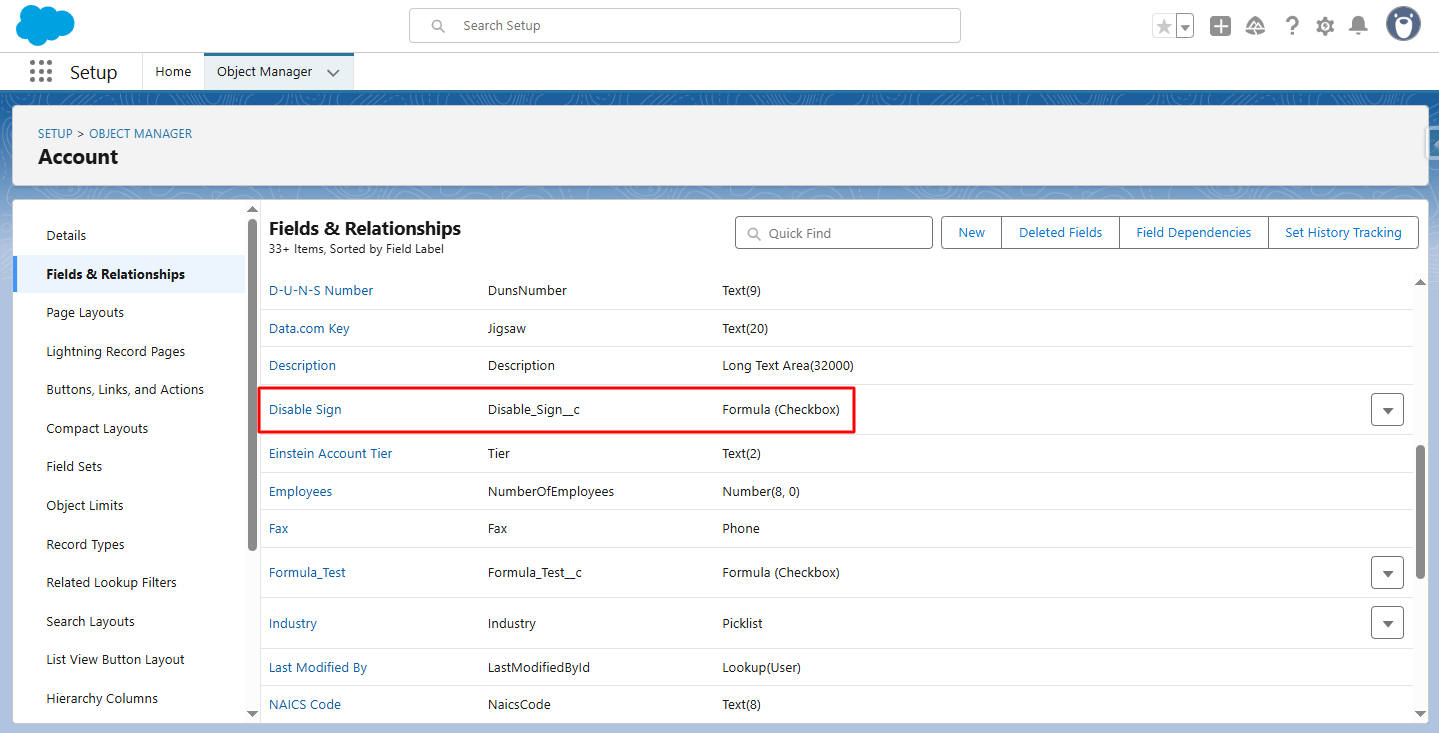
After successfully completing the SME configuration and creating the Sign Made Easy button, then adding it to the relevant page layout for user accessibility, create a checkbox formula field on the selected object.
Below are the steps:
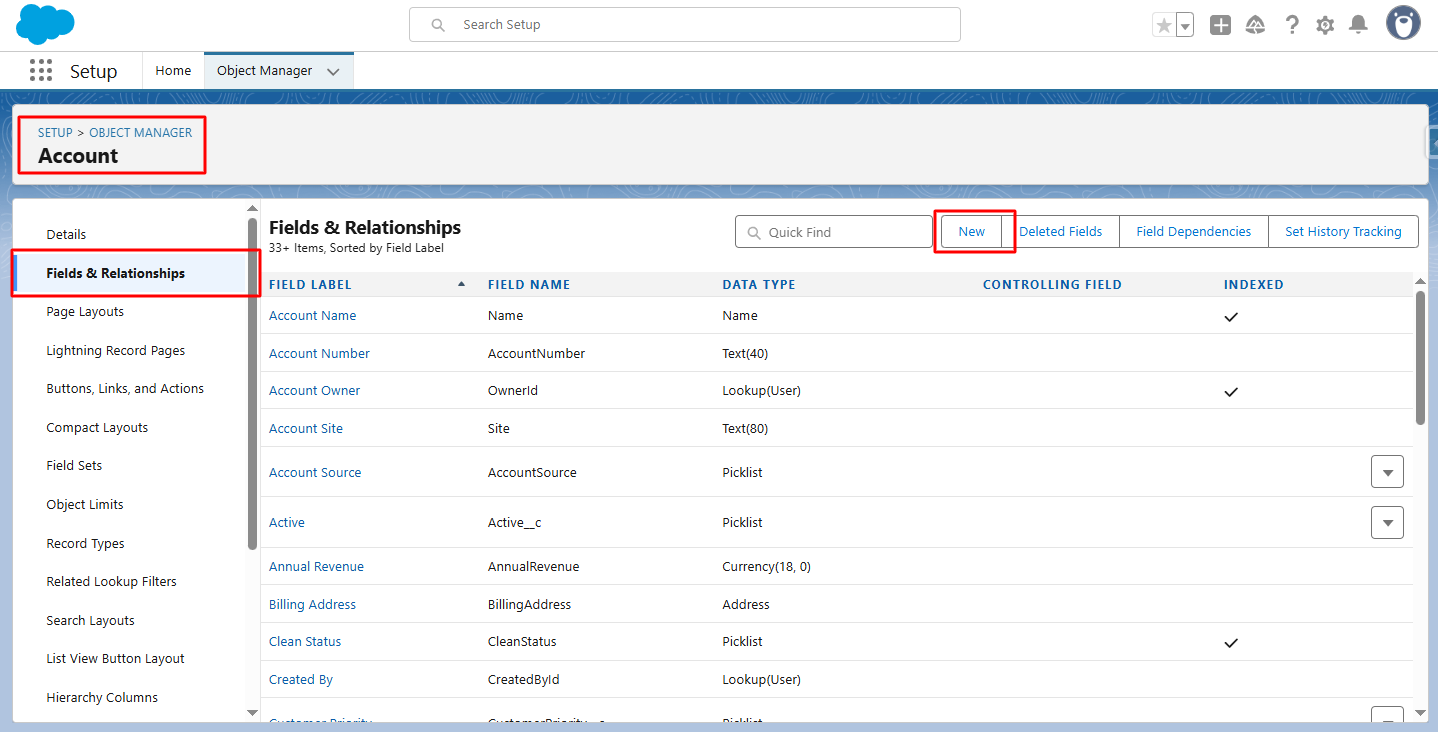
Step 1: In Object Manager, open the selected object, go to Fields & Relationships and click New to create a field.
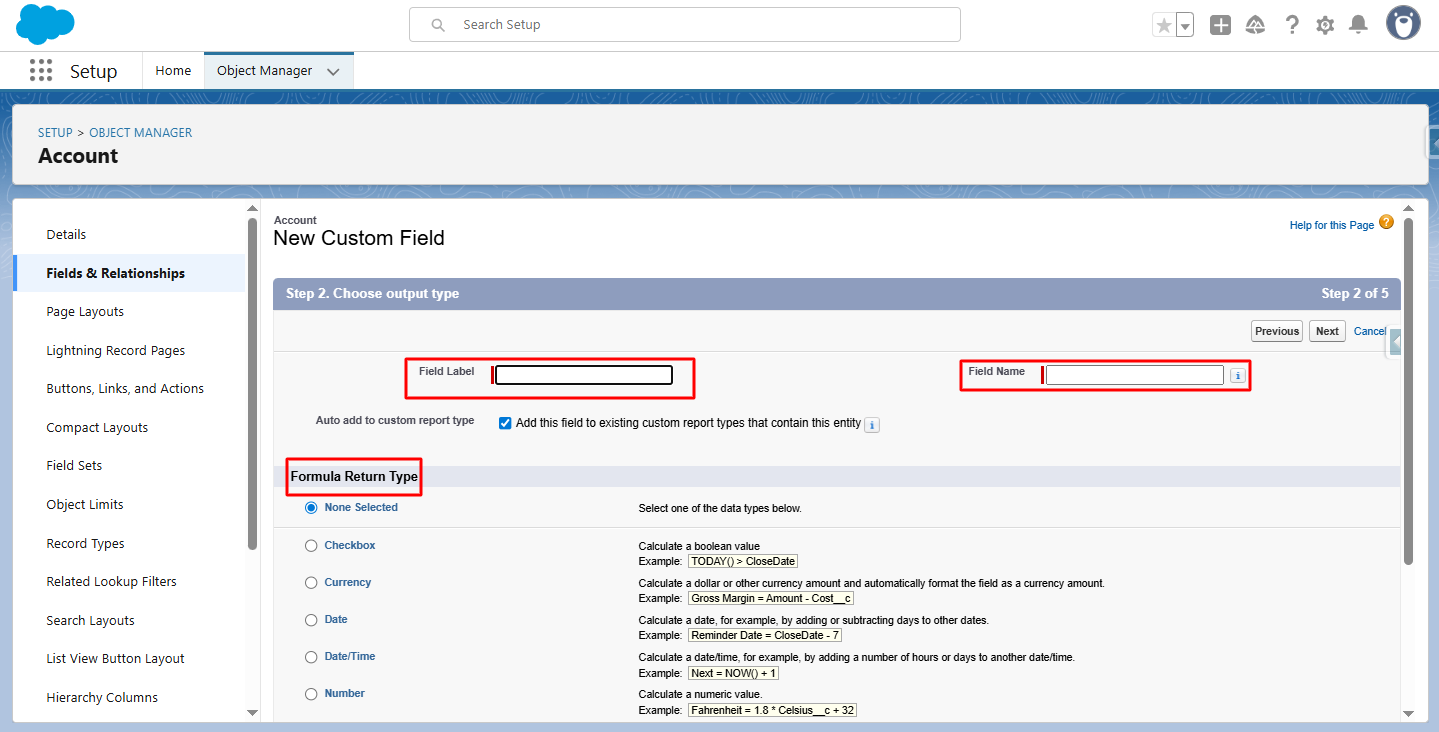
Step 2: Select the Formula radio button as the data type, then click Next.

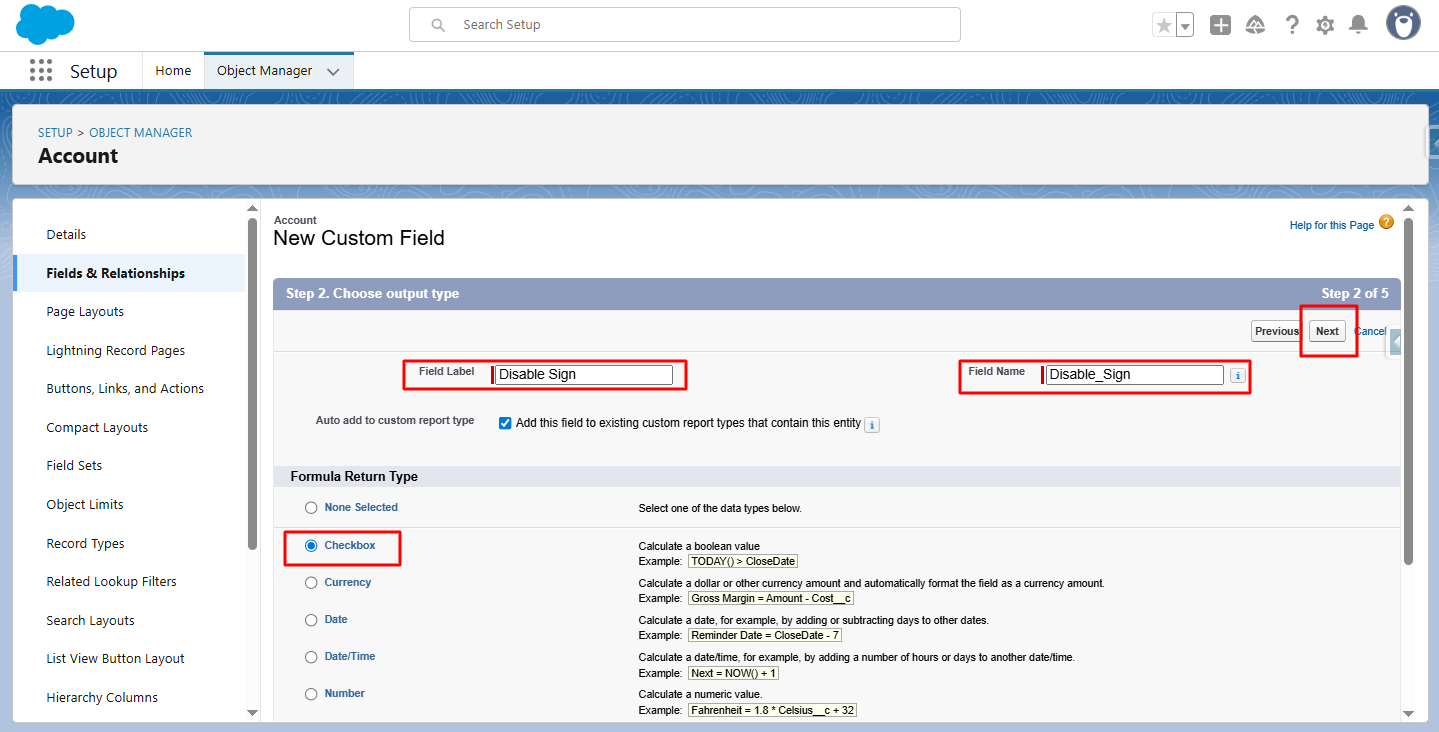
Step 3: Enter the Field Label, Field Name, and select the Formula Return Type, then proceed.
Step 4: Click Next to continue.
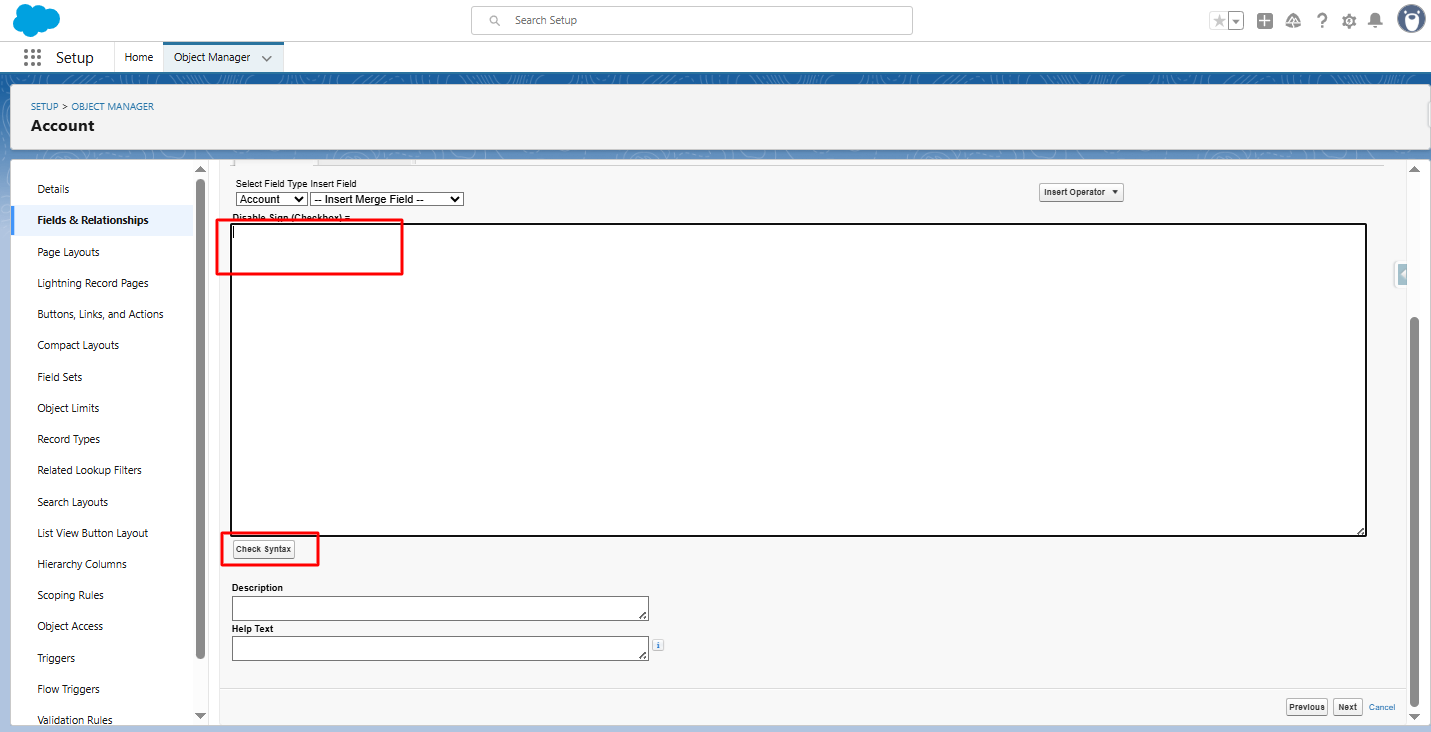
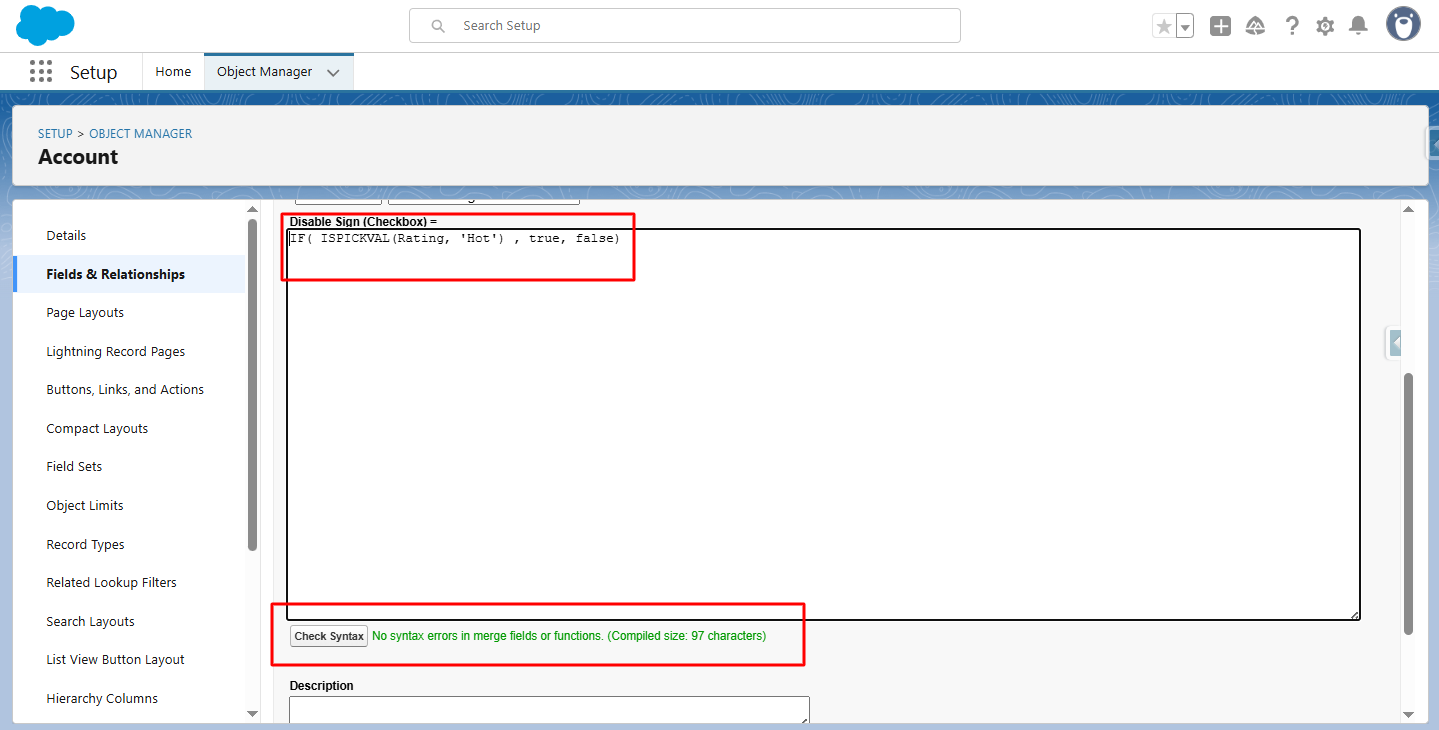
Step 5: Enter the formula for the Disable Sign parameter, then click Check Syntax. For example, if Rating is ‘Hot’, the Disable_Sign__c checkbox will be checked; otherwise, it will remain unchecked.
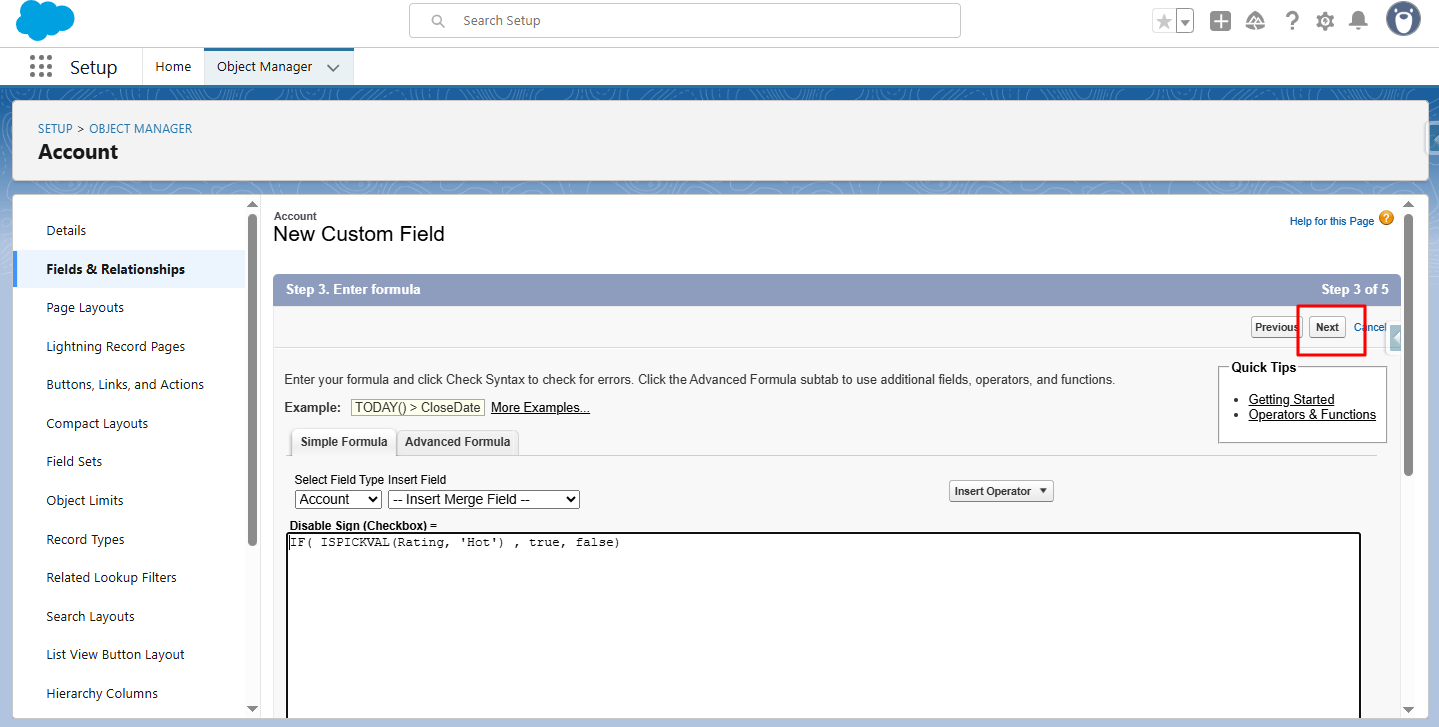
Step 6: Click Next to continue.
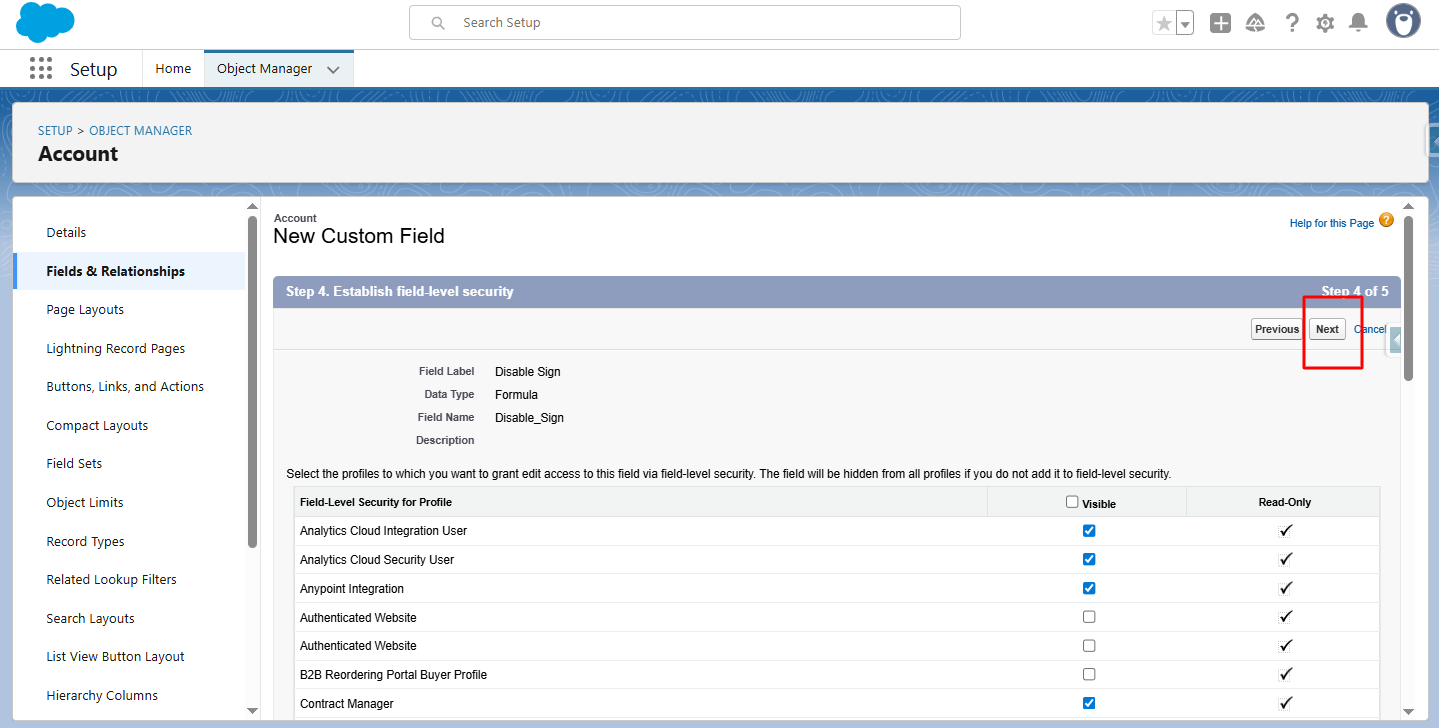
Step 7: Click Next to continue.
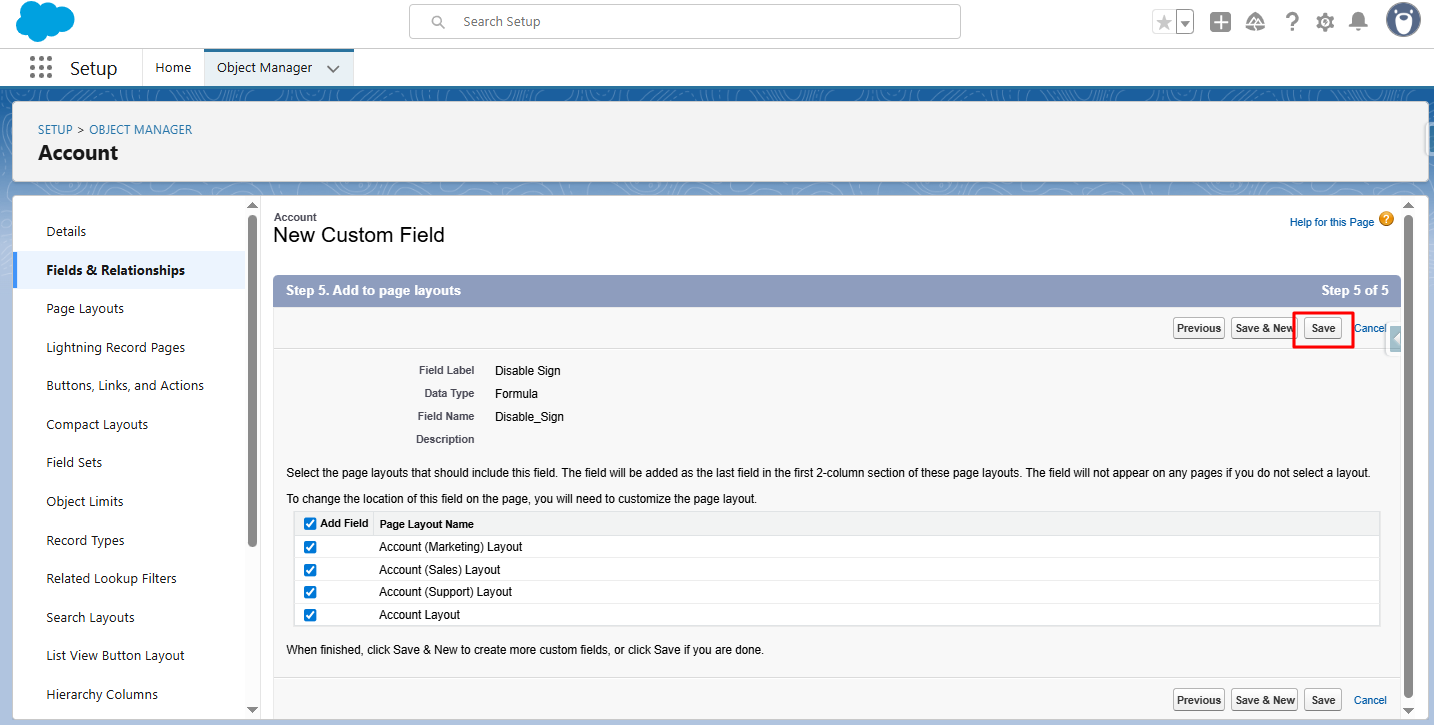
Step 8: Click Save to create the checkbox formula field.
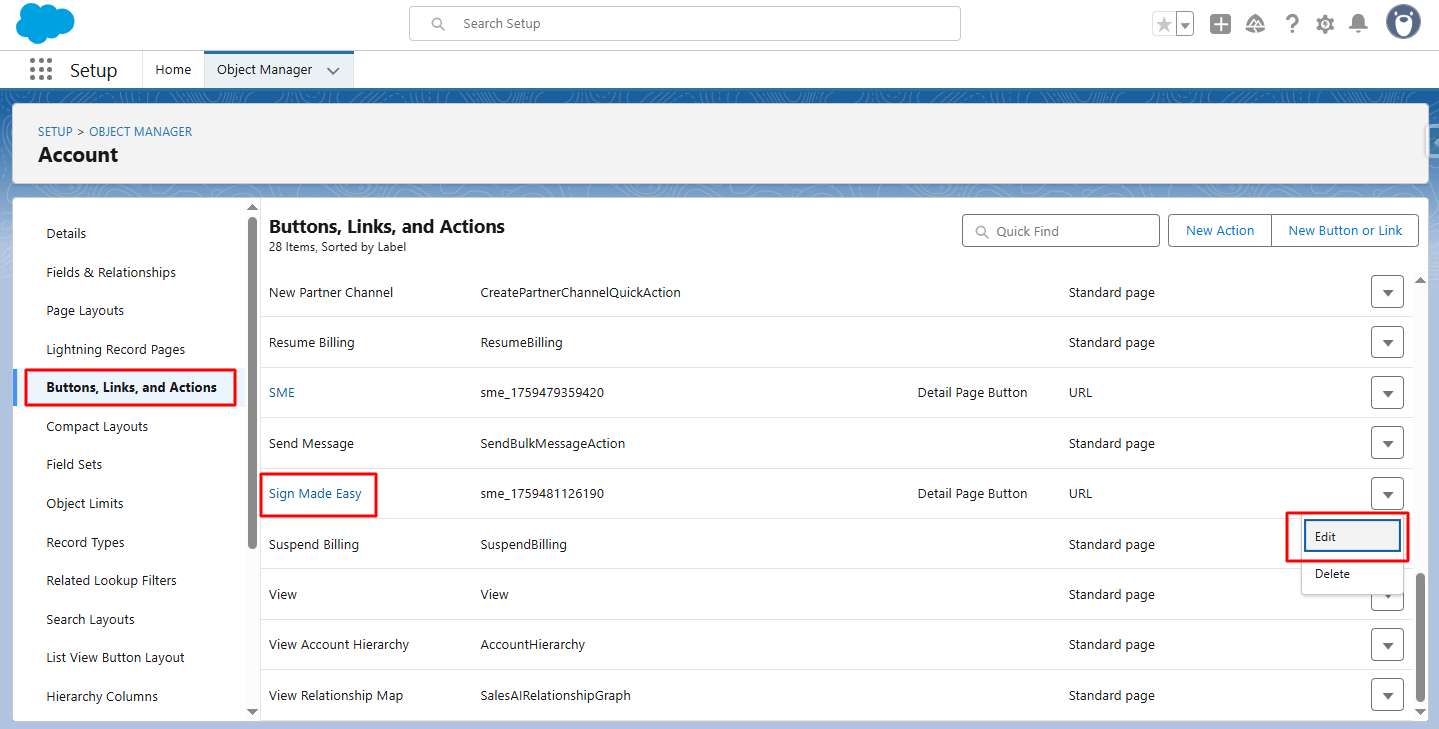
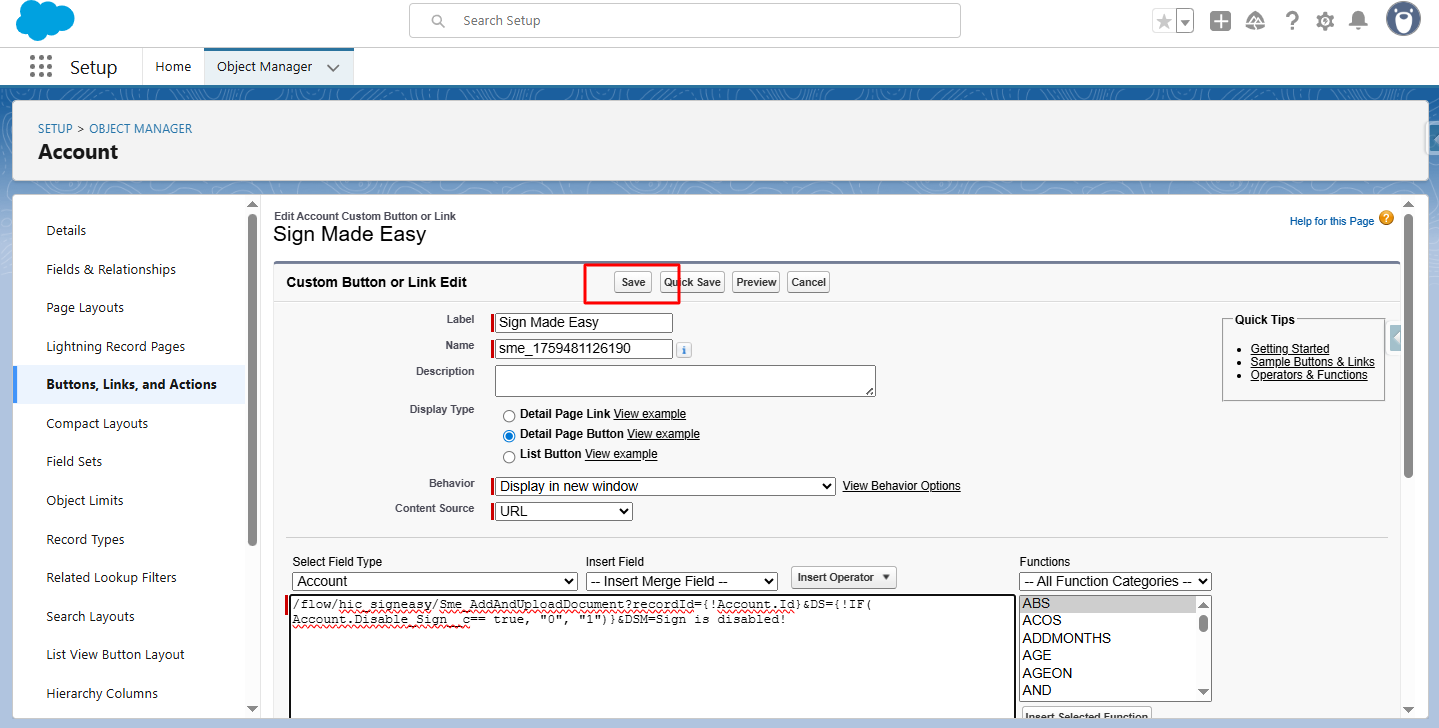
Step 9: Edit the Sign Made Easy button by navigating to Object Manager → [Selected Object] → Buttons, Links & Actions. Locate the ‘Sign Made Easy’ button and click Edit to modify its link or behavior.

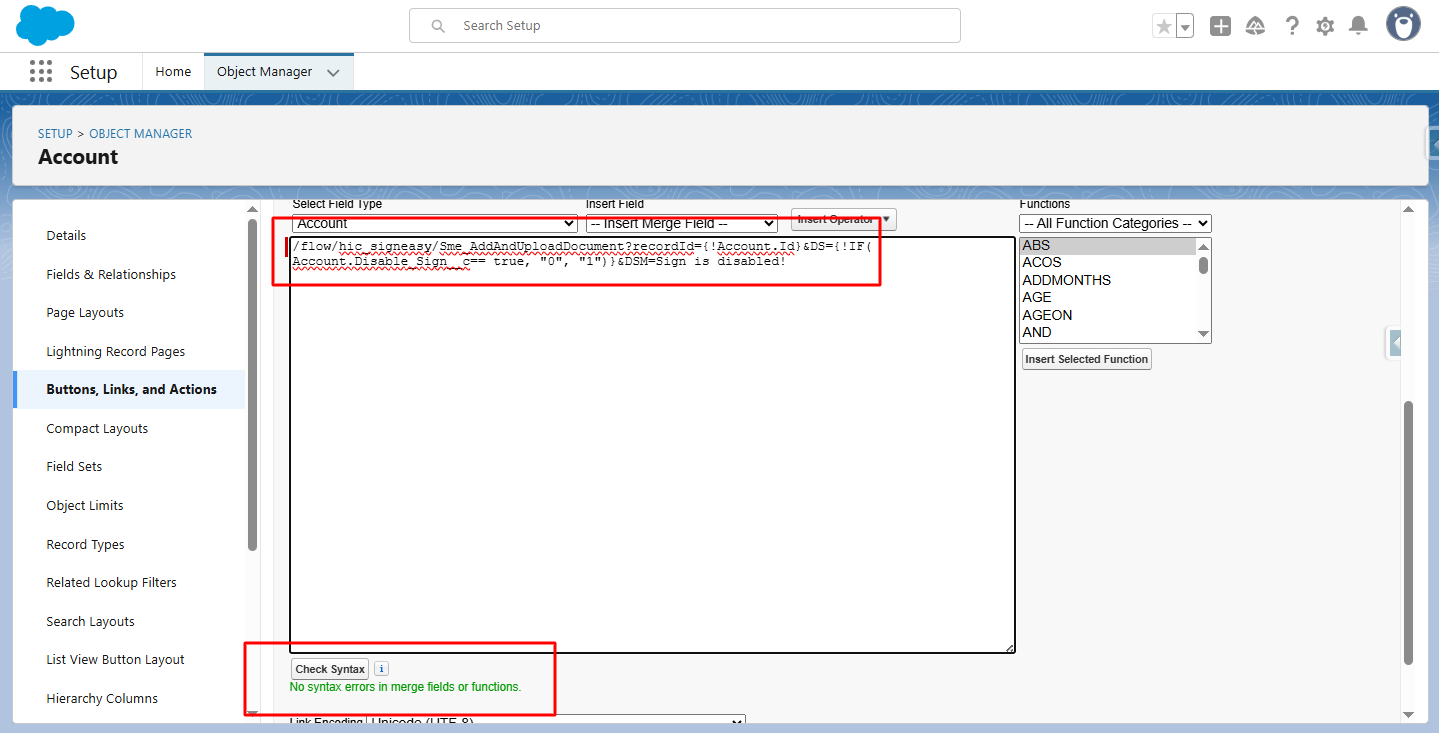
Step 10: In the button link’s formula section, add the DS and DSM parameters to enable the Disable Sign functionality, then click Check Syntax to validate.
Step 11: Click Save to apply the changes to the button and enable the Disable Sign functionality.
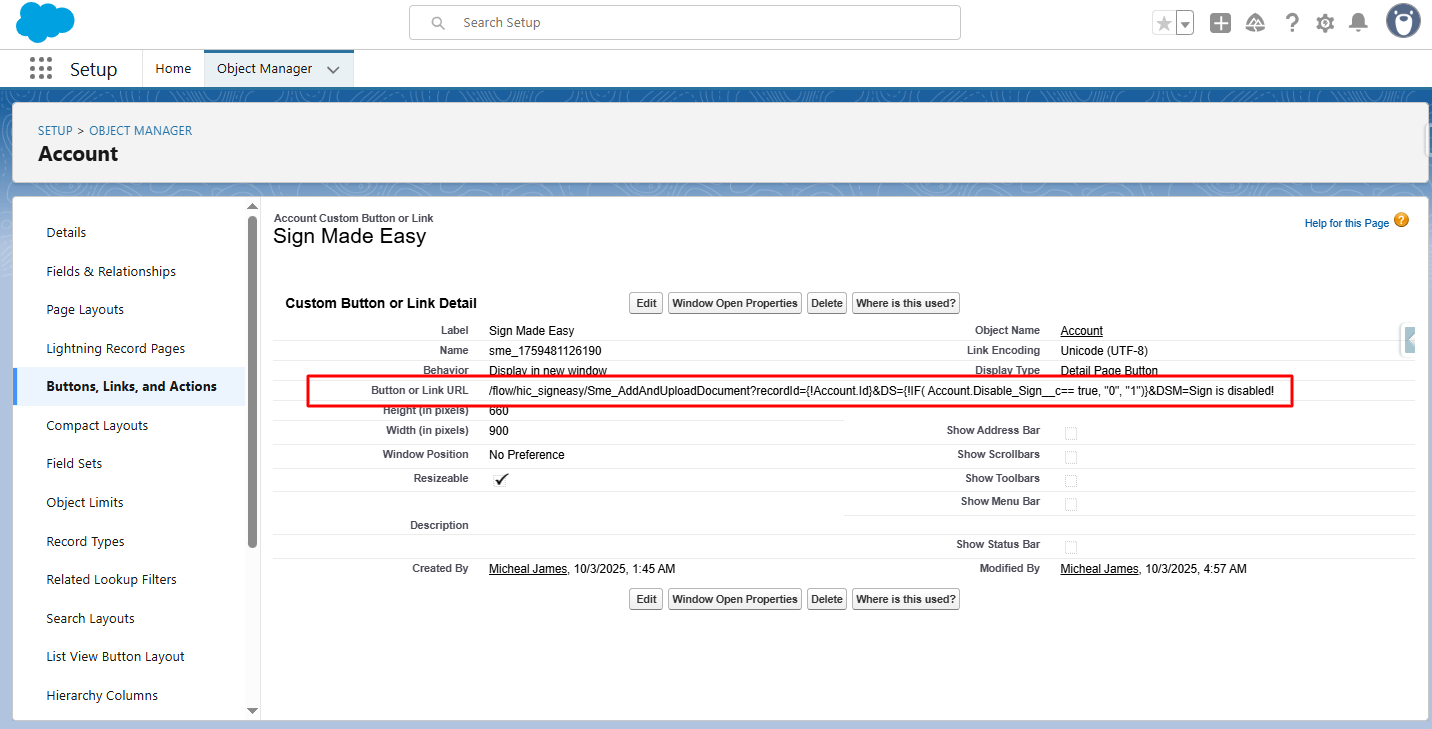
Note: This ensures that the Sign Made Easy button dynamically enforces signing rules: the user can sign only when the DS condition permits it, and if signing is disabled, the DSM message is displayed.
In this case, if the Rating is not ‘Hot’, signing will be disabled and the DSM message (‘Sign is disabled!’) will be displayed to inform the user.
Step 12: When the Rating is ‘Warm’, click the Sign Made Easy button to initiate the signing process.
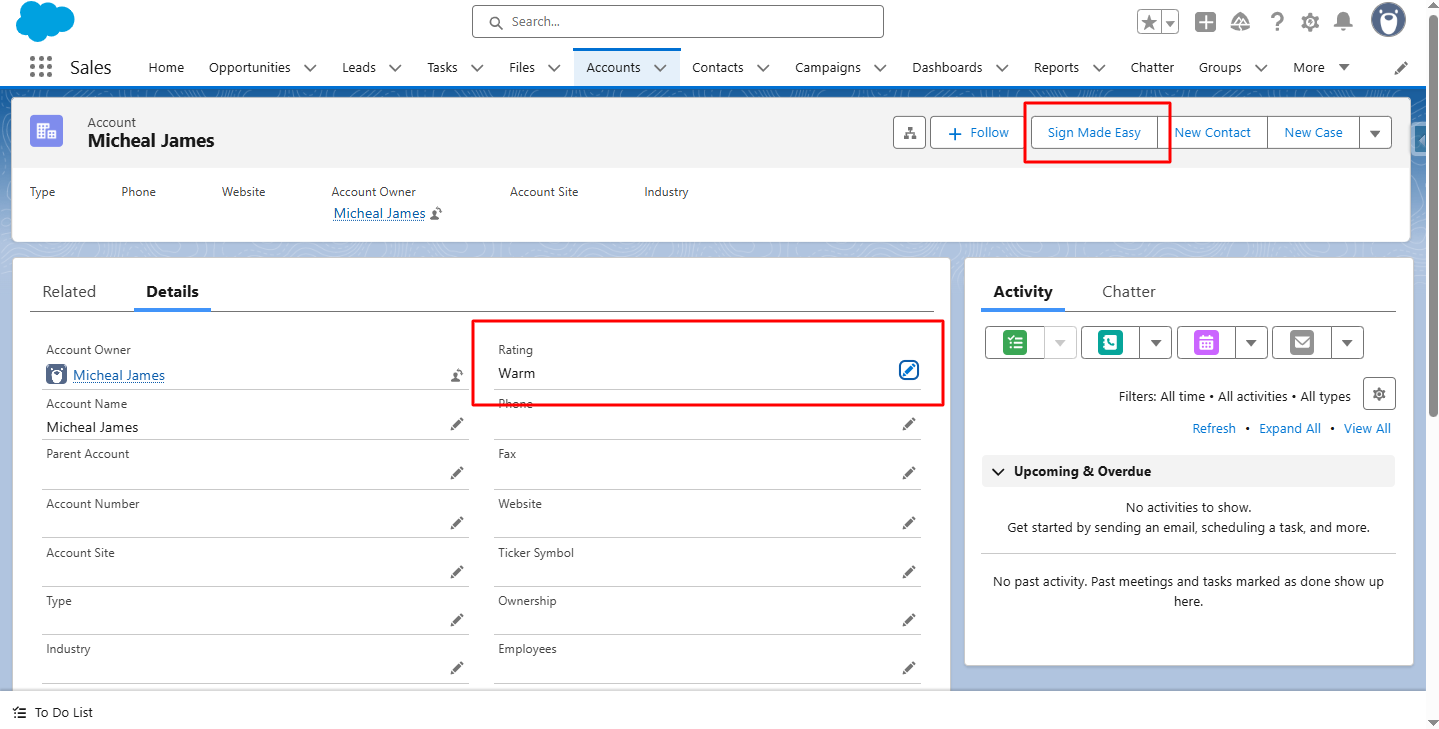
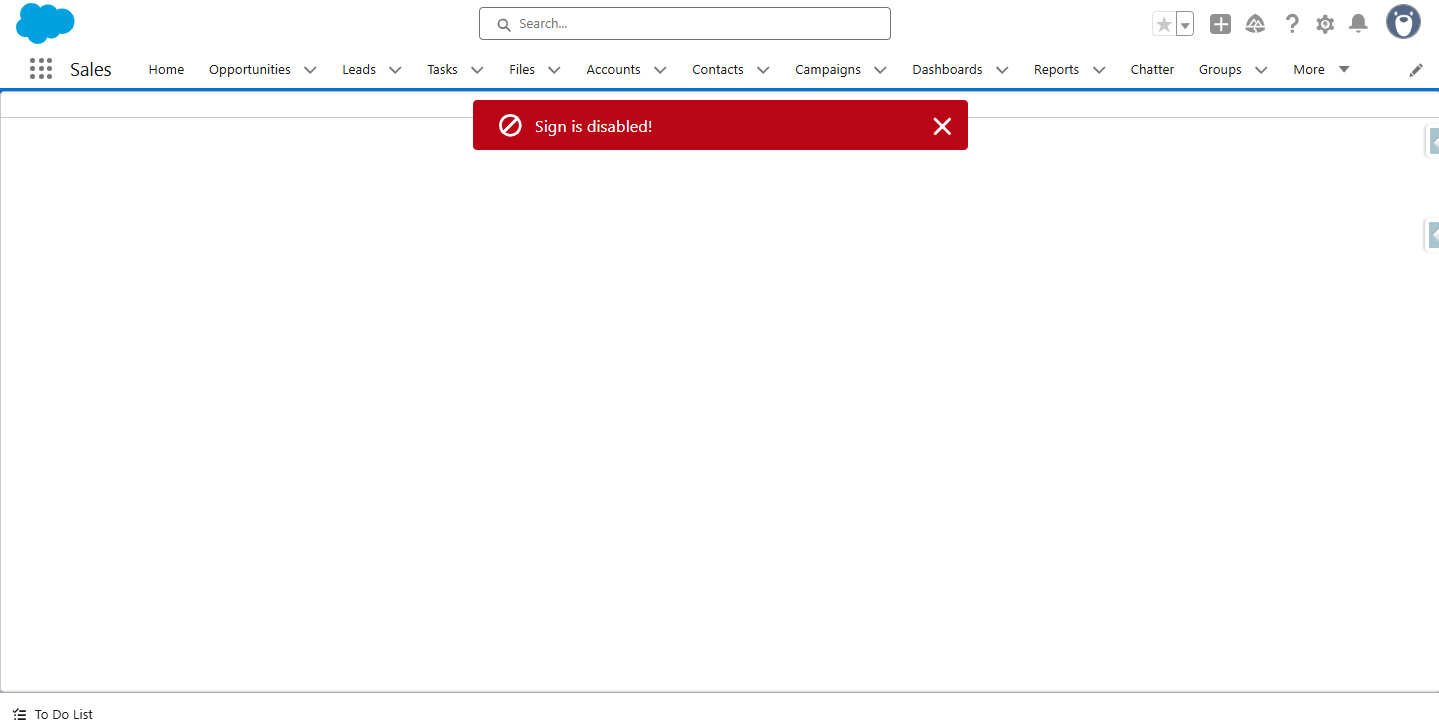
Since signing is disabled in this case, the DSM message (‘Sign is disabled!’) is displayed, and the signing process does not start.
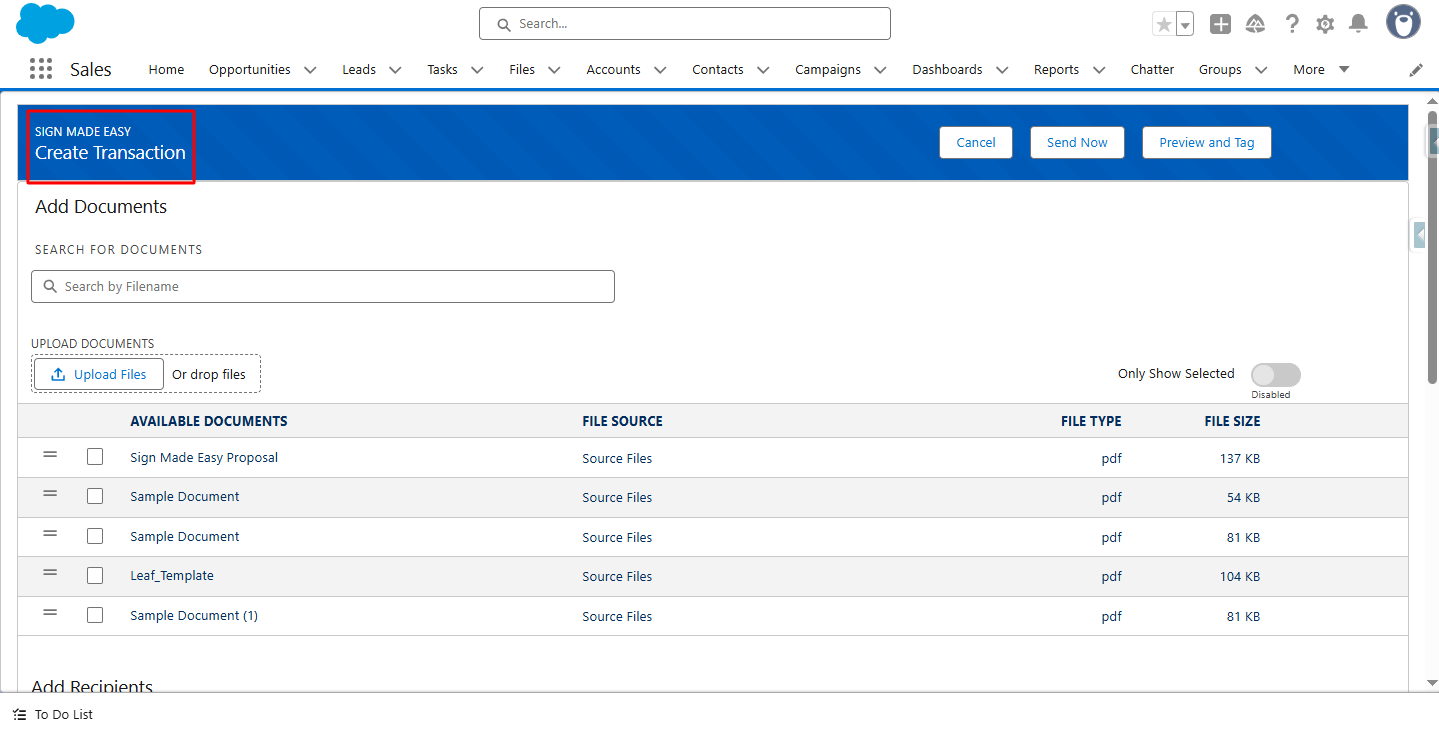
Step 13: When the Rating is ‘Hot’, click the Sign Made Easy button to start the signing process.
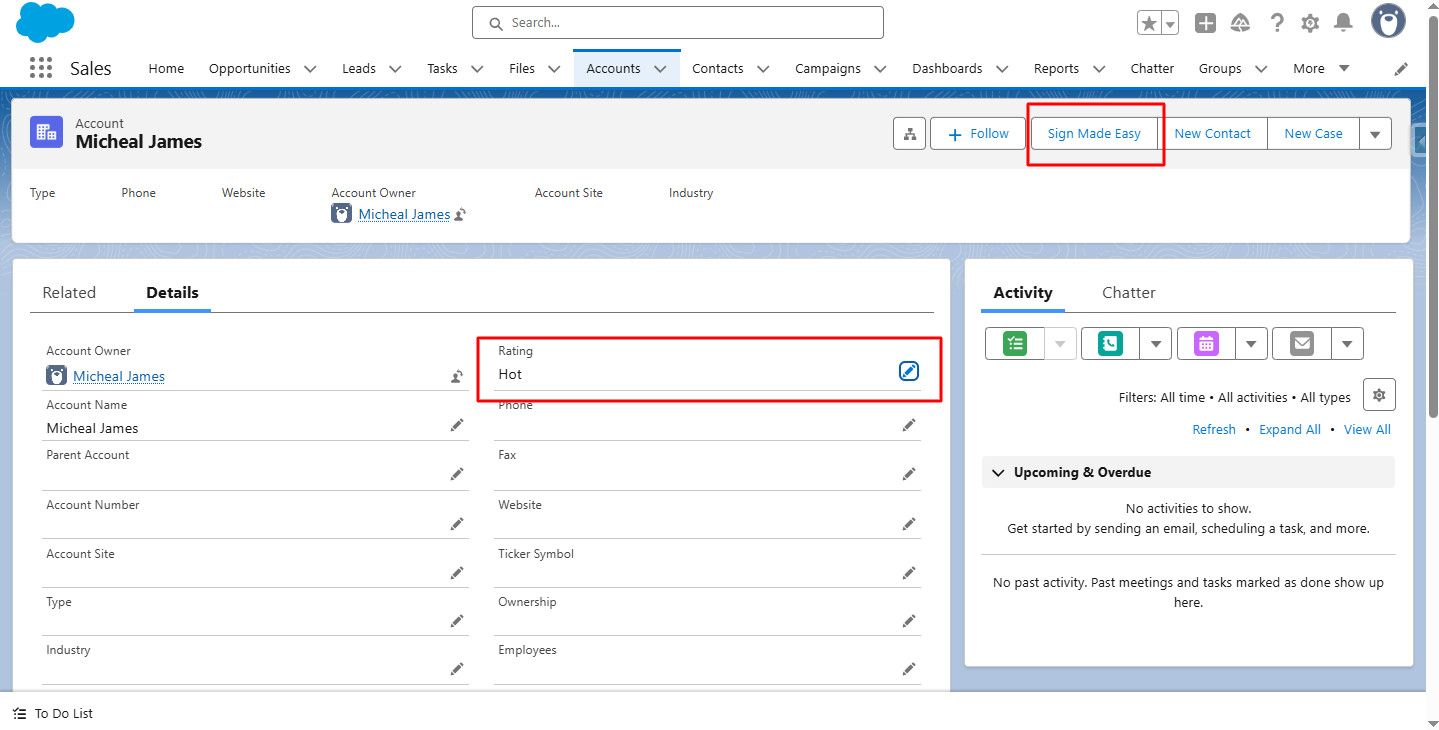
In this case, the DS condition allows signing, so the user can proceed normally without seeing the DSM message, and the Create Transaction interface opens as part of the process.
Conclusion
Validating signing conditions before sending a document is essential for maintaining compliance and preventing unauthorized signatures. By using DS and DSM parameters, Salesforce users can enforce intelligent signing rules that adapt dynamically based on record data, without modifying templates or manual checks.
With eSignature for Salesforce, solutions like Sign Made Easy enable organizations to build secure, rule-based signing workflows directly within Salesforce. By combining validation logic, automation, and Salesforce-native controls, businesses can confidently scale their digital signing processes while maintaining enterprise-grade governance.