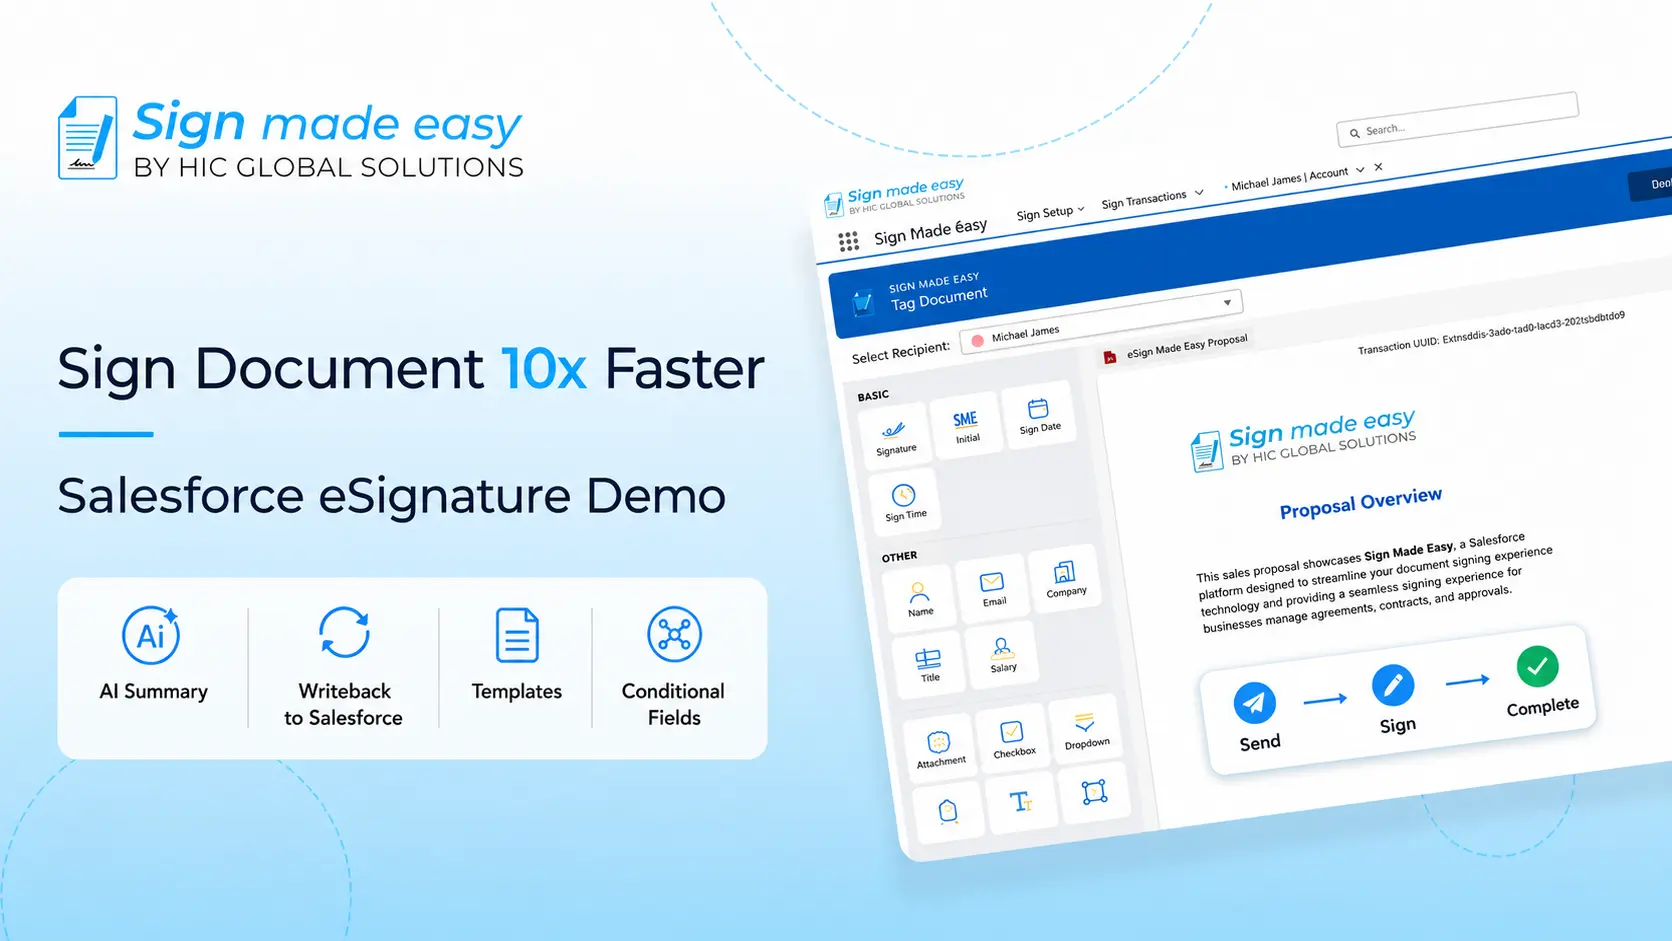


This step-by-step guide will provide you with quick steps on how to add a lookup recipient inside a sign template in just a few easy steps. This process improves your eSignature for Salesforce workflow by pulling recipients directly from related records. Whether you rely on Salesforce digital signature features or any eSignature integration, adding lookup recipients ensures that your signing process stays quick, accurate, and fully automatic.
Step-by-Step: Add a Lookup Recipient in a Sign Template
Step 1:
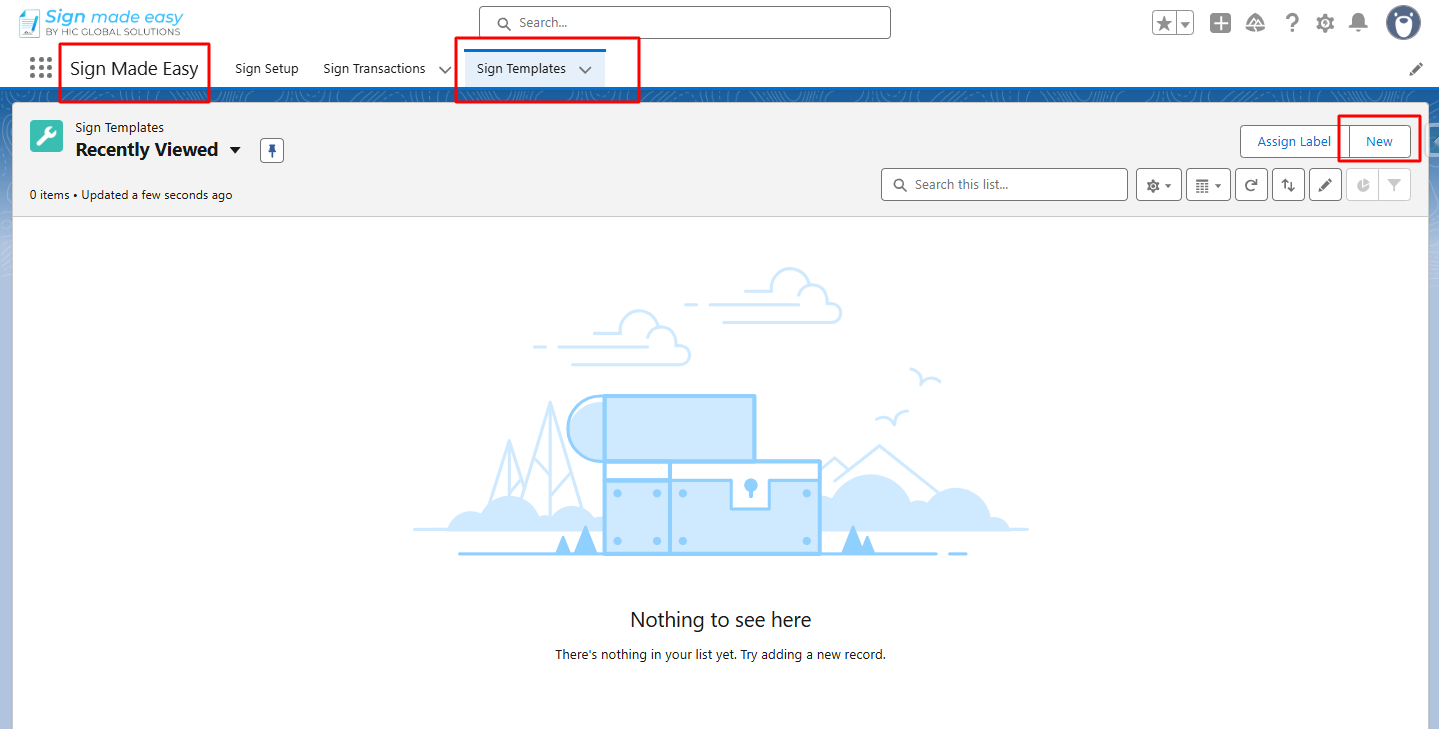
Open the Sign Made Easy app, navigate to the Sign Templates tab, and click on the New button to create a new template.
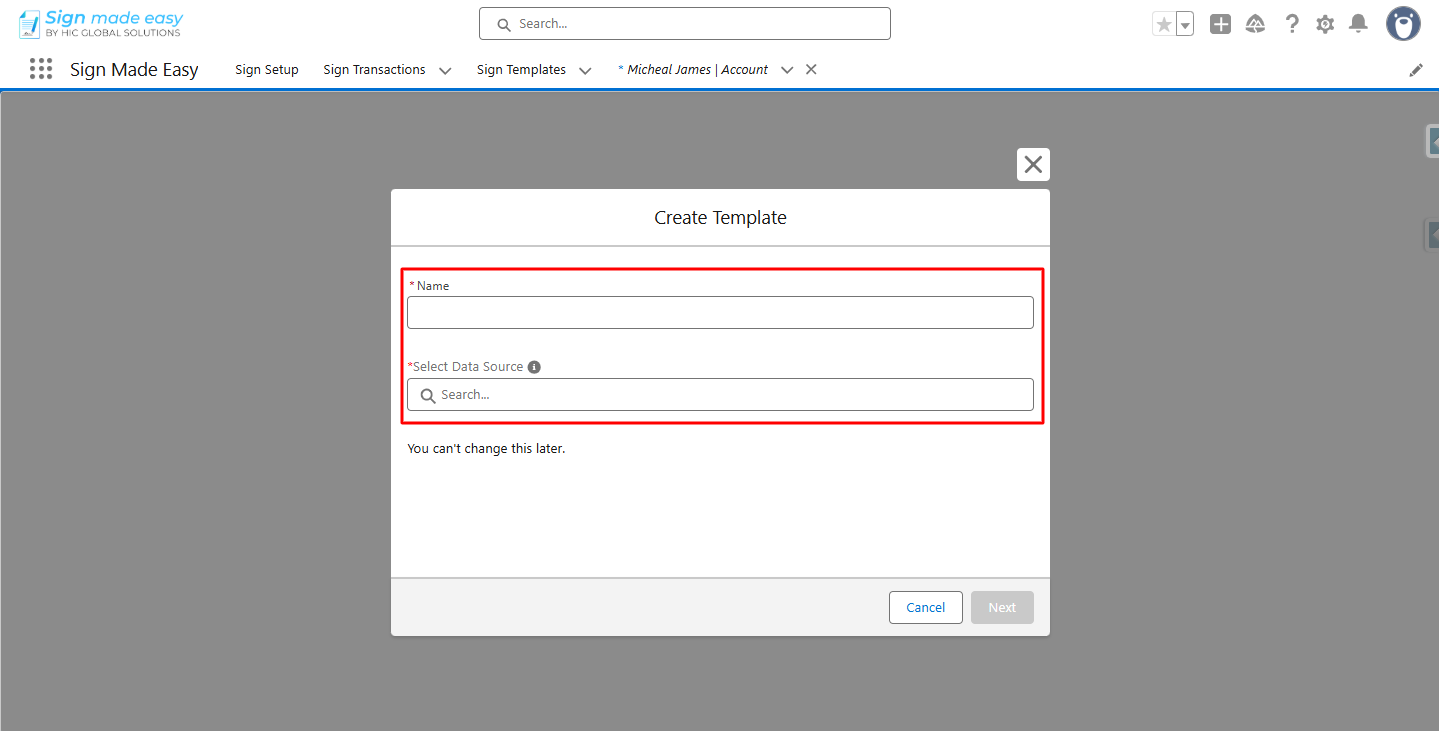
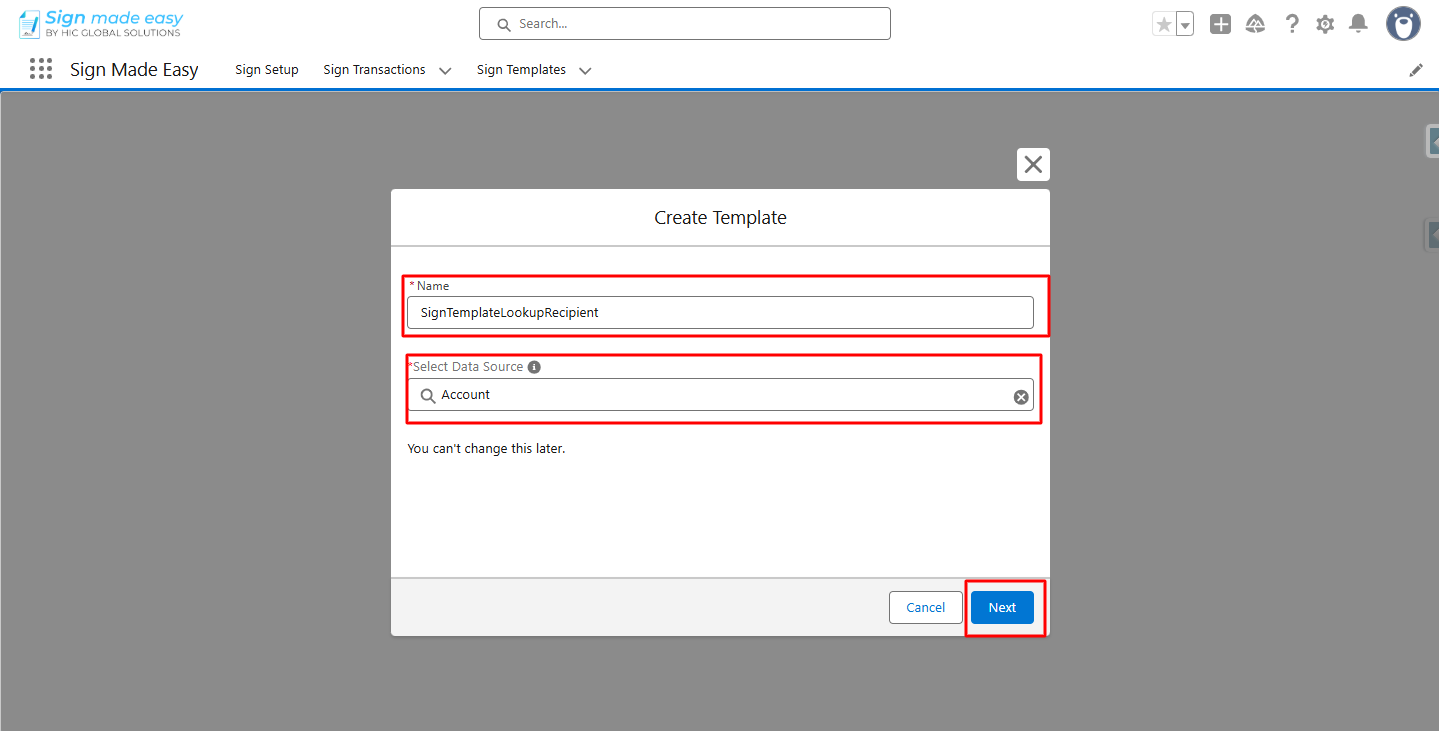
Step 2:
Enter a Name for the template and select the appropriate Data Source from the available options.
Step 3:
Click Next.
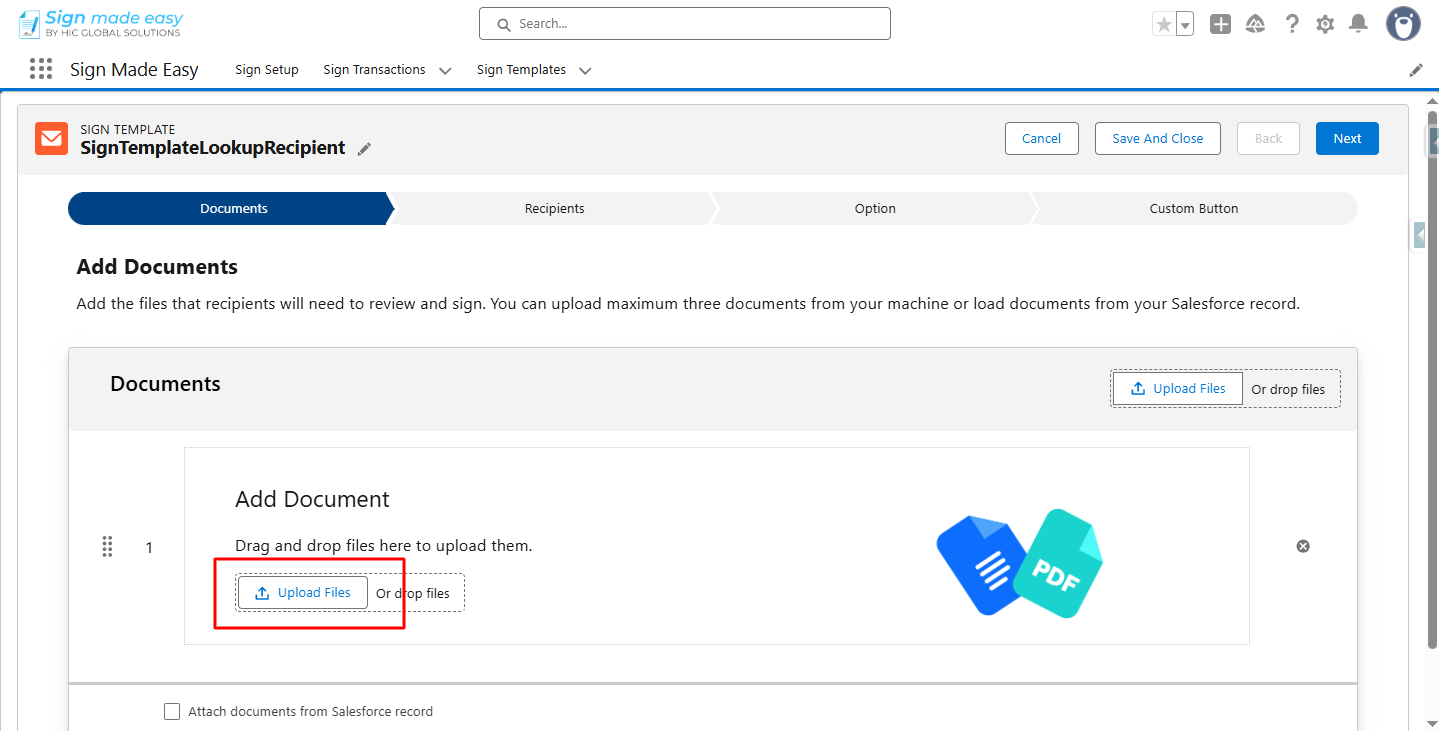
Step 4:
Click on Upload files and upload the document.
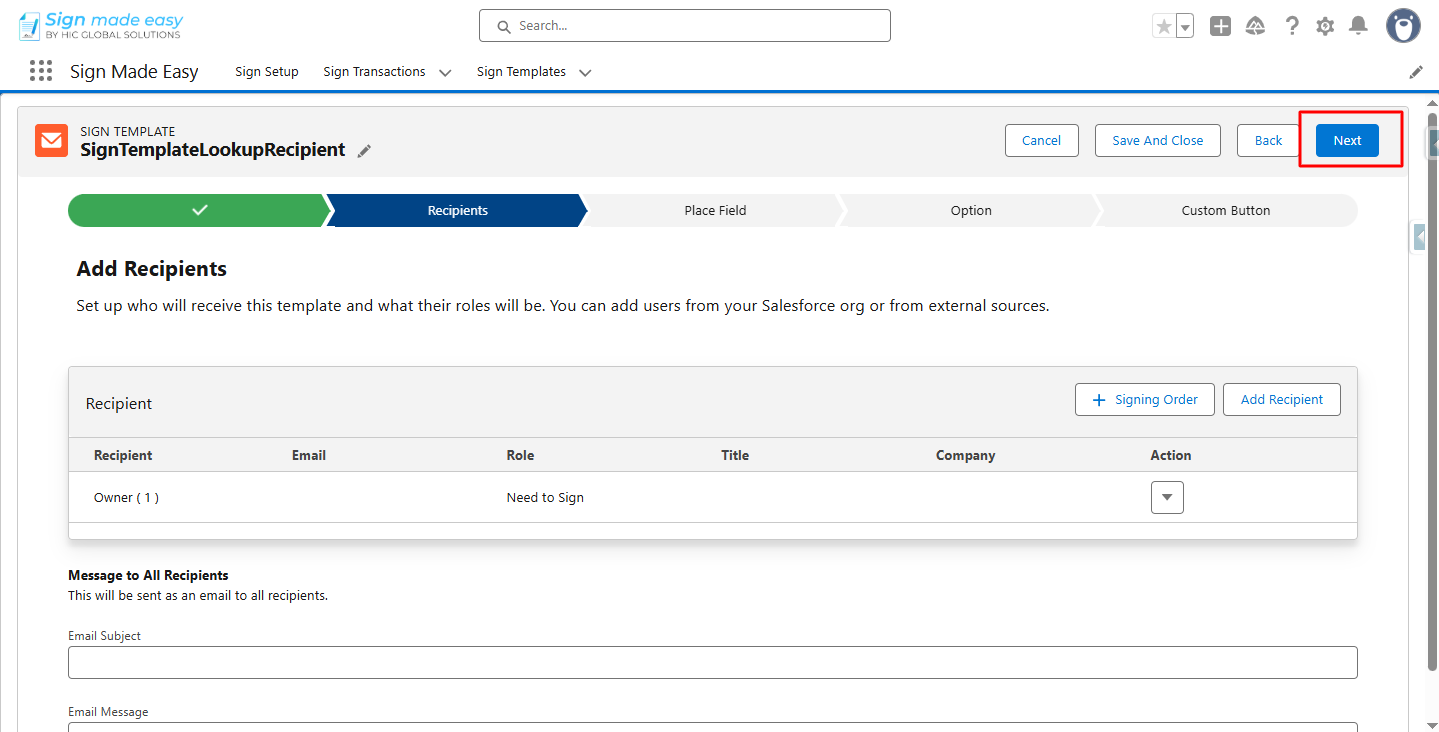
Step 5:
Click Next.
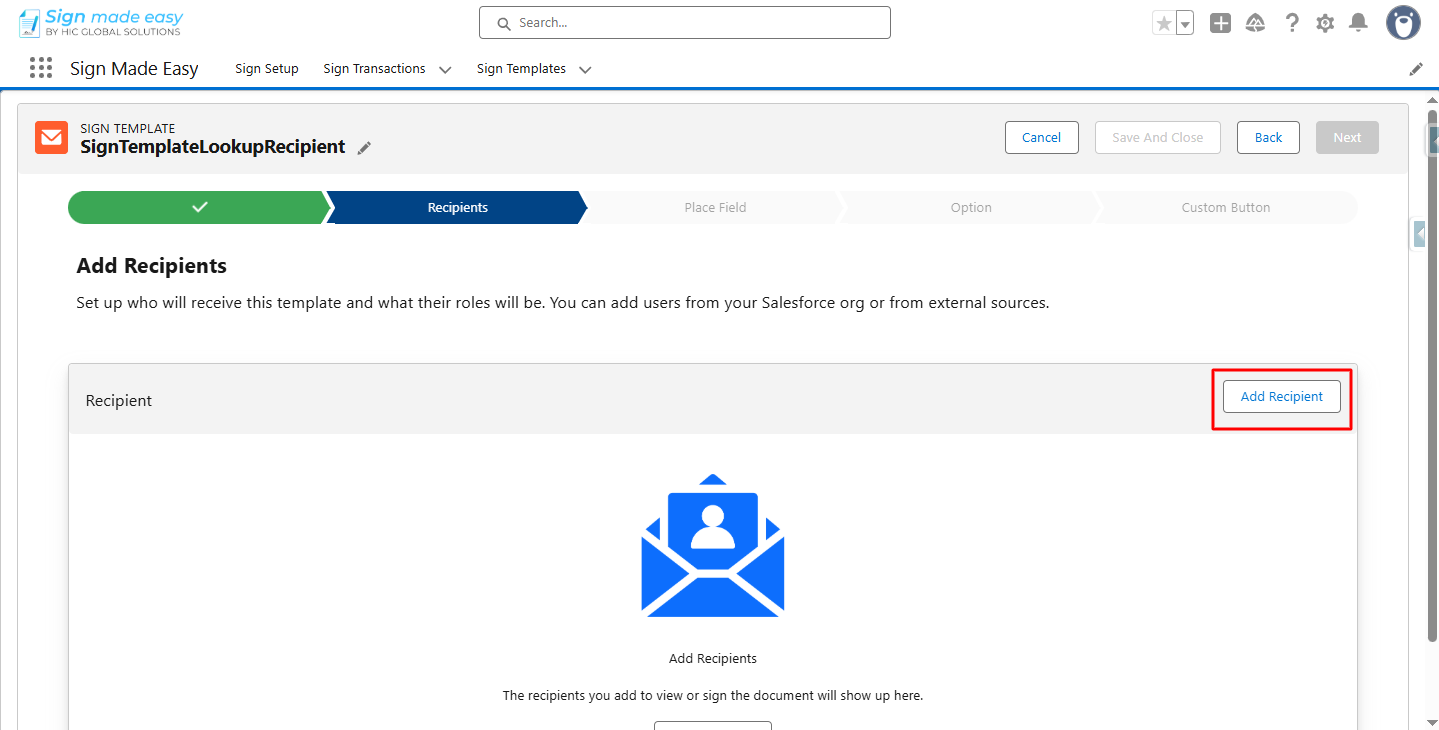
Step 6:
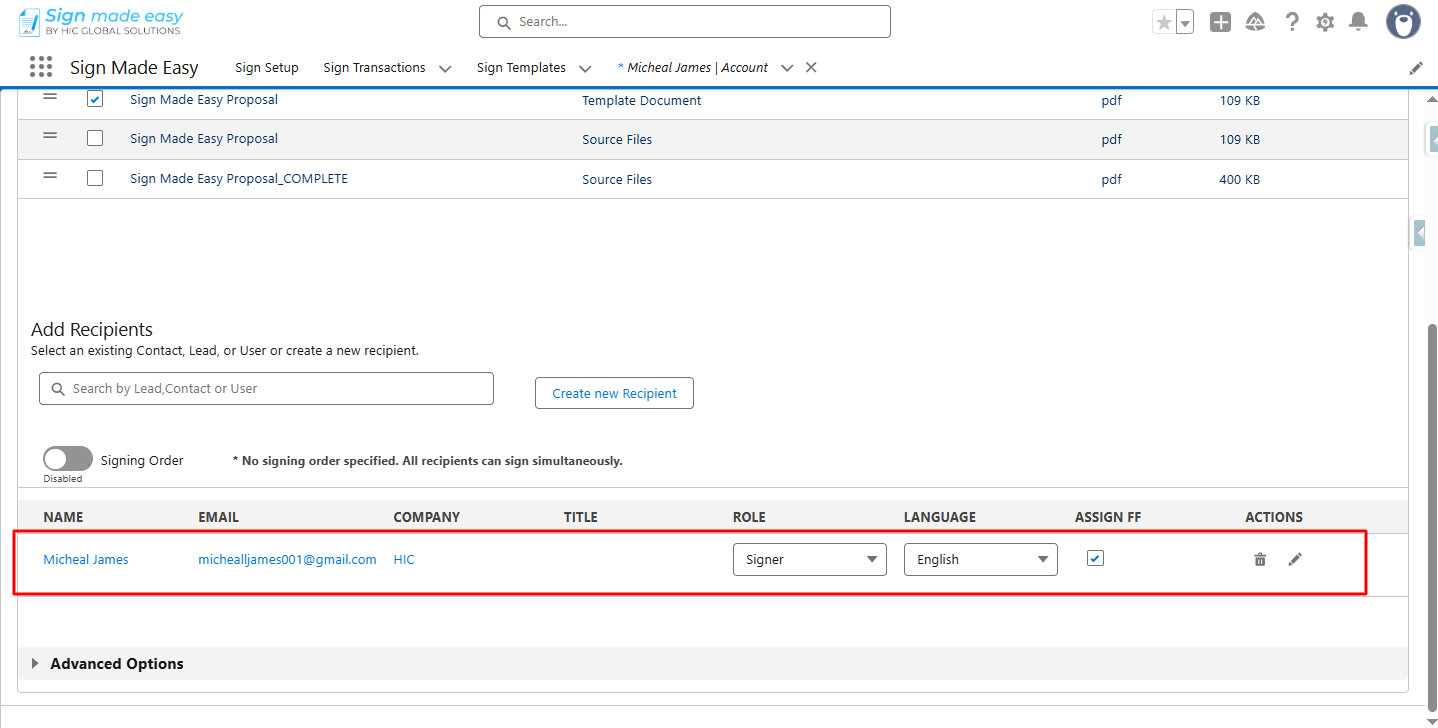
Click Add Recipient.
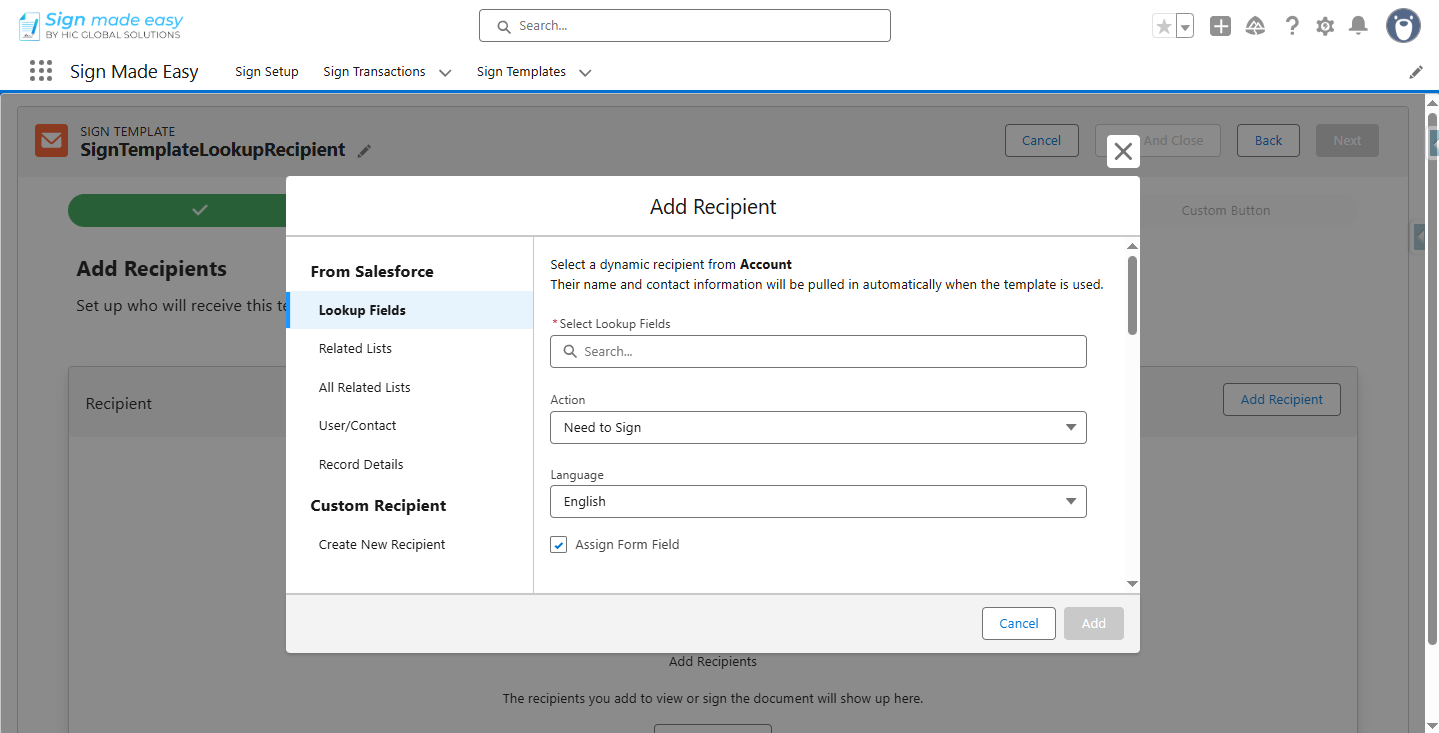
Step 7:
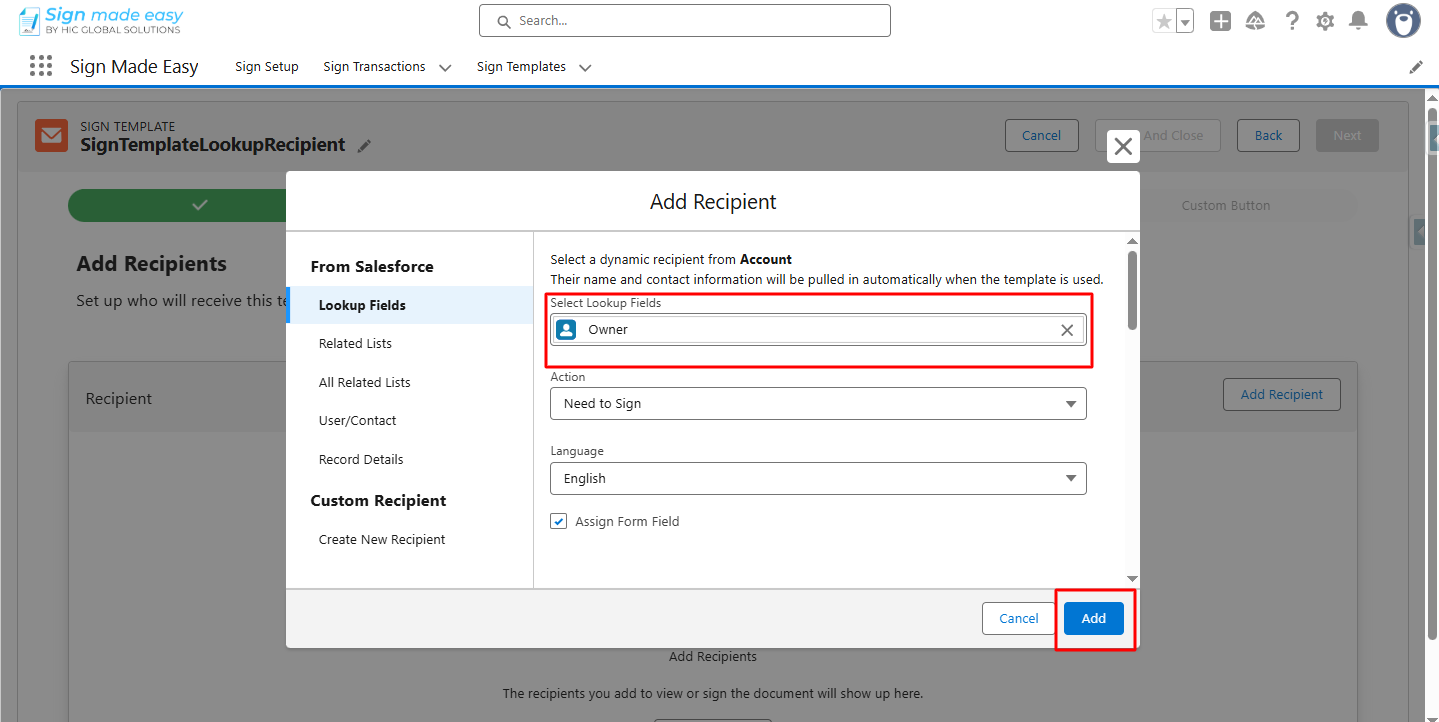
From the Lookup Field menu, select Lookup Fields.
| Note: Only Contact, User, and Lead objects can be selected, depending on the lookup field defined for the object associated with the sign template being created. |
Step 8:
Click on the Add button.
Step 9:
Click on the Next button.

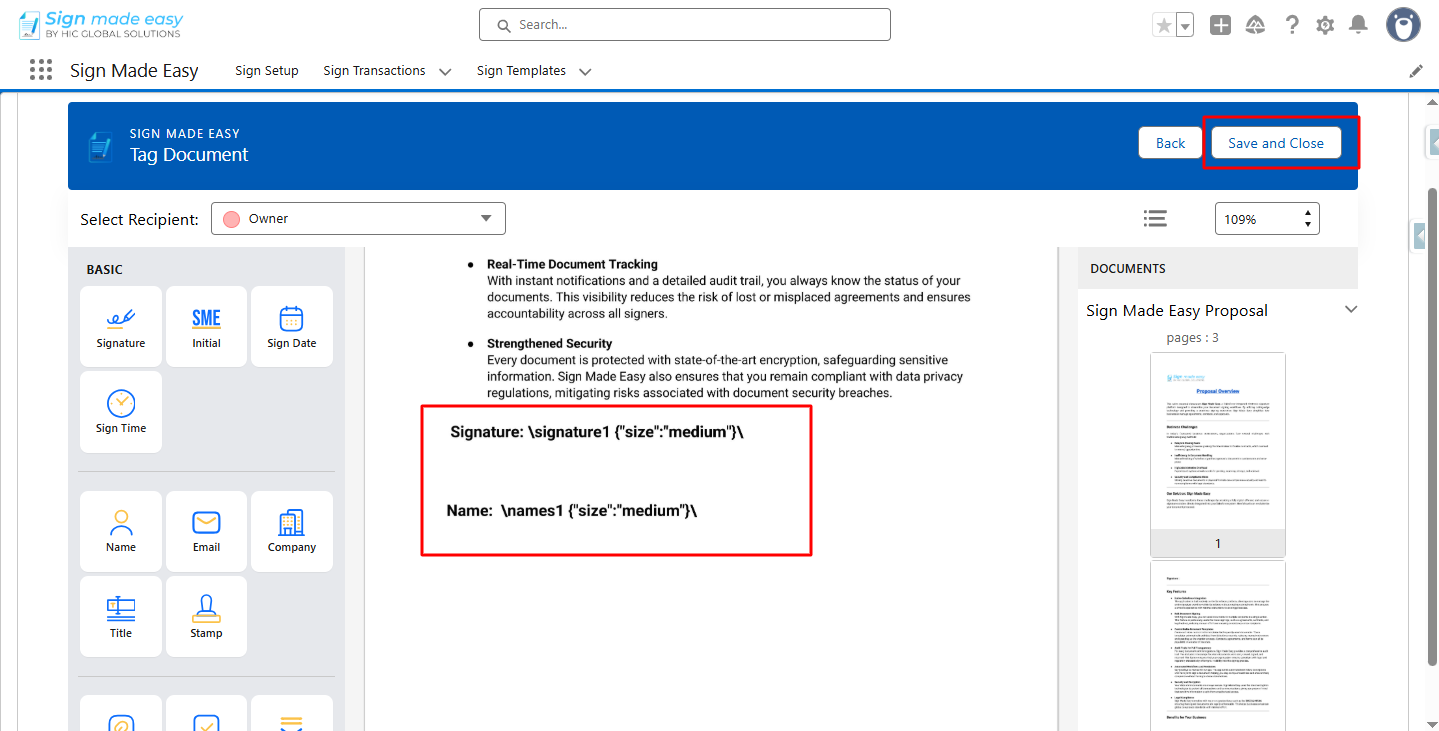
The Place Field interface opens. The syntax for Signature and Name fields is preconfigured, so you do not need to drag and drop these tags manually.
Step 10:
Click the Save and Close button.
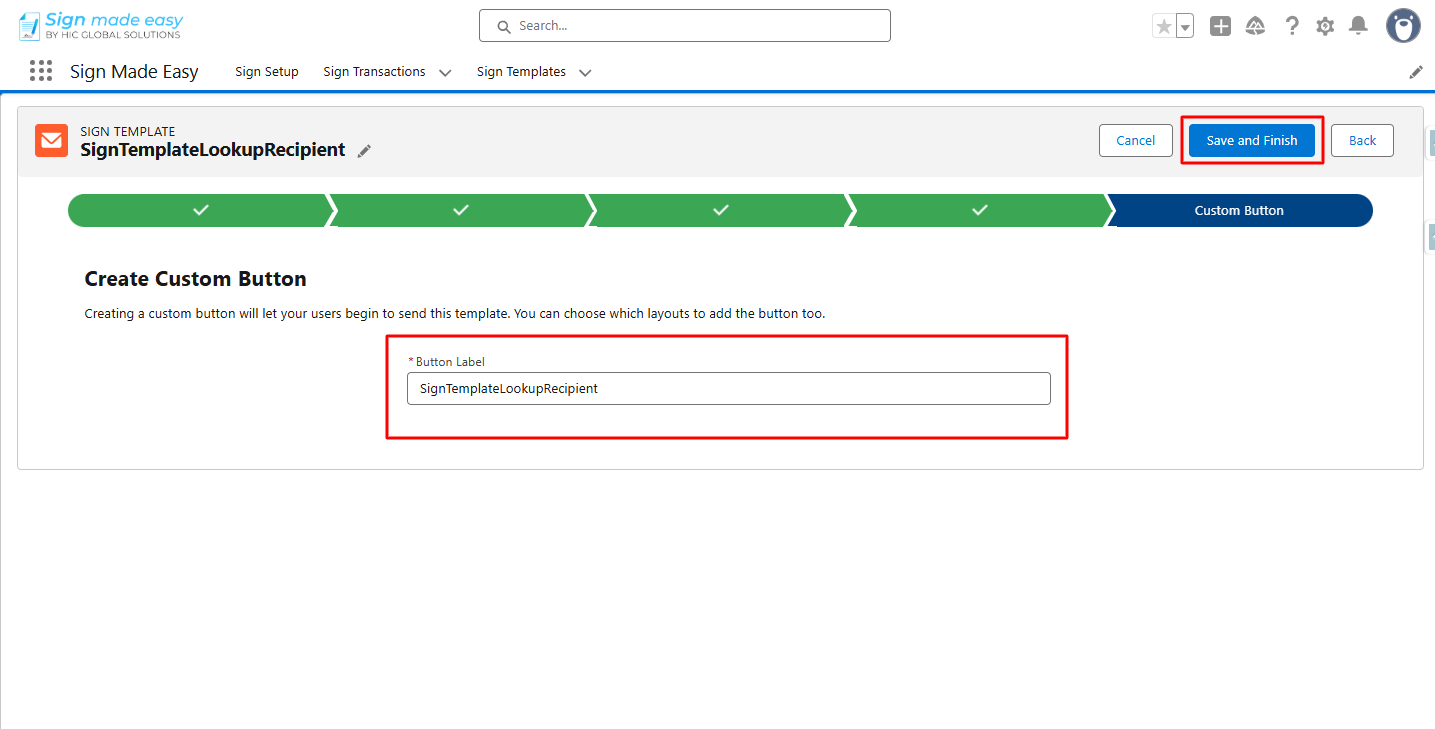
Step 11:
Configure the required settings, then select Next to continue.

Step 12:
Click the Save and Finish button.

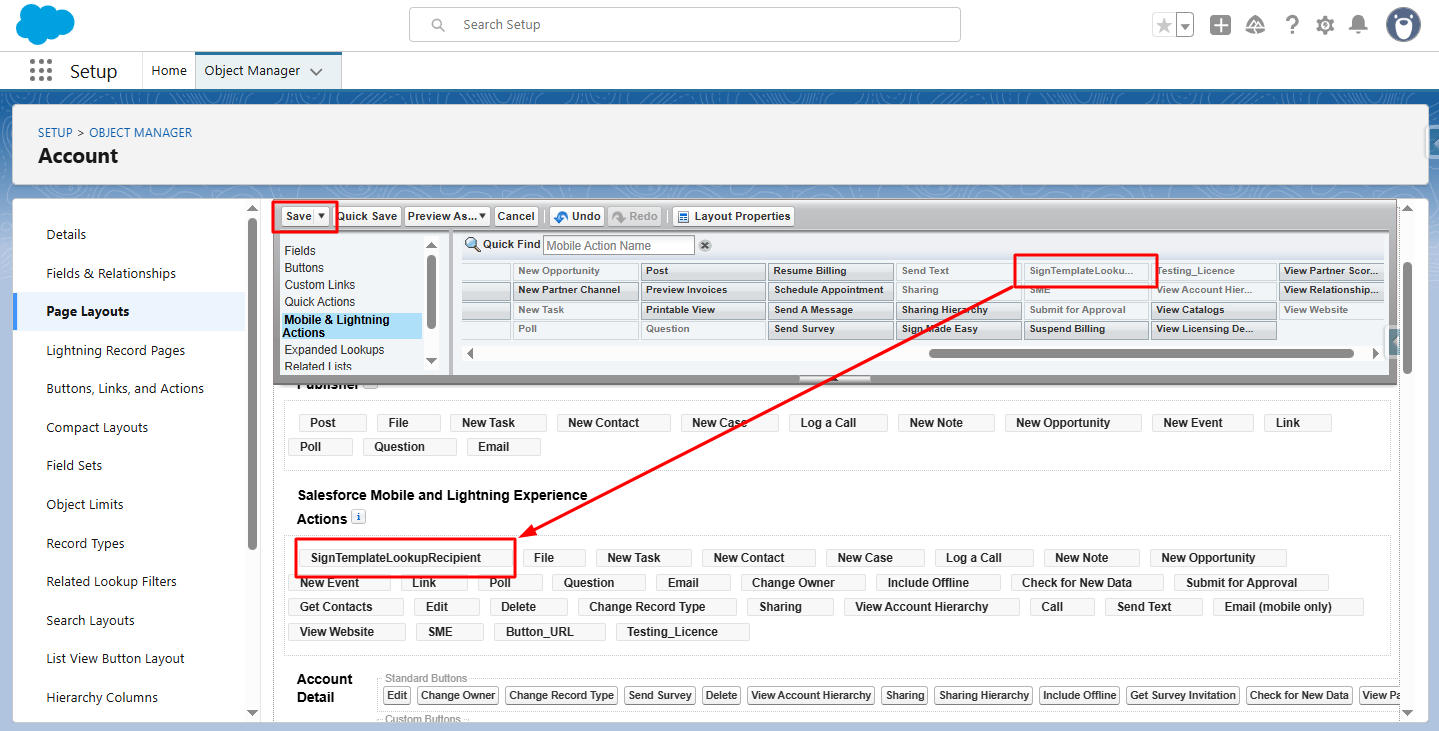
Step 13:
Navigate to the Page Layout section of the object for which the Sign Template was created. Drag and drop the Sign Template custom button into the Salesforce Mobile and Lightning Experience Actions, then select Save or Quick Save to apply the changes.
Step 14:
Navigate to the record detail page of the object where the Sign Template button was added, and click on the template button to open the Sign Template.
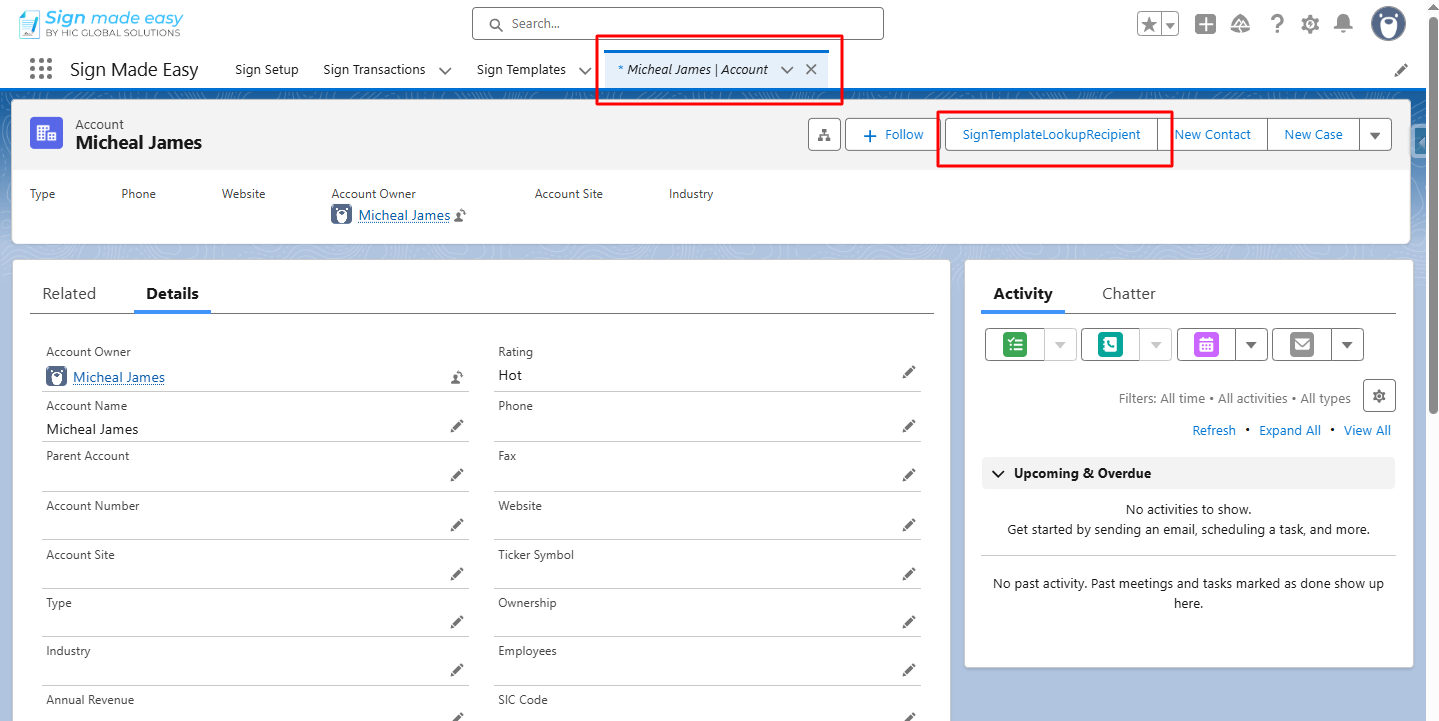
At last, the Recipient selected in the Sign Template from the Lookup menu is automatically displayed.
Conclusion
Adding a lookup recipient to a sign template keeps your signing process fully automated and accurate. This approach supports smoother workflows with Salesforce digital signature tools and enhances any eSignature integration you use. With lookup-based selection, your eSignature for Salesforce setup becomes faster and effortless for your users.
For large organizations managing complex approval structures and high document volumes, Sign Made Easy supports the enterprise deployment by architecting secure, compliant, and scalable eSignature for Salesforce solutions.
From workflow design to enterprise-grade automation and ongoing optimisation, it ensures electronic signature processes align seamlessly with Salesforce best practices, regulatory requirements, and long-term operational goals.
Learn About Reusable Templates.