


Managing documents efficiently in Salesforce is essential for businesses that need fast, compliant, and organized workflows. A common challenge many organizations face is saving signed documents in Salesforce without storing the original file. This helps reduce storage usage and keeps records clean and easy to manage.
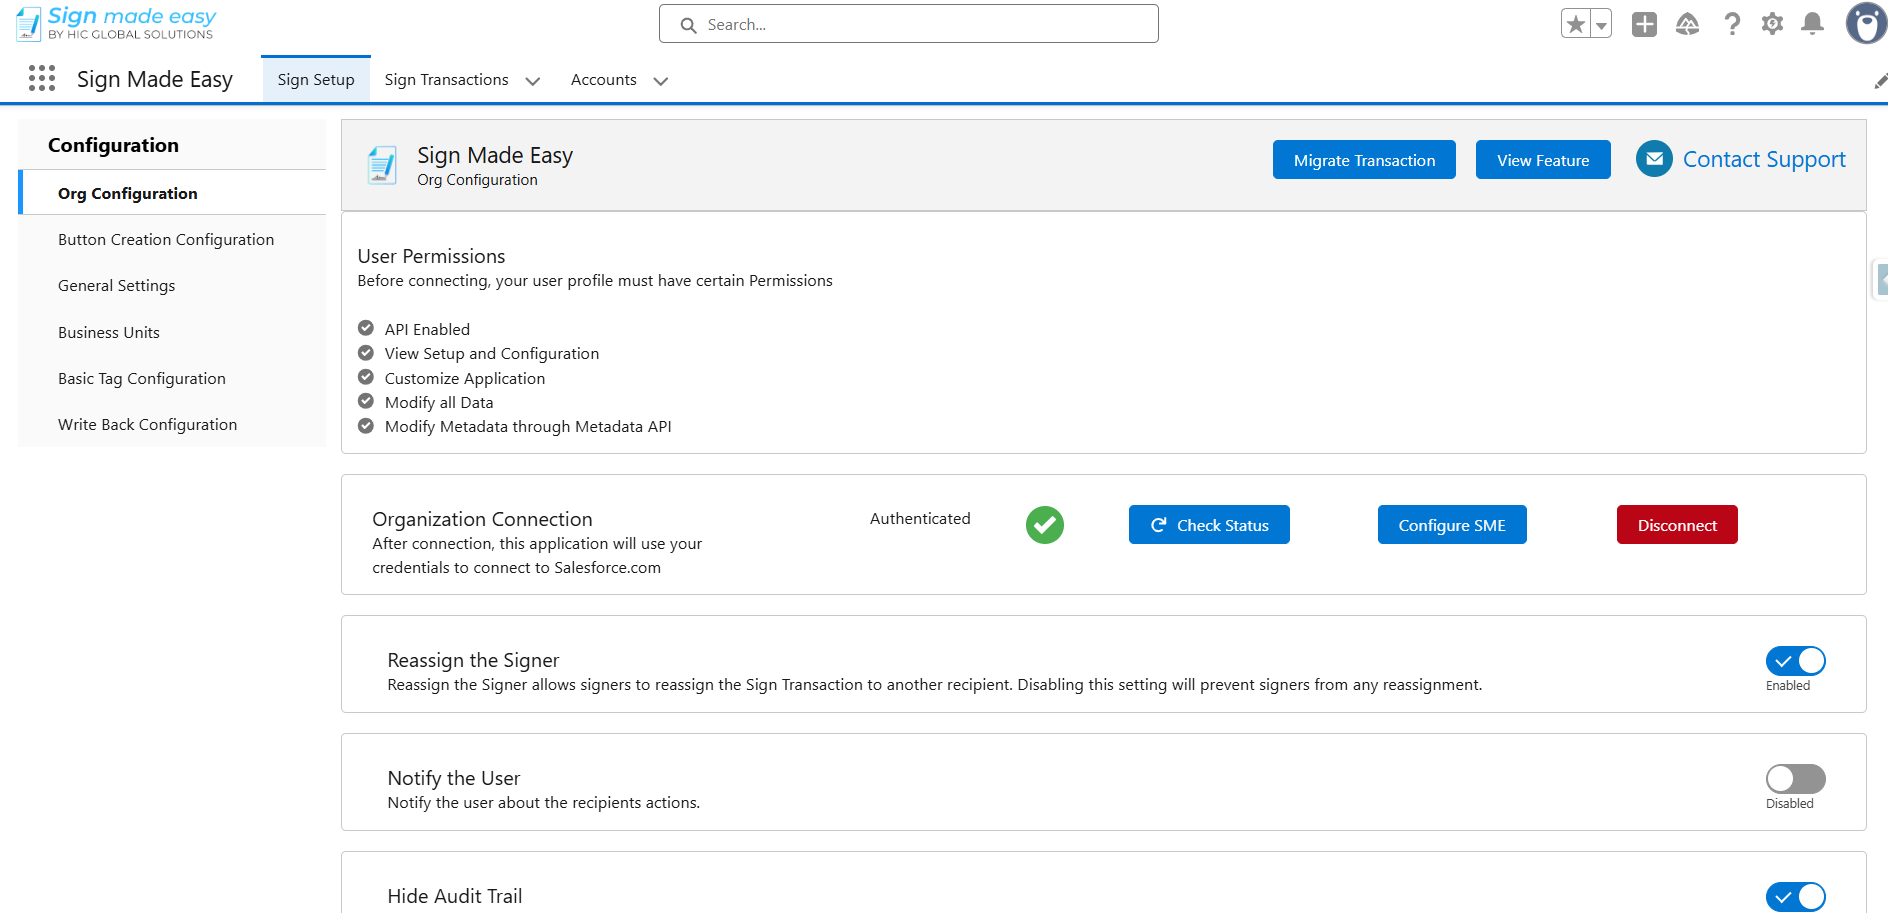
Note: To save the signed document to the parent record without storing the original document, please ensure the following settings are configured correctly:
- Enable Document Cloning = False
- Save Document Back to Salesforce Record = True
With this configuration, only the completed (signed) document will be saved to the parent Salesforce record, and the original document will not be stored.
How to Store Signed Documents in Salesforce Without Keeping the Original File
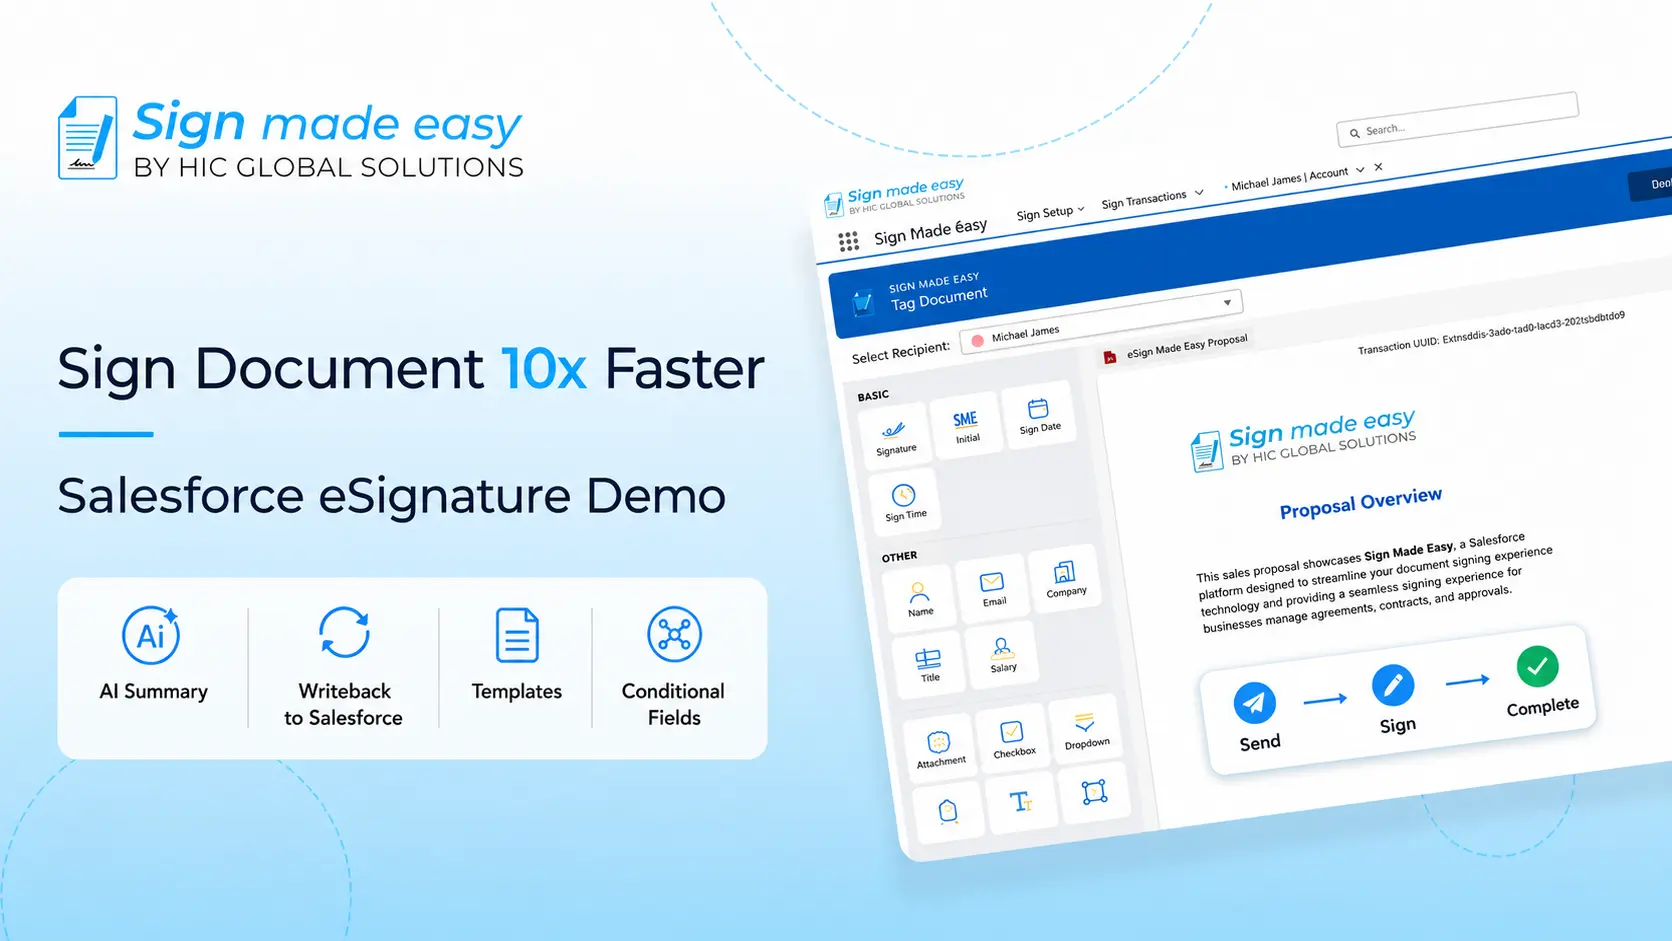
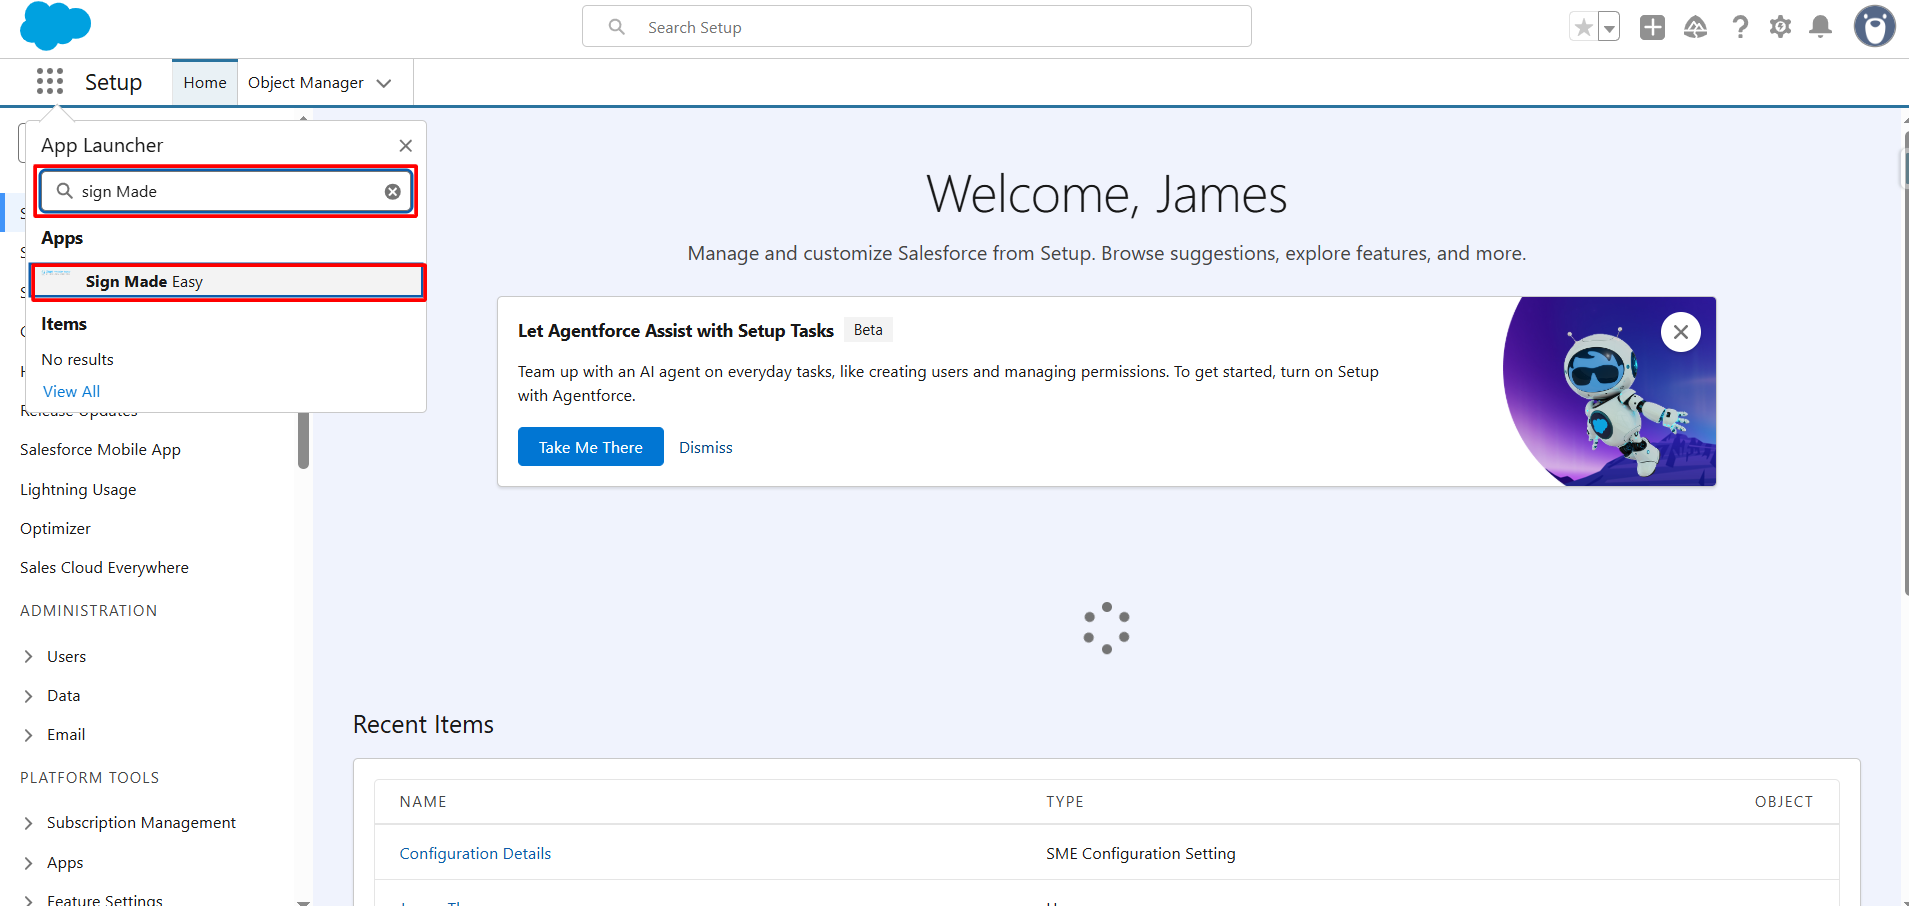
Step 1: Navigate to the App Launcher, type Sign Made Easy in the search bar, and click to access the application.
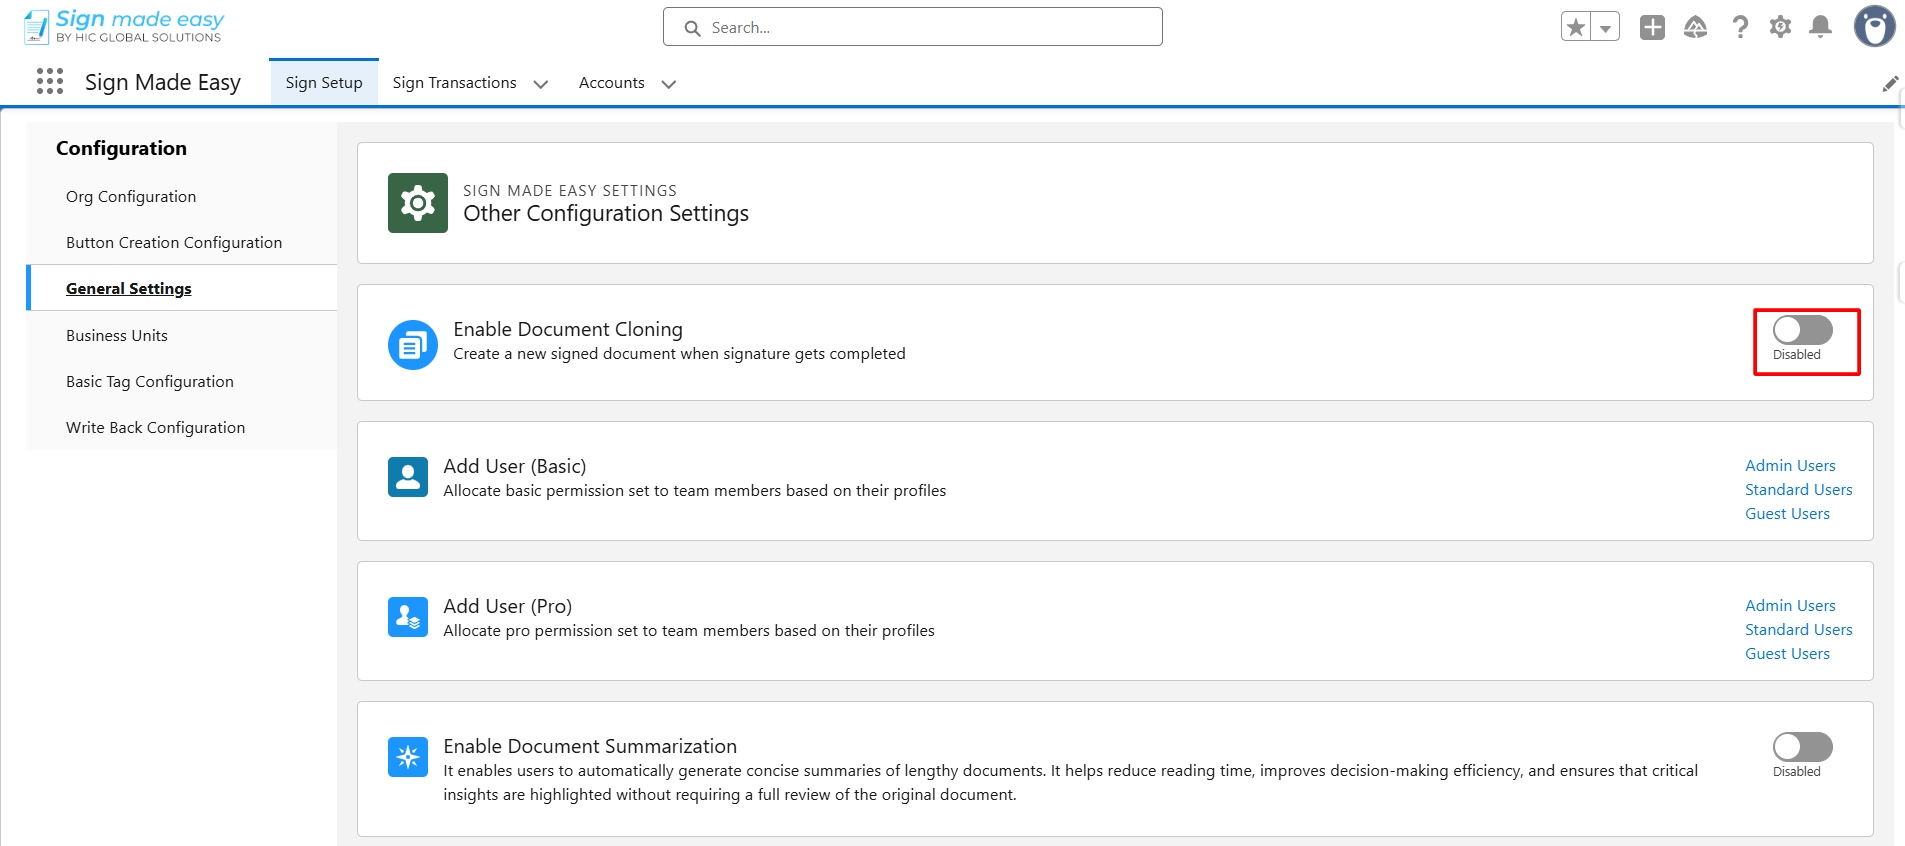
Step 2: Navigate to the General Setting and Disable the Enable Document Cloning.
Step 3: Open the Record from which you want to create a transaction.
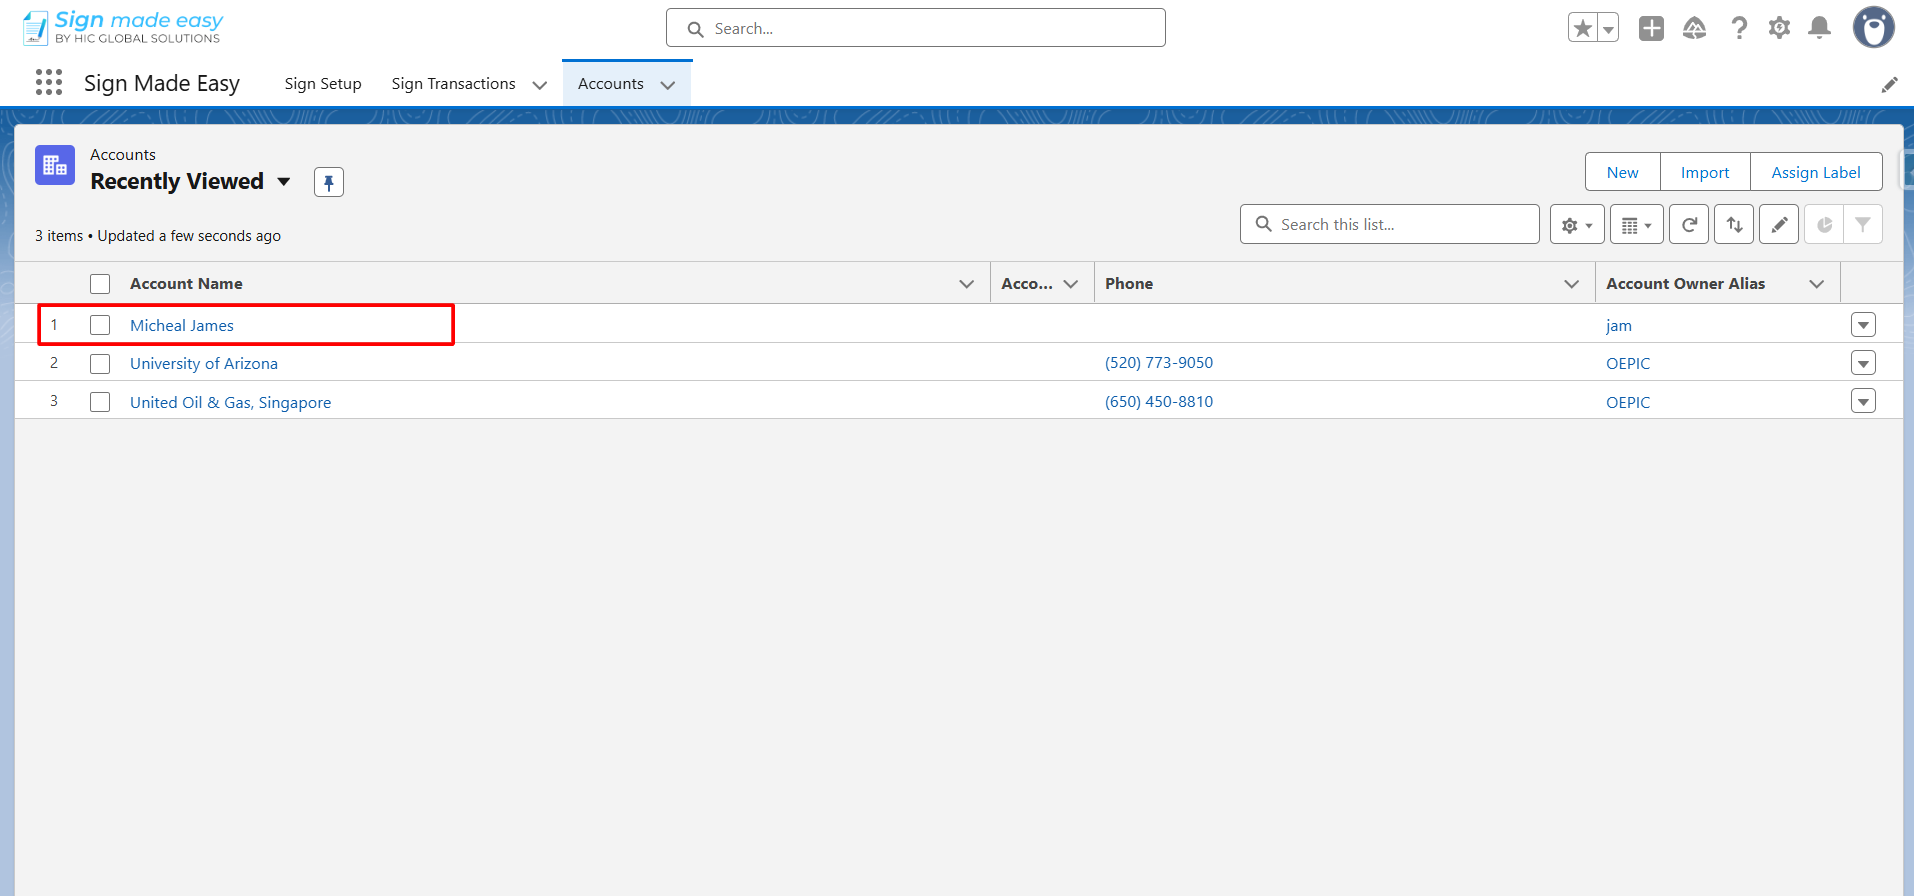
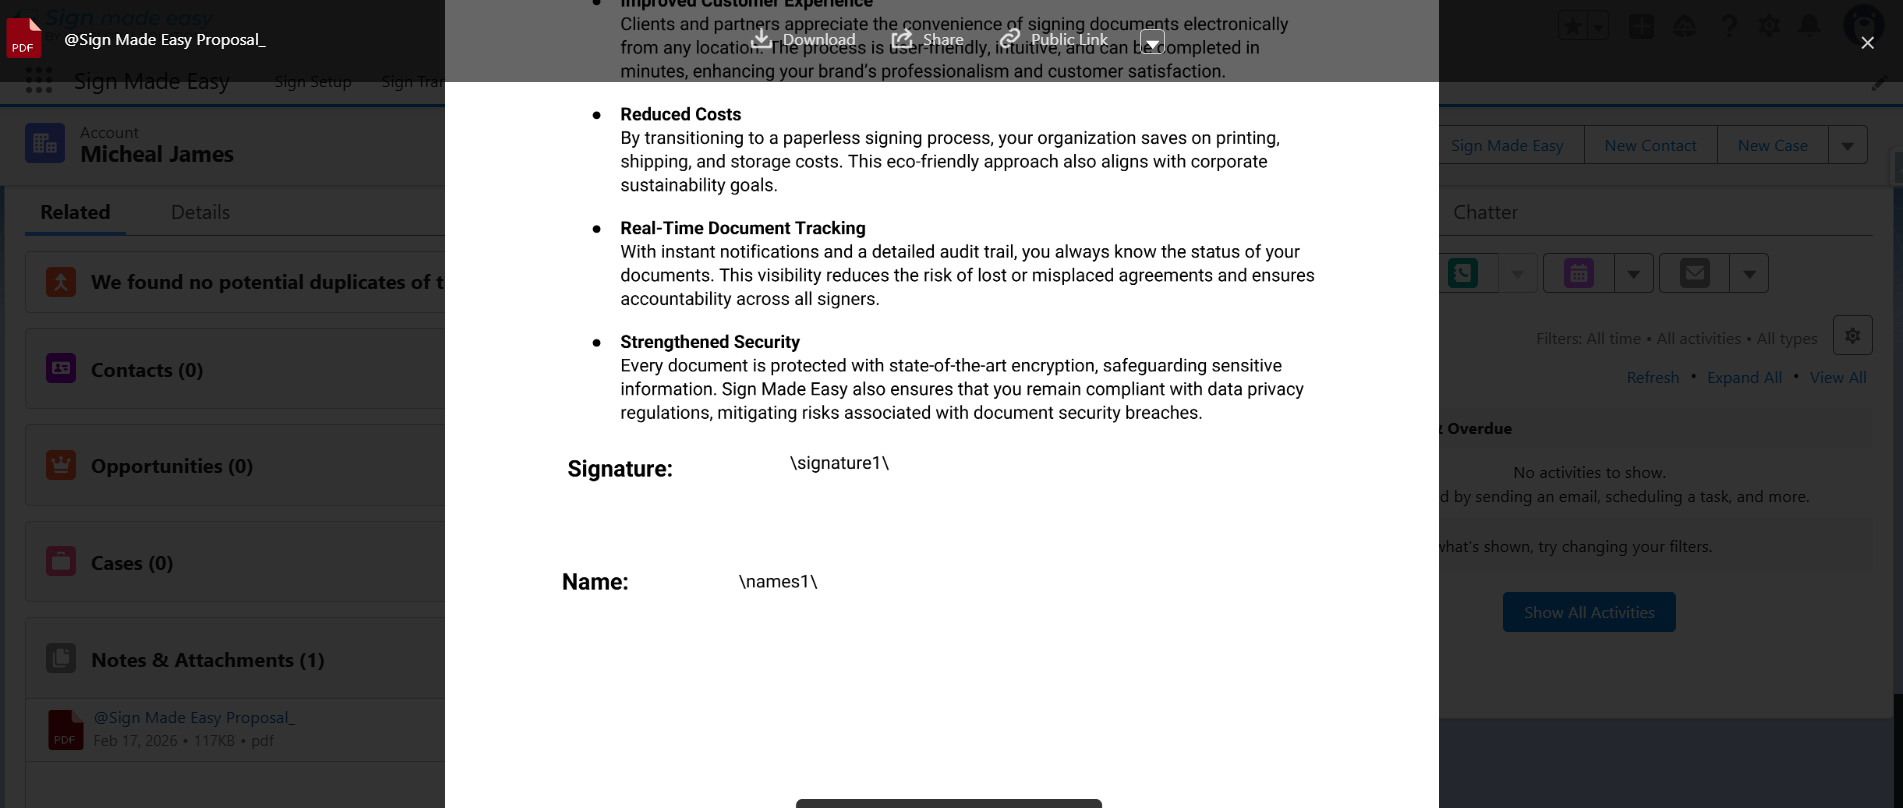
Step 4: Upload the file in Notes & Attachments and click on the File to view the uploaded file.
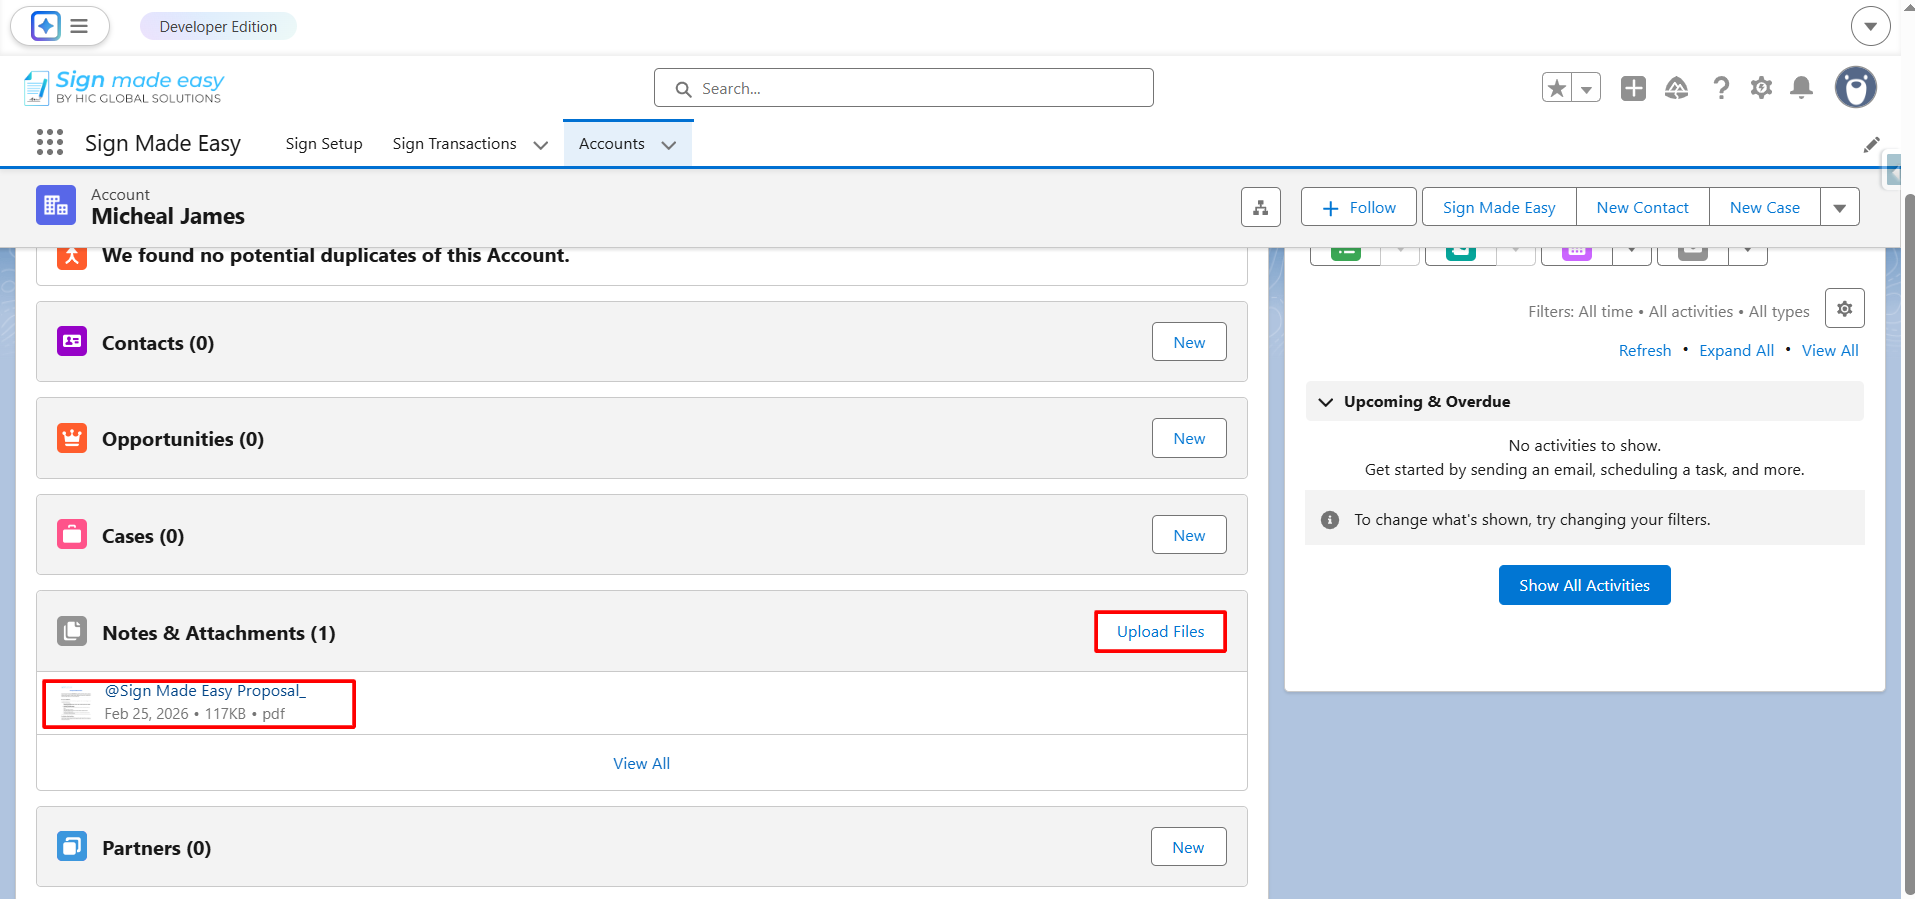
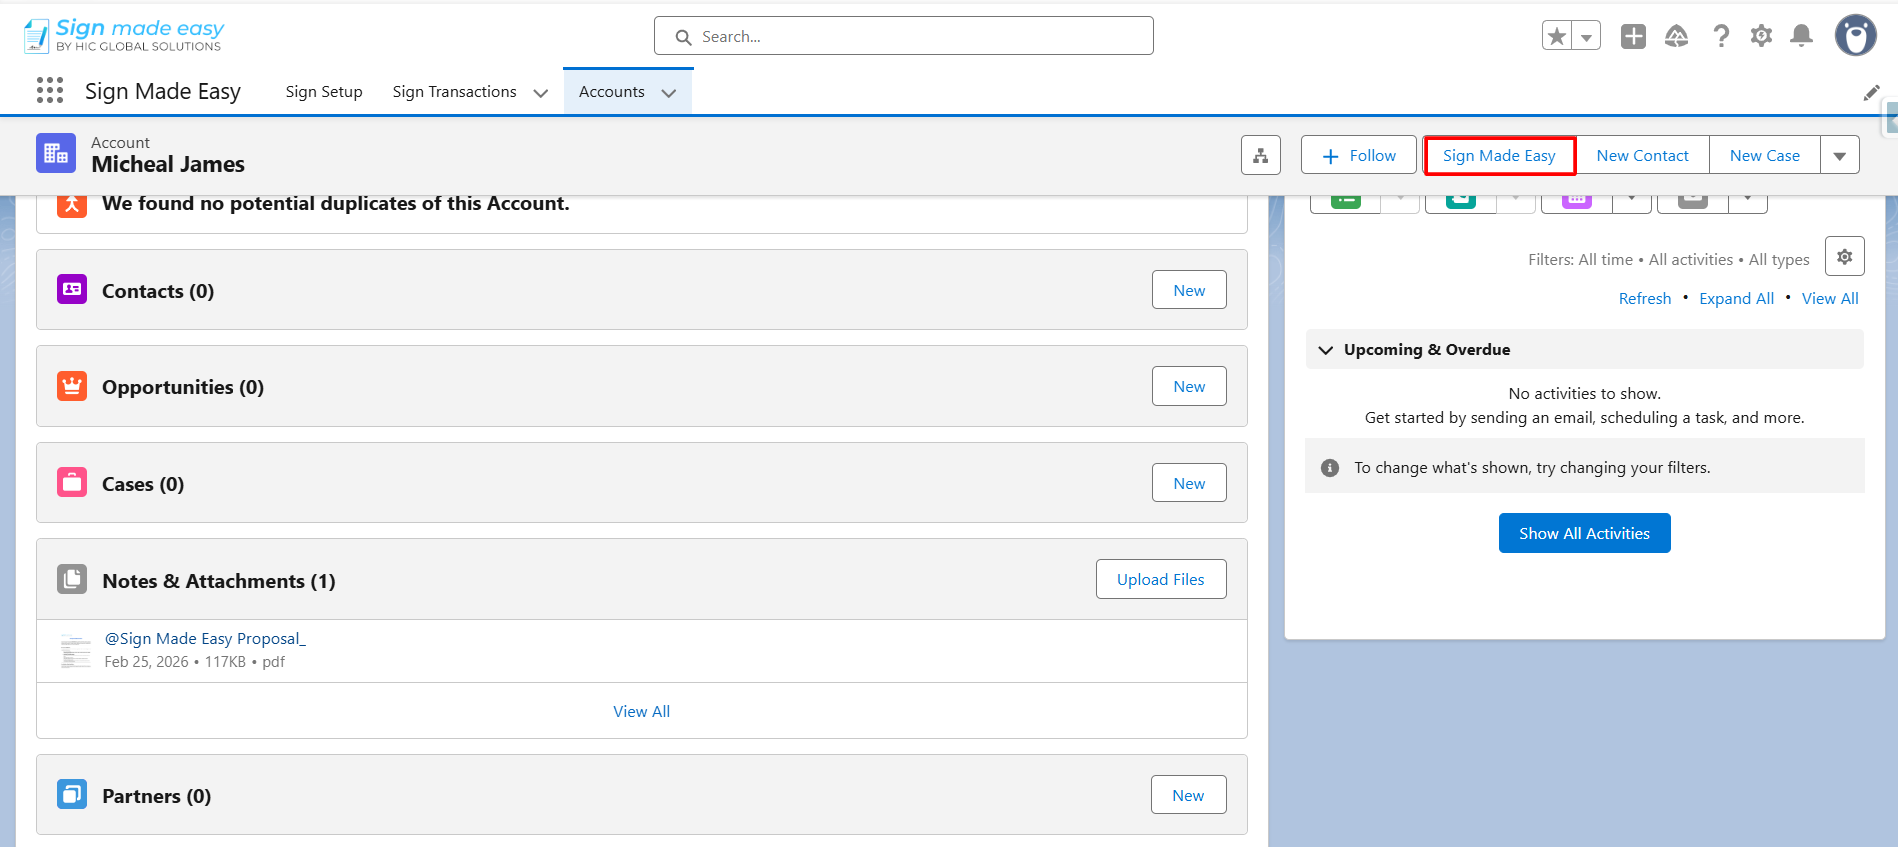
Step 5: Click on the Sign Made Easy button that you have created earlier, if not created, you can learn on how to create custom button
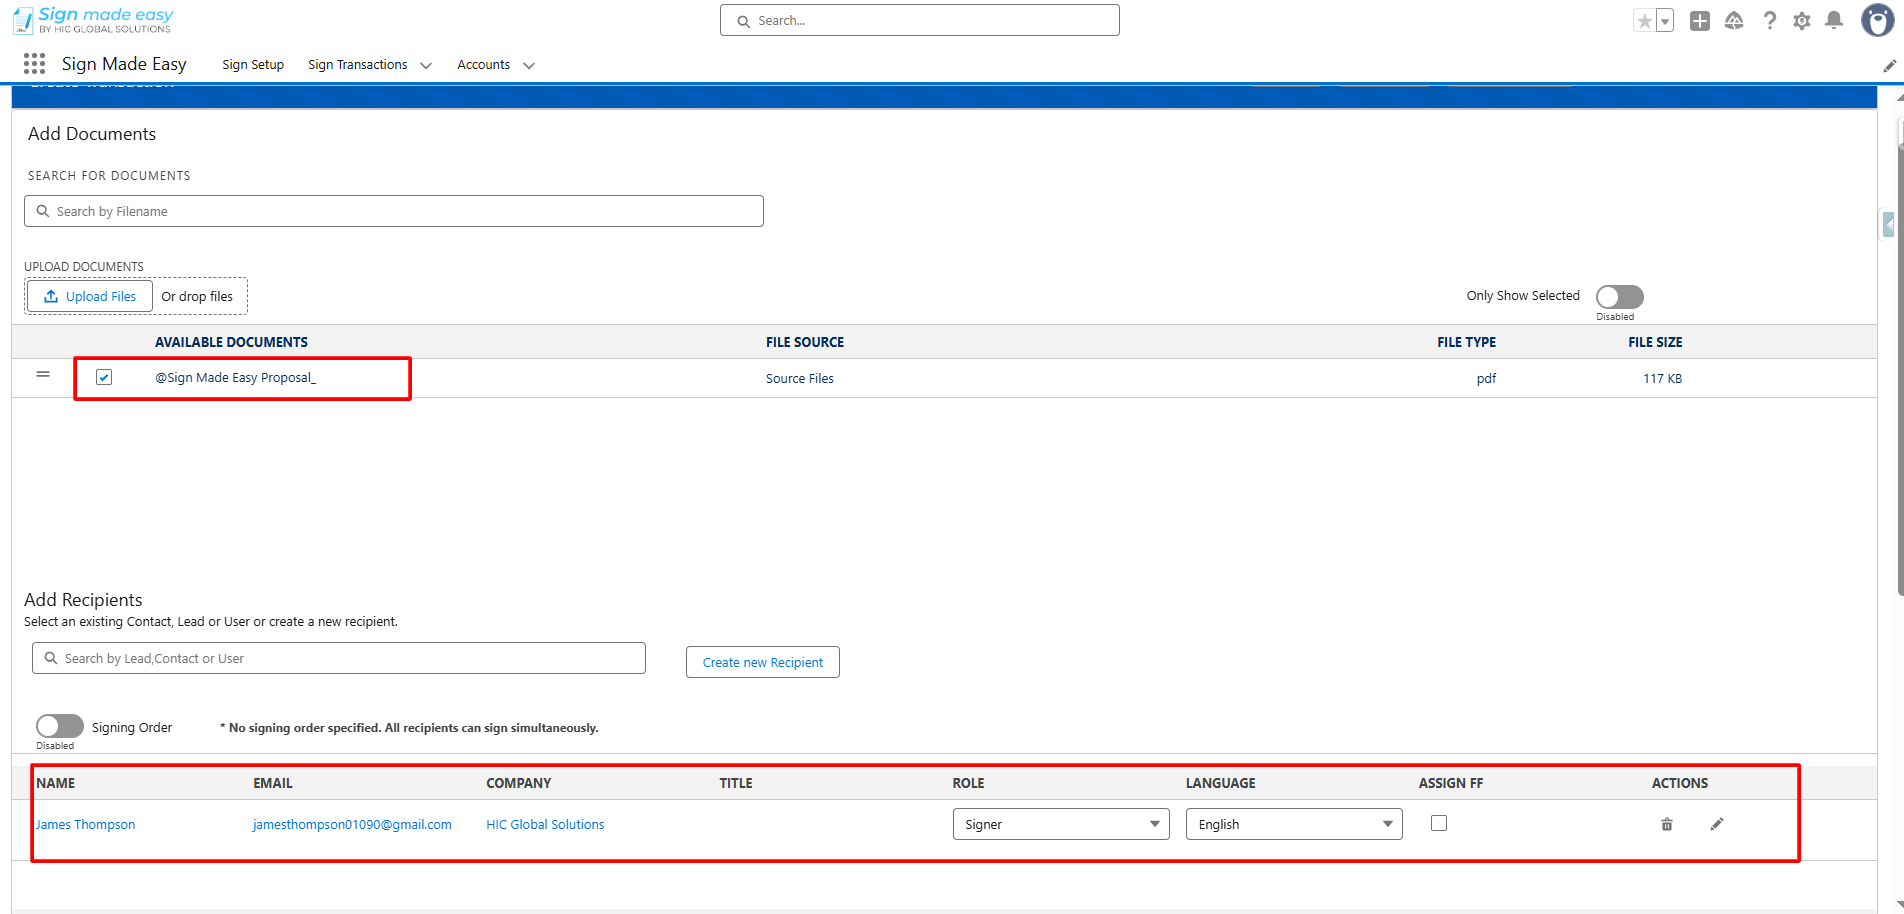
Step 6: Select or upload File and Recipient.
Note:
- All documents related to the object (available in Notes & Attachments) will be displayed here. You can also upload a new document by clicking the Upload Document button.
You may select up to three (3) documents and assign a maximum of five (5) recipients per transaction.
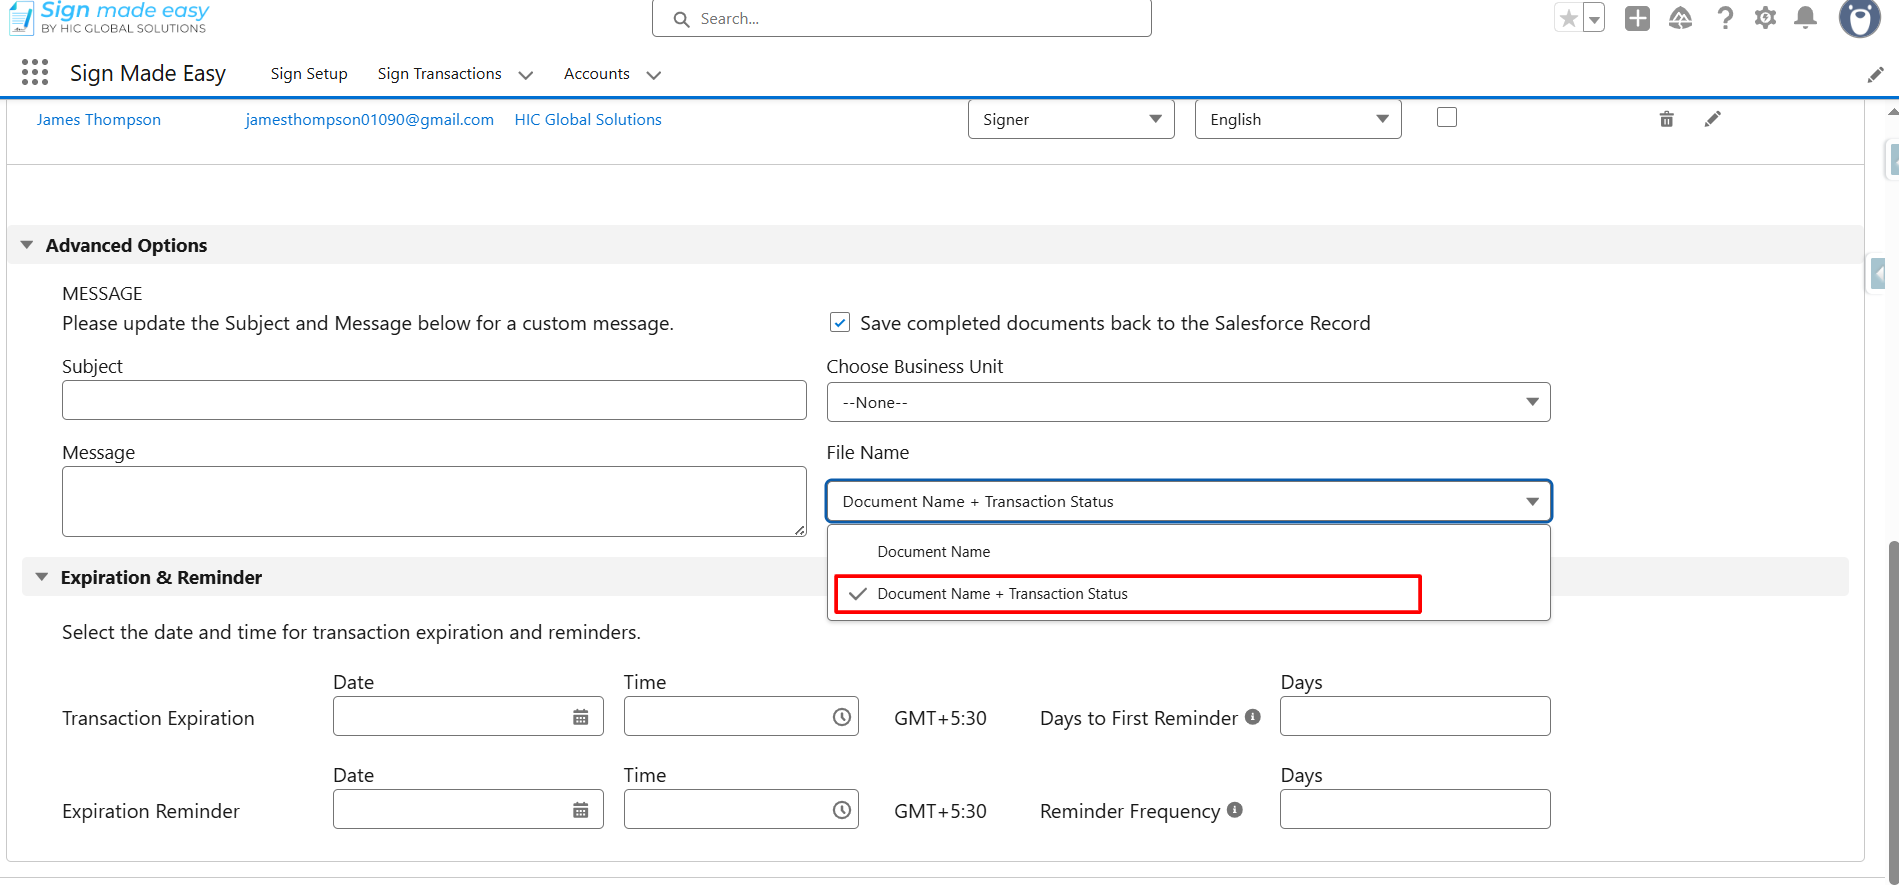
Step 7: Click on the Save completed back to the Salesforce Record checkbox.

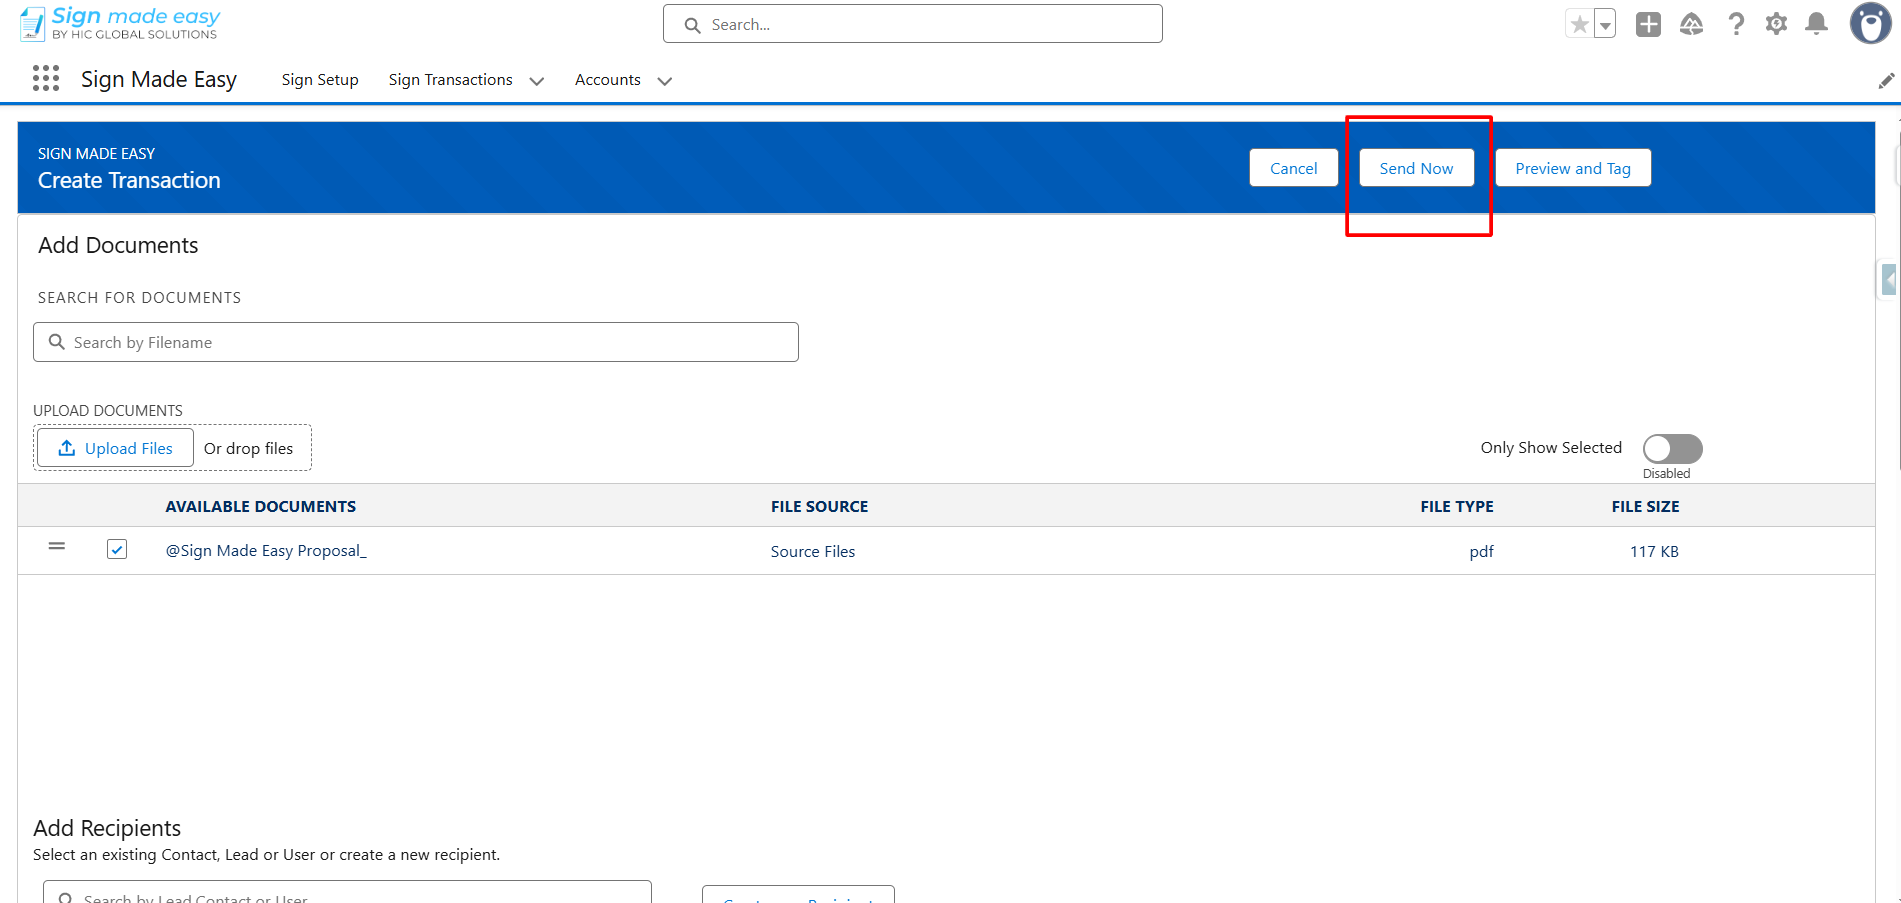
Step 8: Click on the Send Now Button.
Note : If you want to add tags using Drag & Drop, first click on the Preview and Tag button. After that, drag and drop the tags to the desired location on the File then click the Send button.
Step 9: Open the sign transaction email and click on View Document to Sign the it.

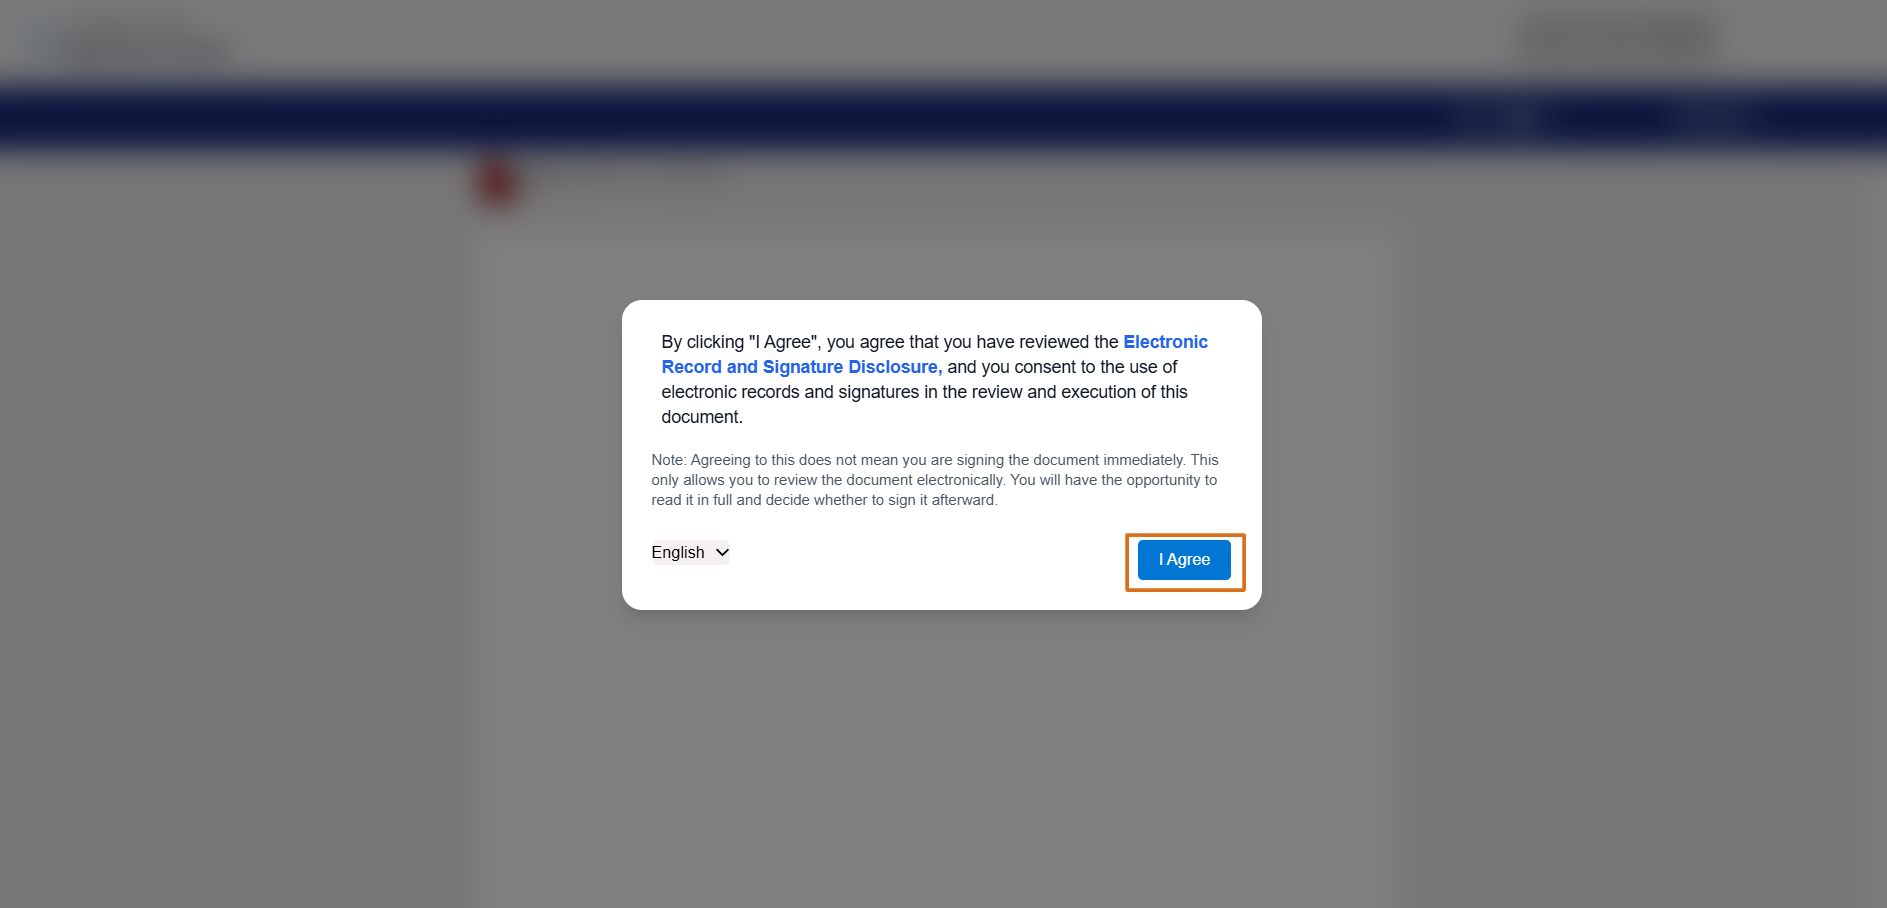
By clicking “I Agree”, you confirm that:
- You have read and understood the Electronic Record and Signature Disclosure.
- You consent to use electronic records and electronic signatures.
- You agree that your electronic signature is legally valid and binding.
- You understand that you may review the document before signing.
Step 10: Fill in the required details in tags to complete the eSigning process.
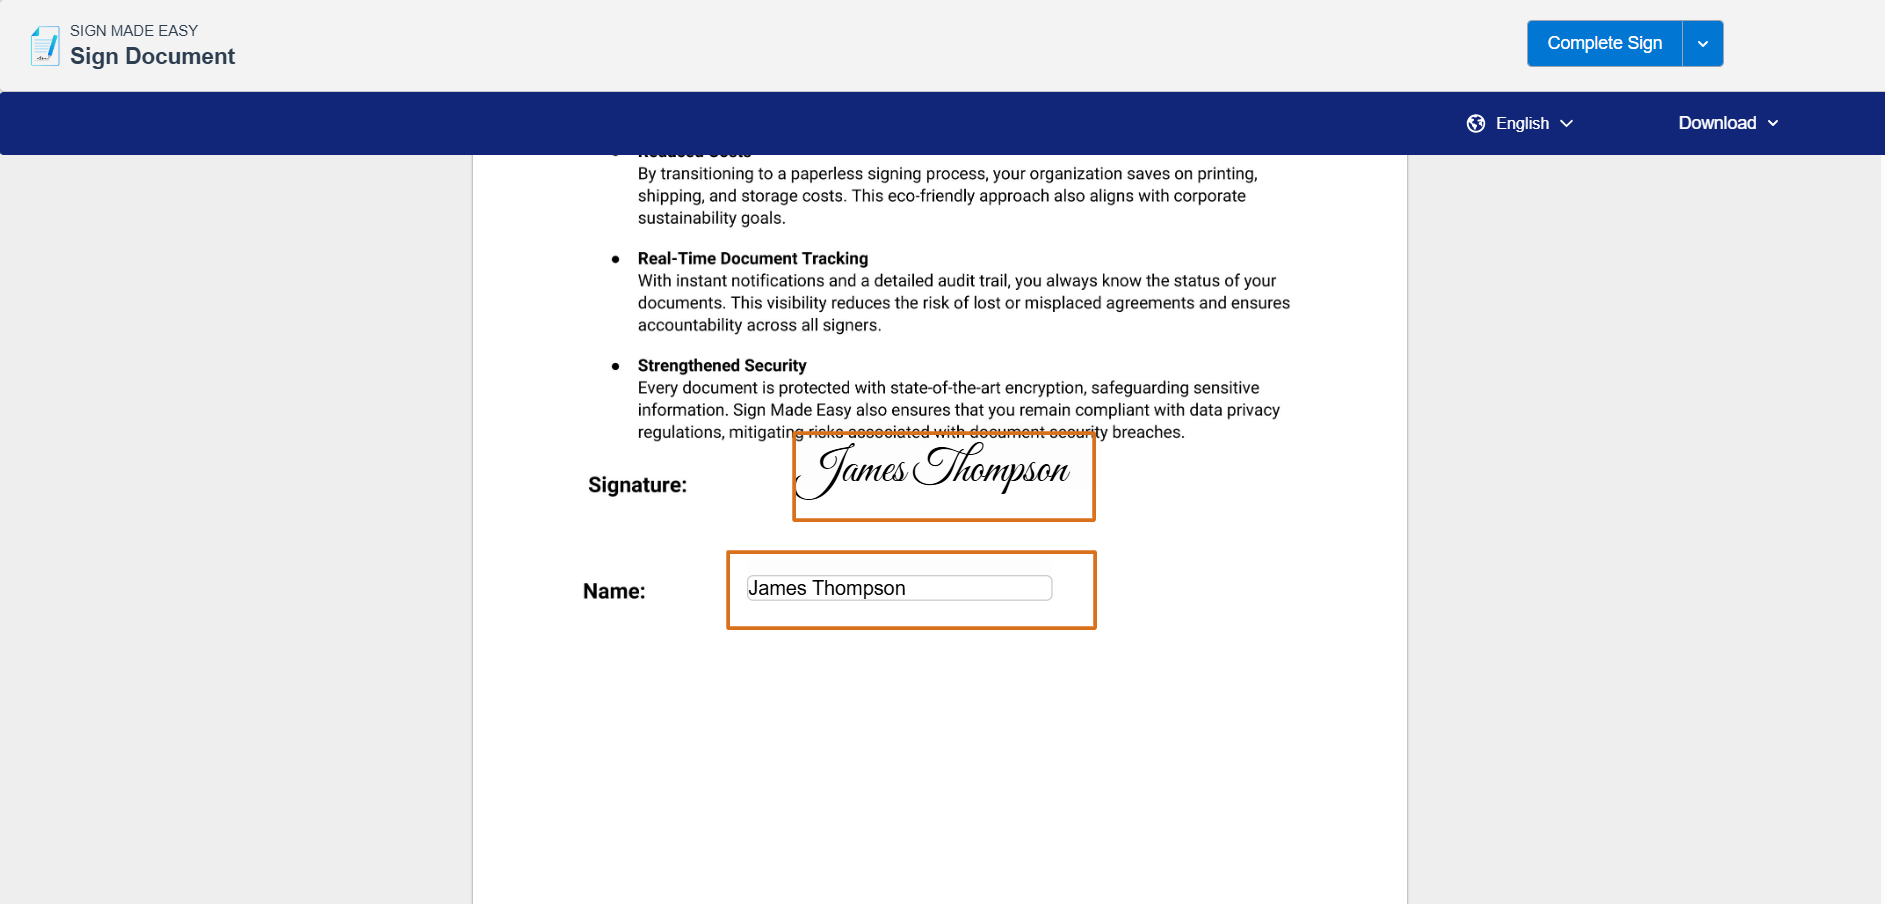
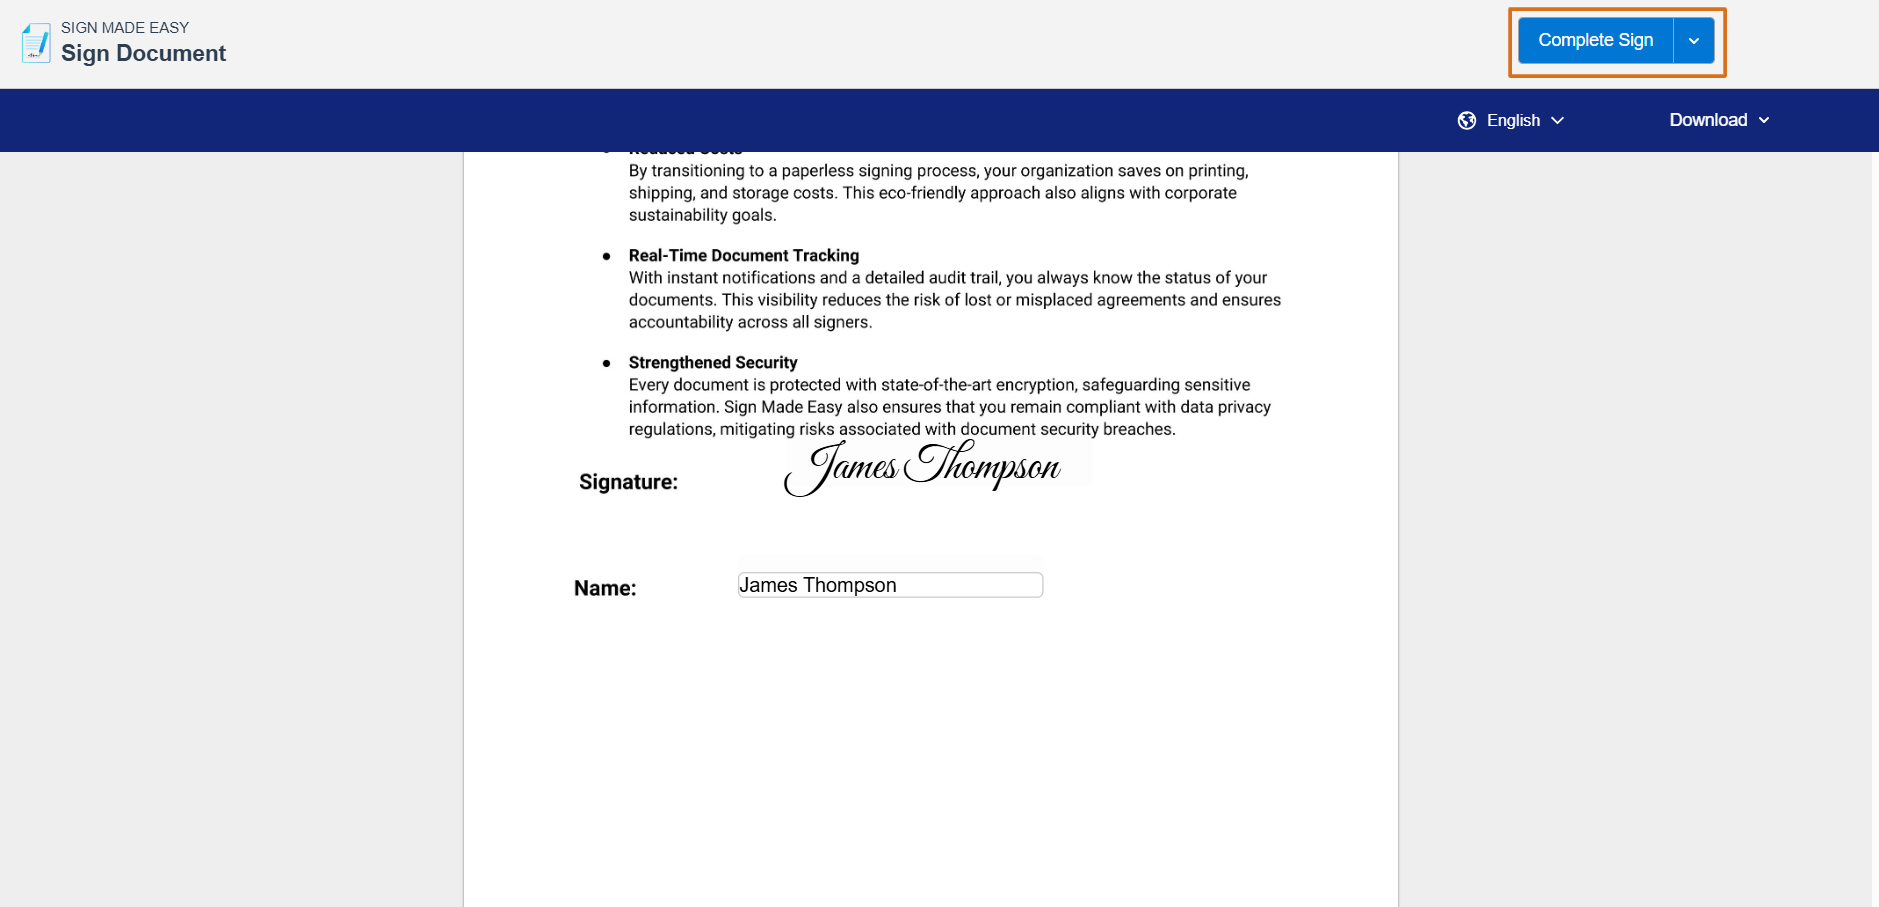
Step 11: Click on the Complete Sign button to sign the document and complete the transaction.
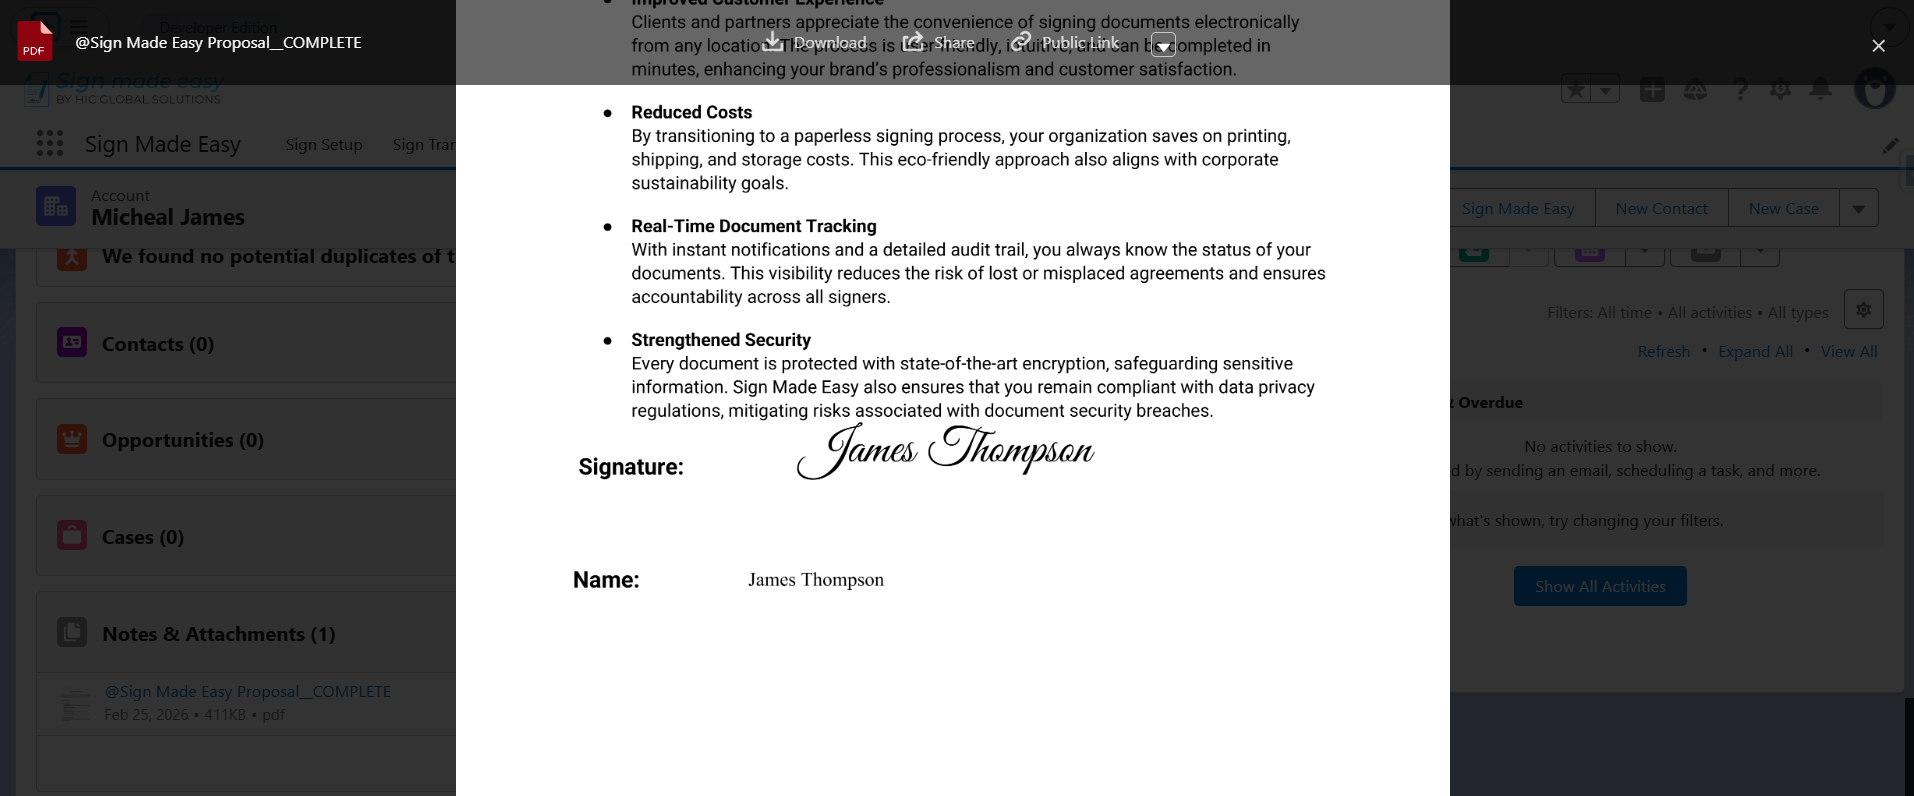
Step 12: The signed document will be saved on the parent object record from which the transaction was sent.

Saving only signed documents in Salesforce without retaining the original file is a smart approach to maintaining a clean, efficient, and compliant CRM system. By configuring your eSignature solution for Salesforce correctly, you ensure that only finalized, legally binding documents are stored against the relevant records, reducing redundancy and improving data organization.
This approach not only enhances document management but also aligns your signing workflow with Salesforce automation and best practices.
As businesses continue to optimize their digital processes, adopting streamlined eSignature configurations like this ensures better performance, improved compliance, and a more scalable Salesforce ecosystem.