






Businesses store important documents directly in Salesforce records, such as opportunities, accounts, or custom objects. When these documents need approval or a signature, downloading them and uploading them again can add unnecessary steps to the process.
With Sign Made Easy, users can Send Documents for E-Signature directly from a related Salesforce record without downloading and uploading the files again. This makes Salesforce eSignature easier to manage because users can work with documents already available in their CRM.
In this blog, we will walk through how to configure a Sign Template to retrieve the latest document from a Salesforce record and send it to a recipient for eSignature.
How to Send Documents for eSignature Directly from a Salesforce Record
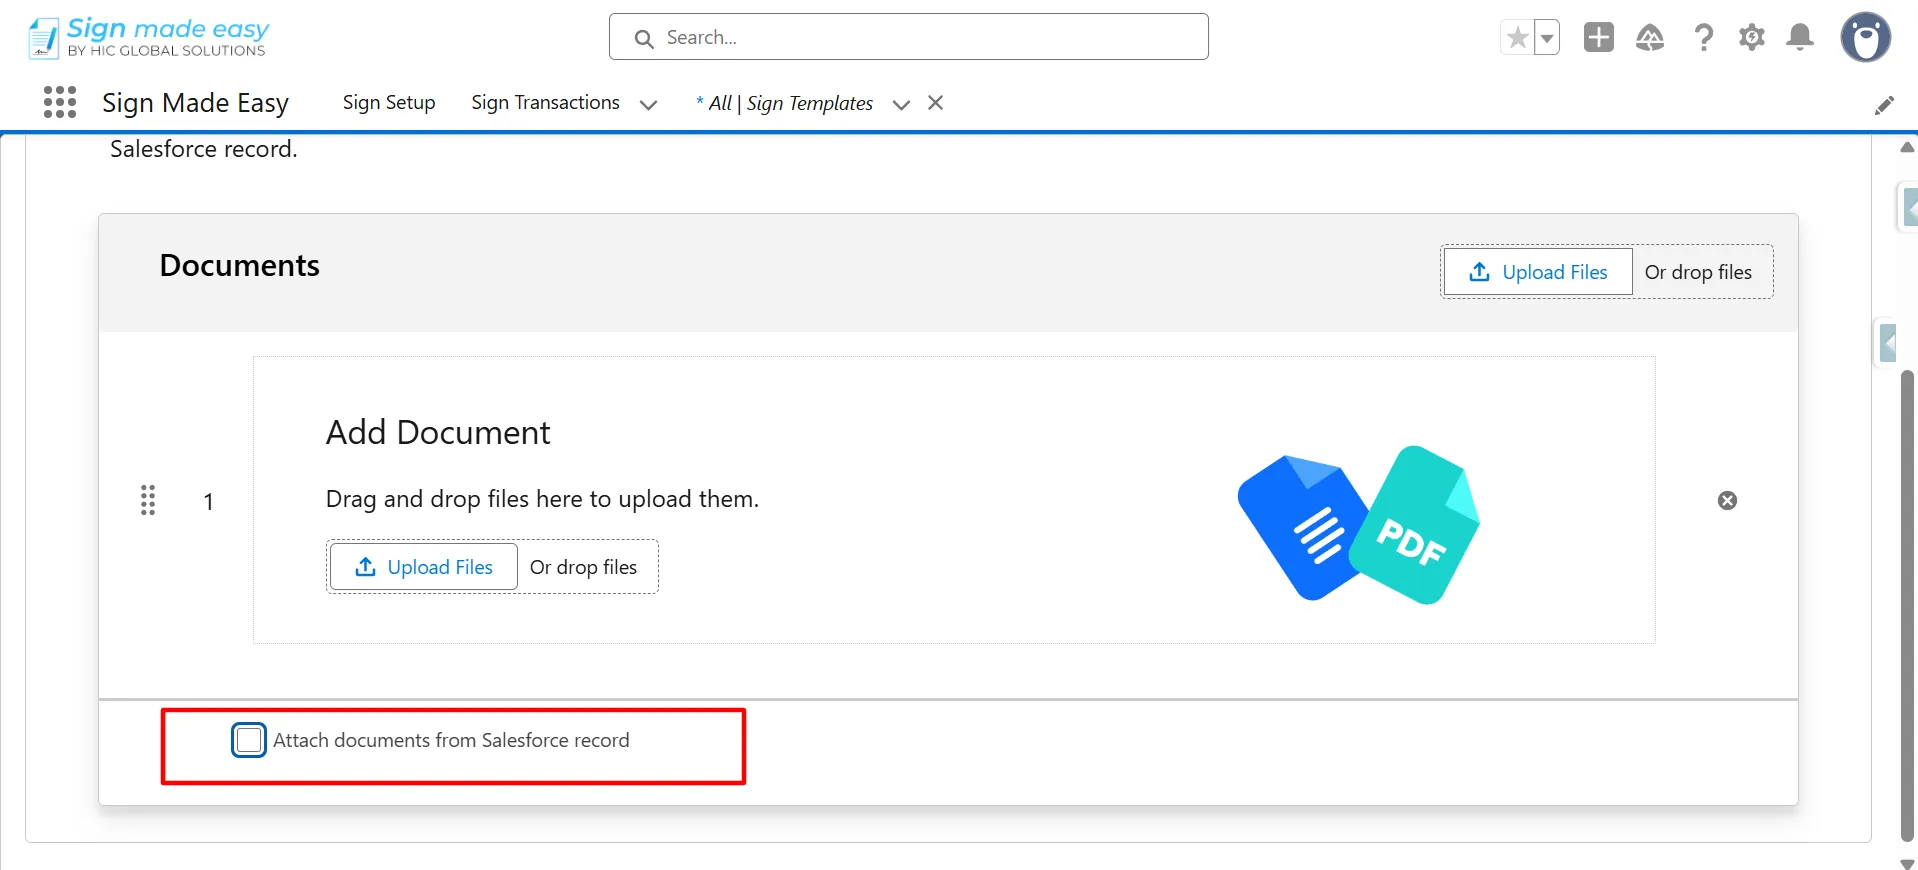
Note: Sign Made Easy provides an option called Attach Documents from Salesforce Record. It allows users to retrieve documents stored in the parent object record where the Sign Template is created, such as an Opportunity, Account, or custom object.
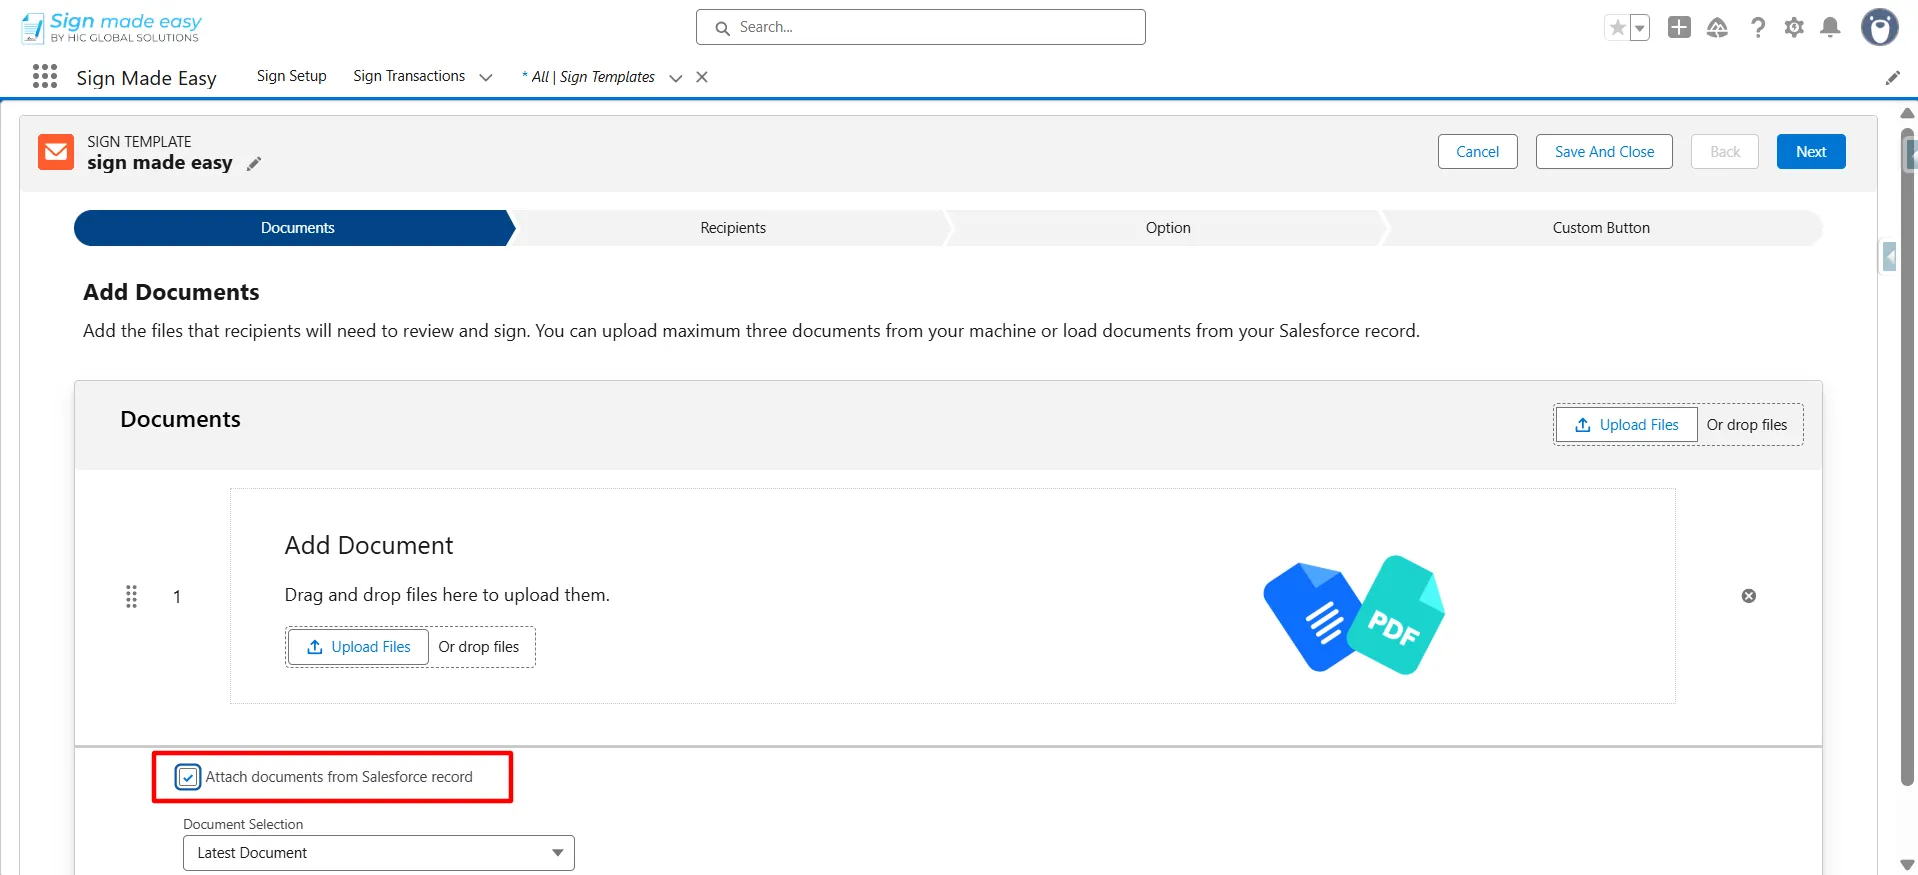
When configuring this option, users can choose how the document should be selected:
- Latest Document: Automatically attaches the most recently uploaded or updated document from the related Salesforce record.
- File Name Contains: Retrieves documents based on a specific keyword or partial file name.
- All Documents: Attaches all documents available in the related parent record.
For this walkthrough, we will select Latest Document so the Sign Template can automatically retrieve the most recently uploaded document.
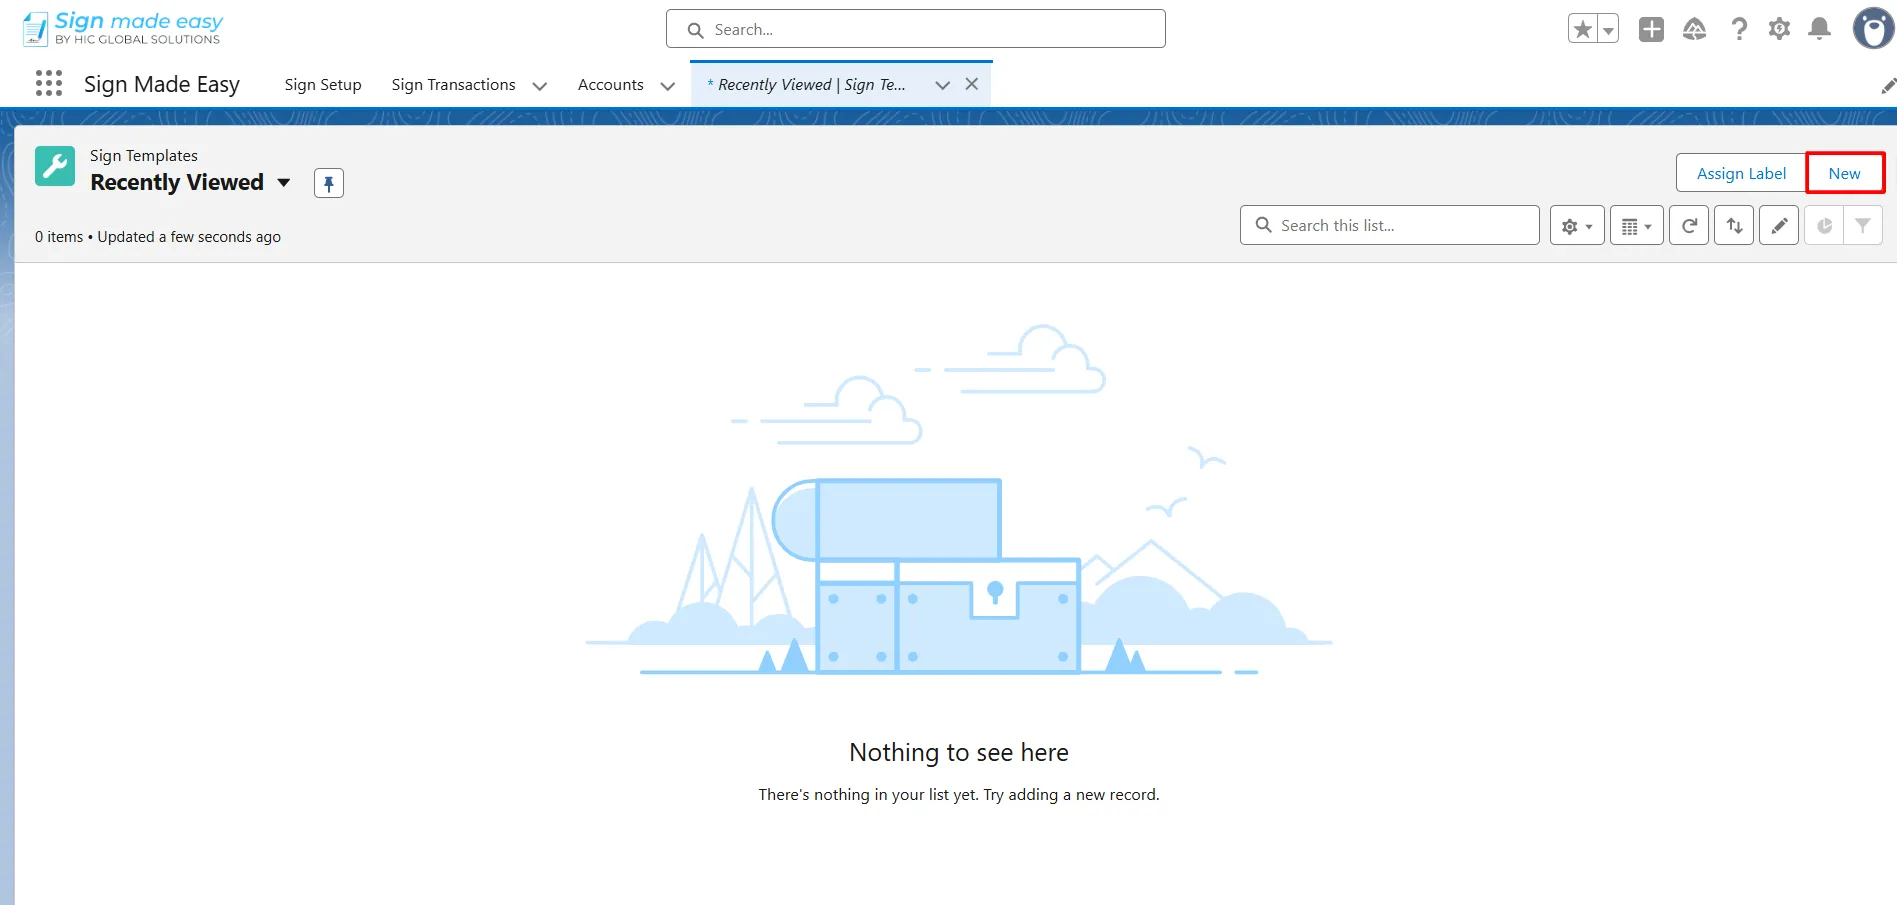
Step 1: Open Sign Templates
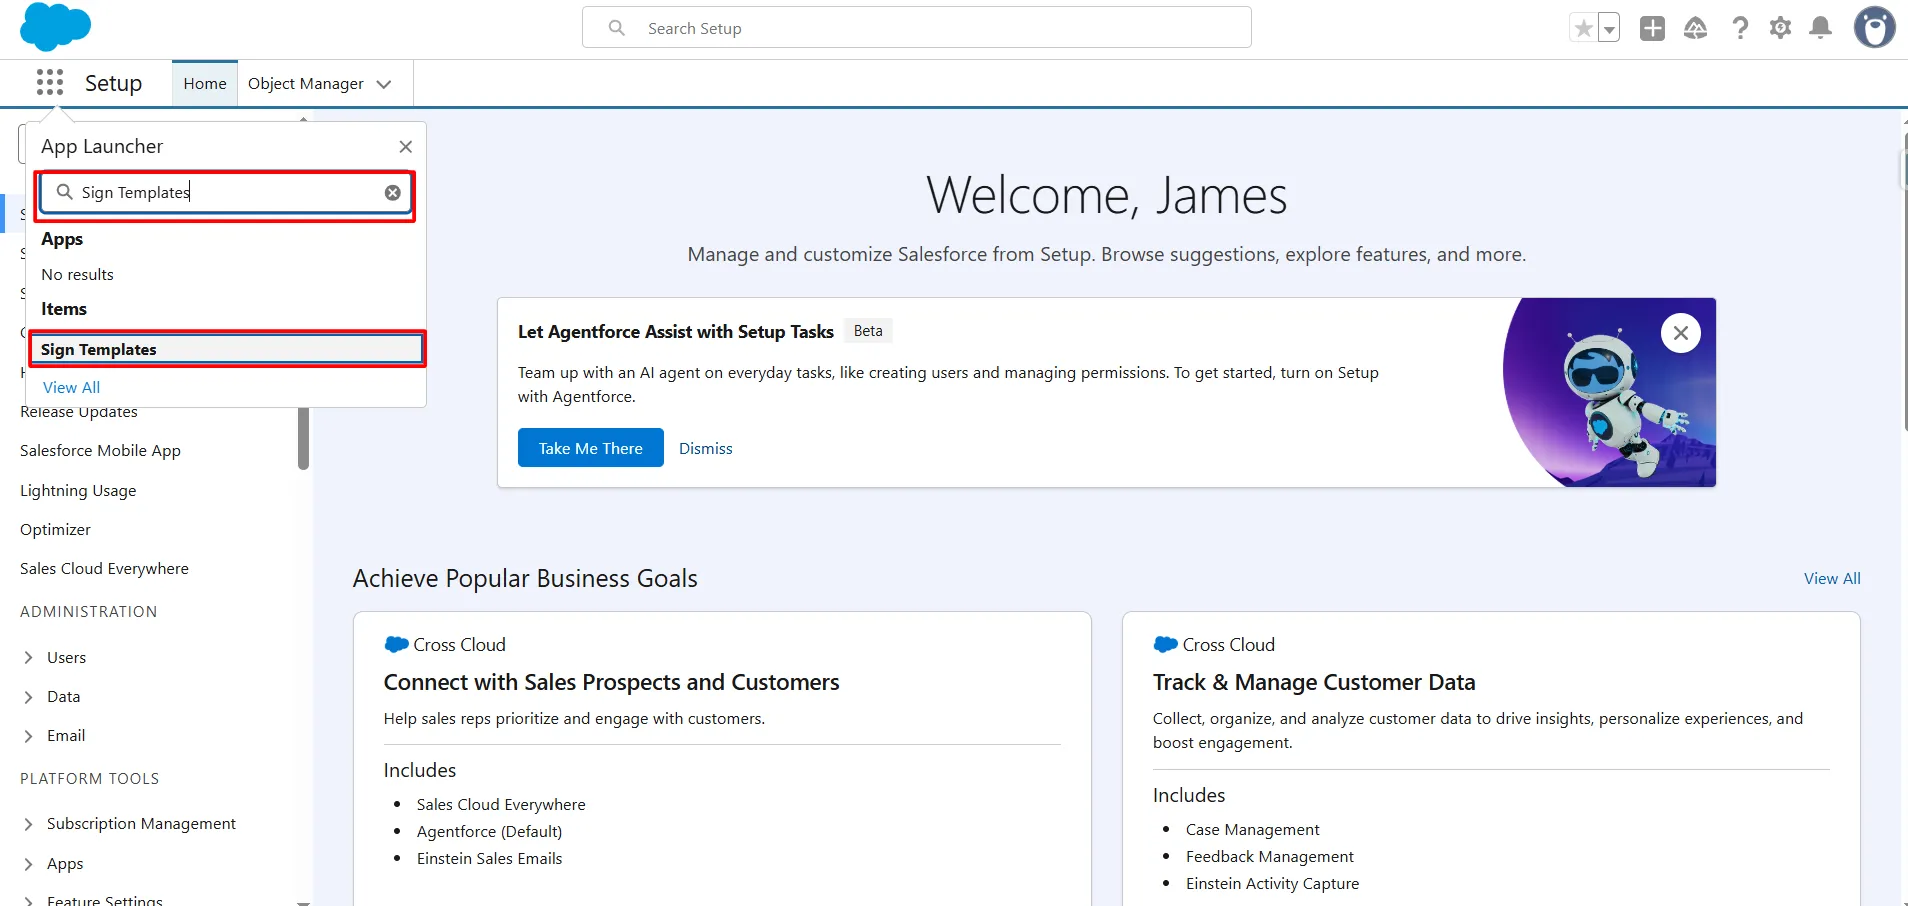
- Navigate to the App Launcher in Salesforce.
- Enter Sign Templates in the search bar.
- Click Sign Templates to open the application.
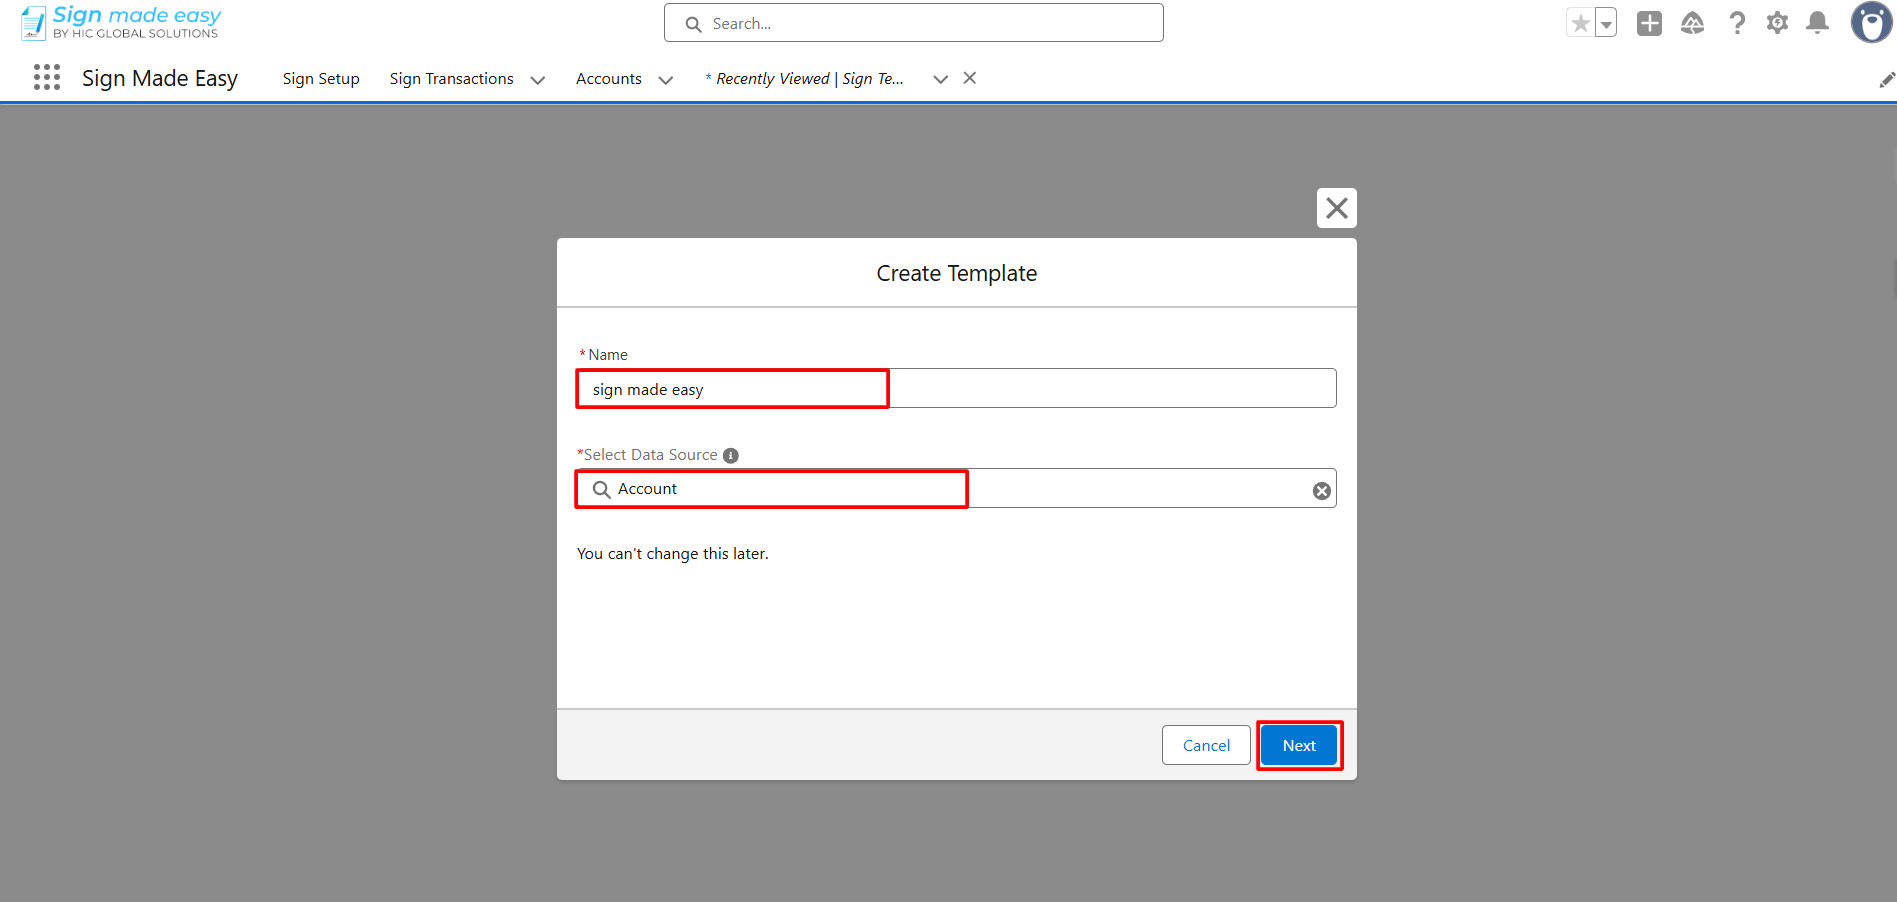
- Open the Sign Template you want to configure or create a new one.
- Select Attach Documents from Salesforce Record as the document source.
Step 2: Select the document source
- Choose Latest Document from the available options.
This setting ensures that the template retrieves the latest document stored in the related parent record instead of requiring users to select and upload it again.
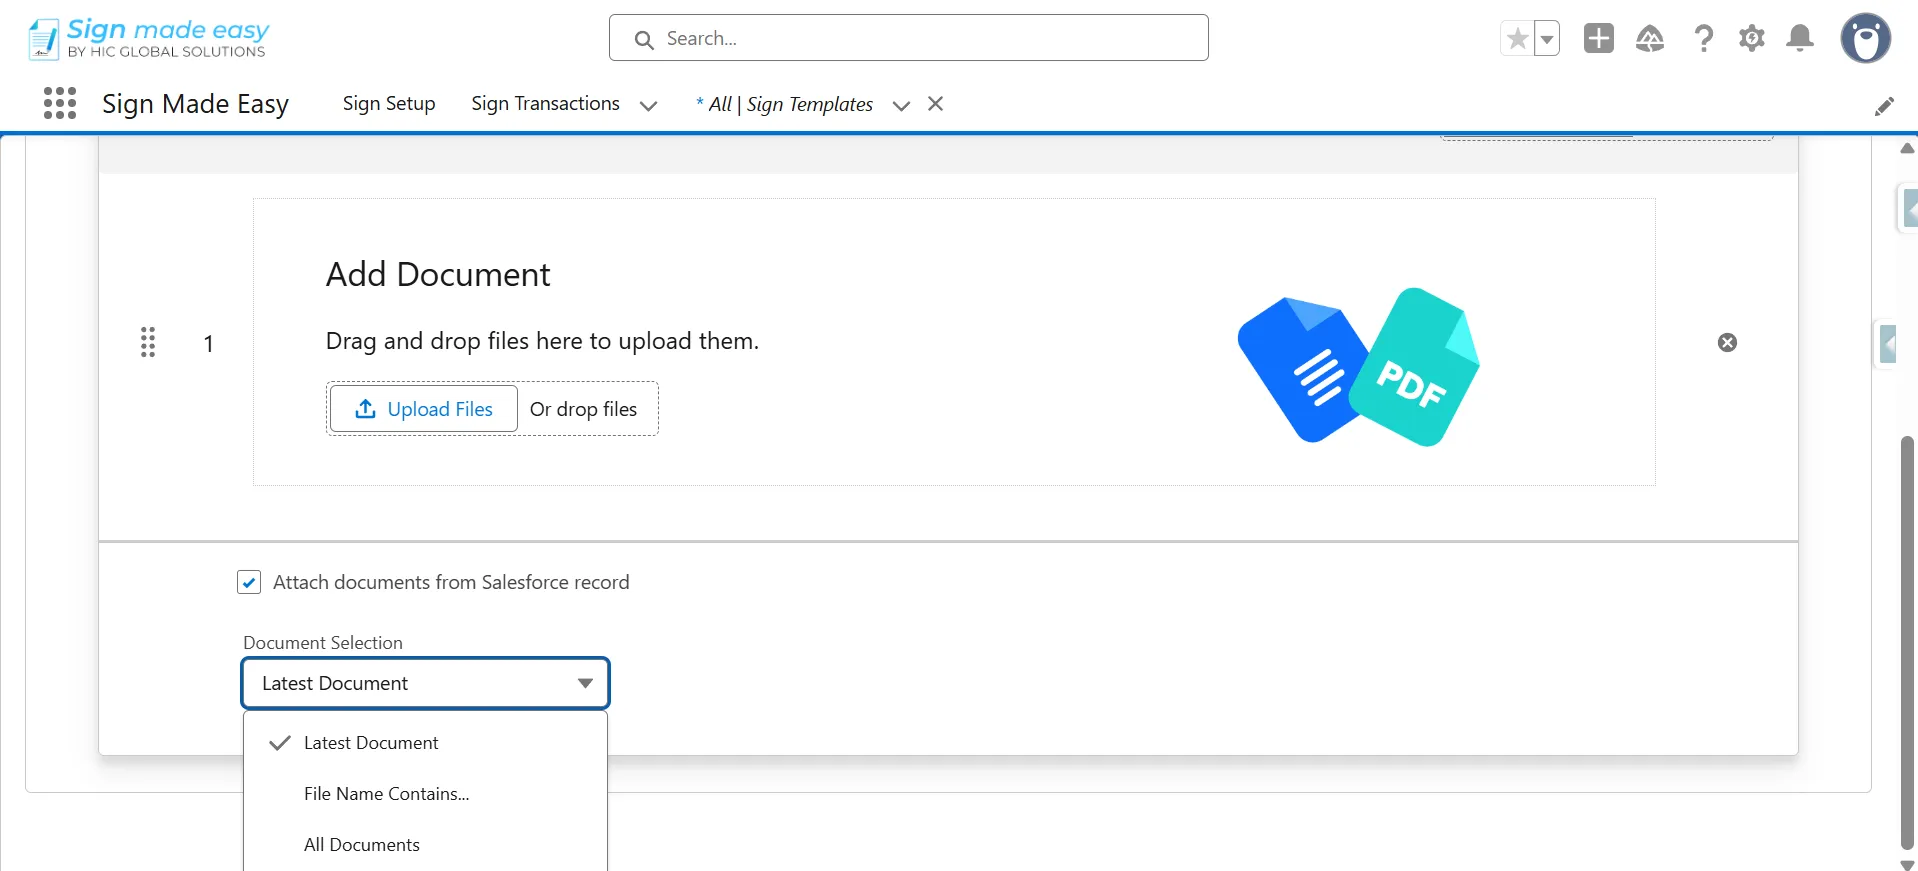
Step 3: Proceed to the next configuration
- After selecting Latest Document, click Next to continue with the Sign Template setup.
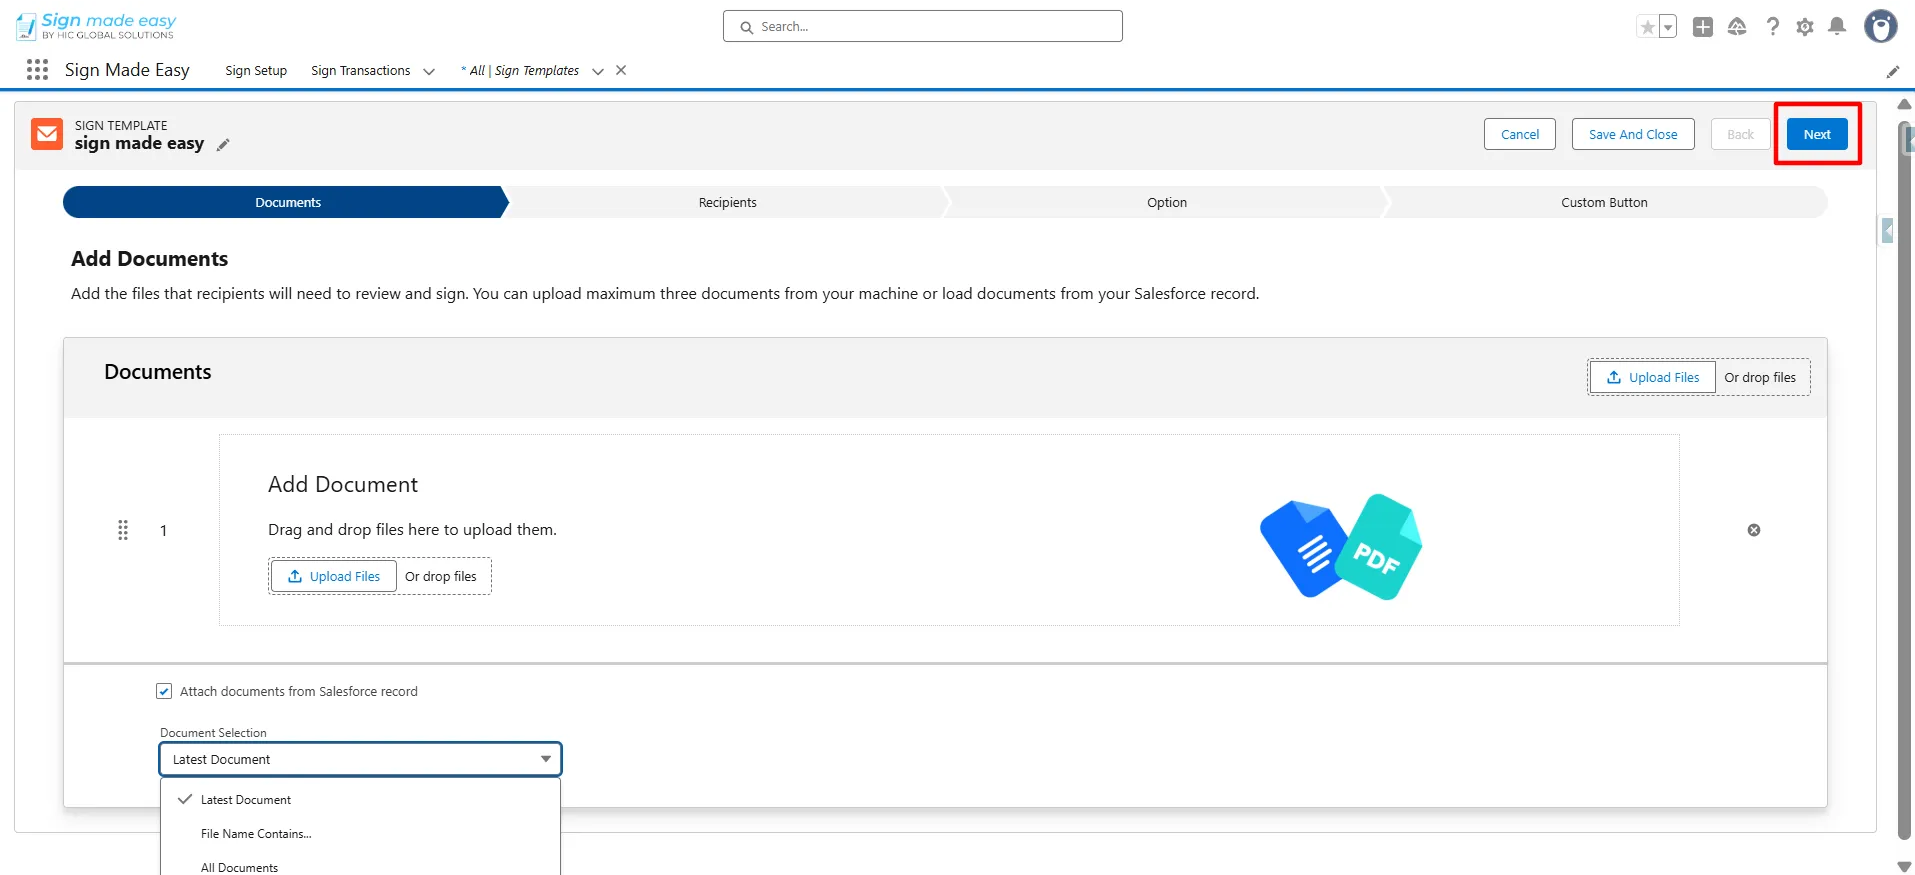
Step 4: Add a recipient
- Click the Add Recipient button.
- Select or configure the recipient who will receive the document for signing.
- Verify the recipient details before proceeding.
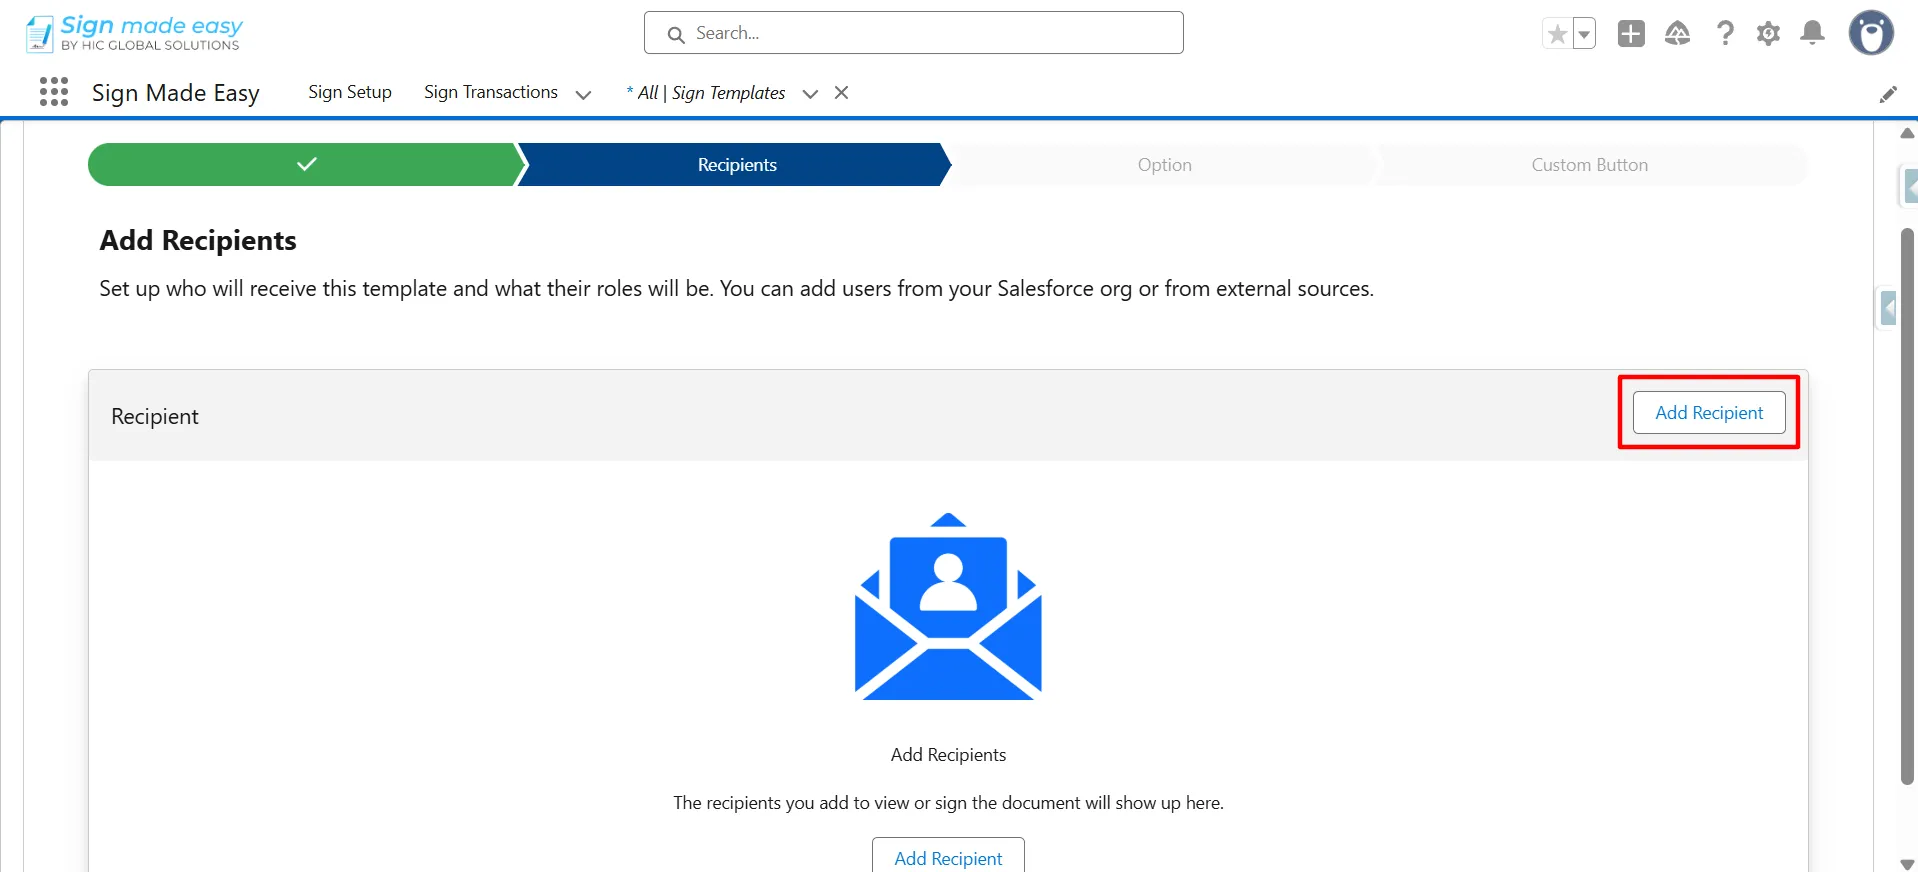
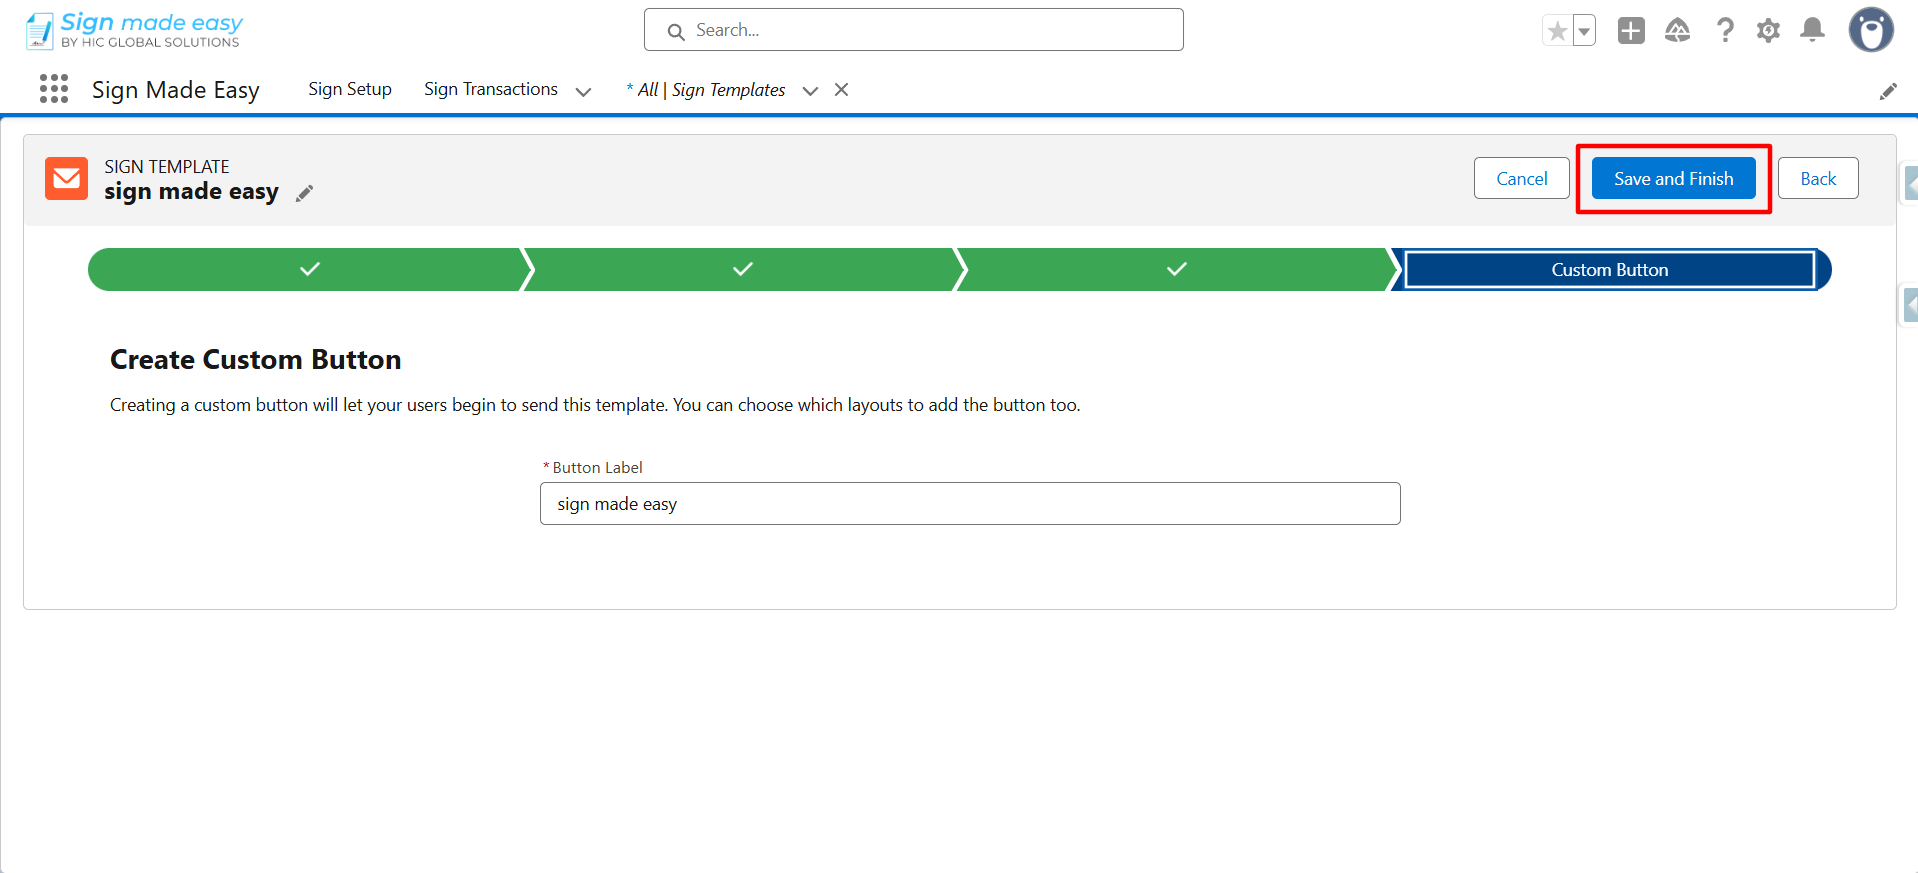
Step 5: Select the custom button option
- Once the recipient is selected, click the Custom Button option.
- The Sign Template name is automatically populated in the Button Label field.
- Review the button label and proceed with the configuration.
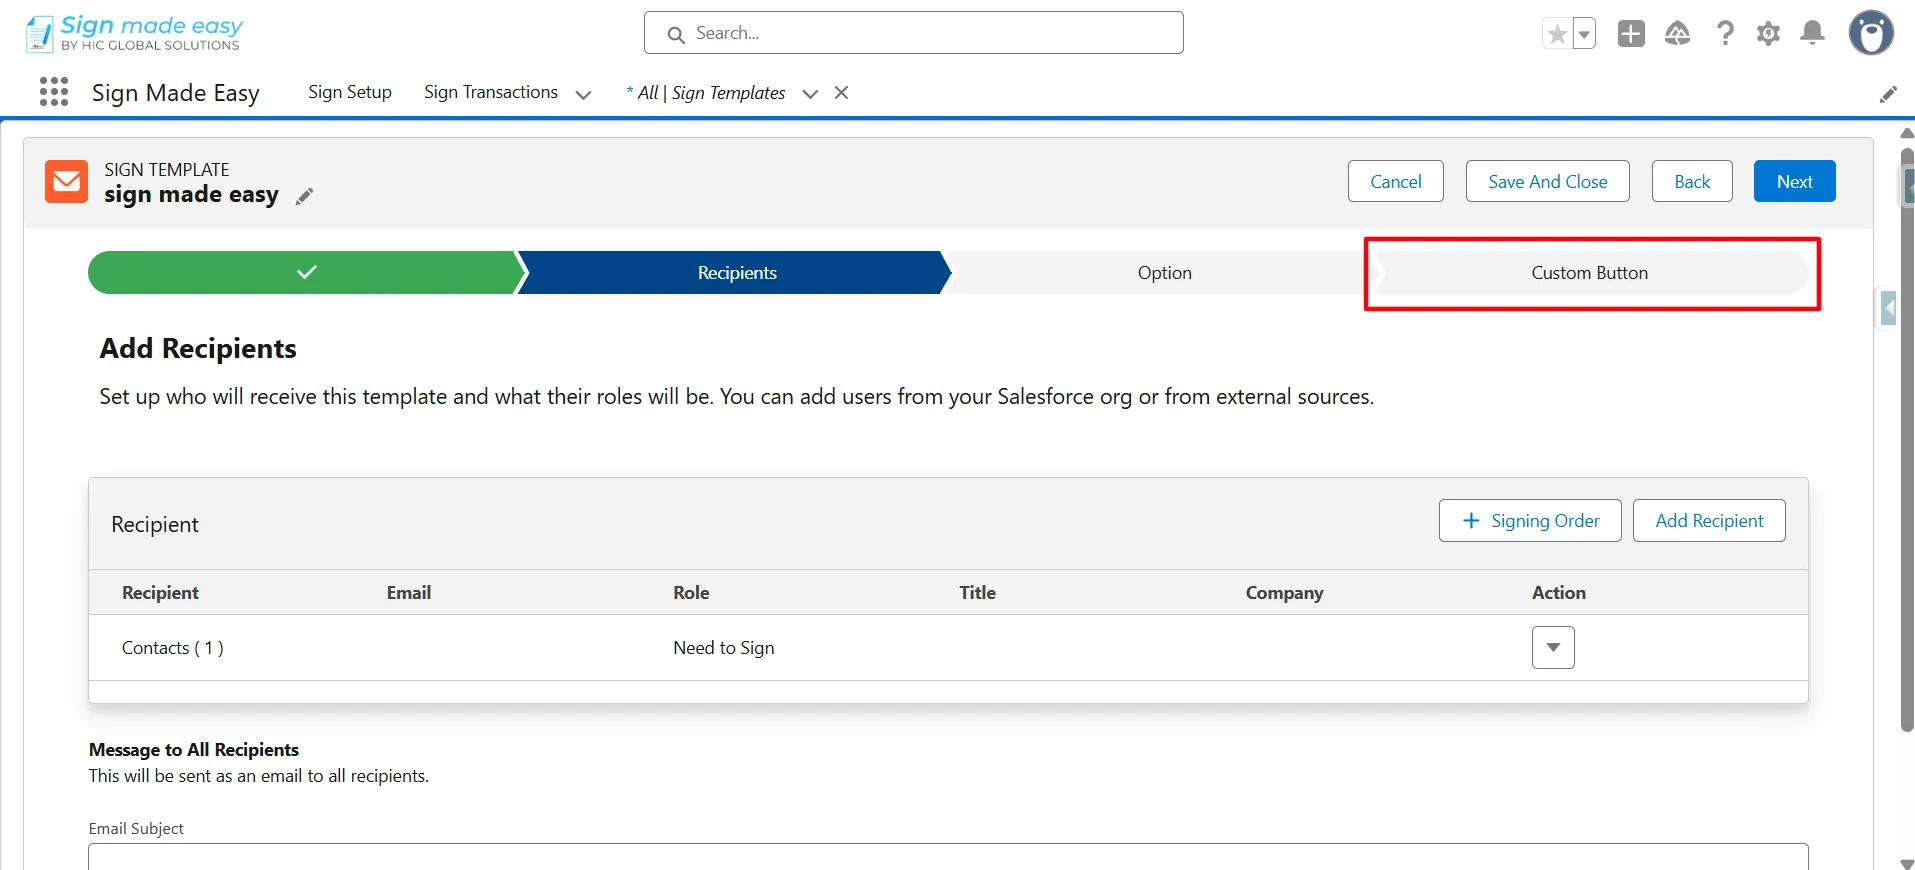
Step 6: Save and finish the Sign Template
- Click Save and Finish to complete the Sign Template configuration.
The custom button will allow users to initiate the signing process directly from the Salesforce record.
Step 7: Add the button to the page layout
- Open the page layout of the object on which the Sign Template was created.
- Add the newly created Sign Template button to the appropriate page layout.
- Save the changes.
Once added, the button will be available on the corresponding Salesforce record page.
Step 8: Open the related Salesforce record
- Navigate to the record associated with the Sign Template, such as an Opportunity, Account, or custom object.
- Open the Related page.
- Locate the Notes & Attachments section.
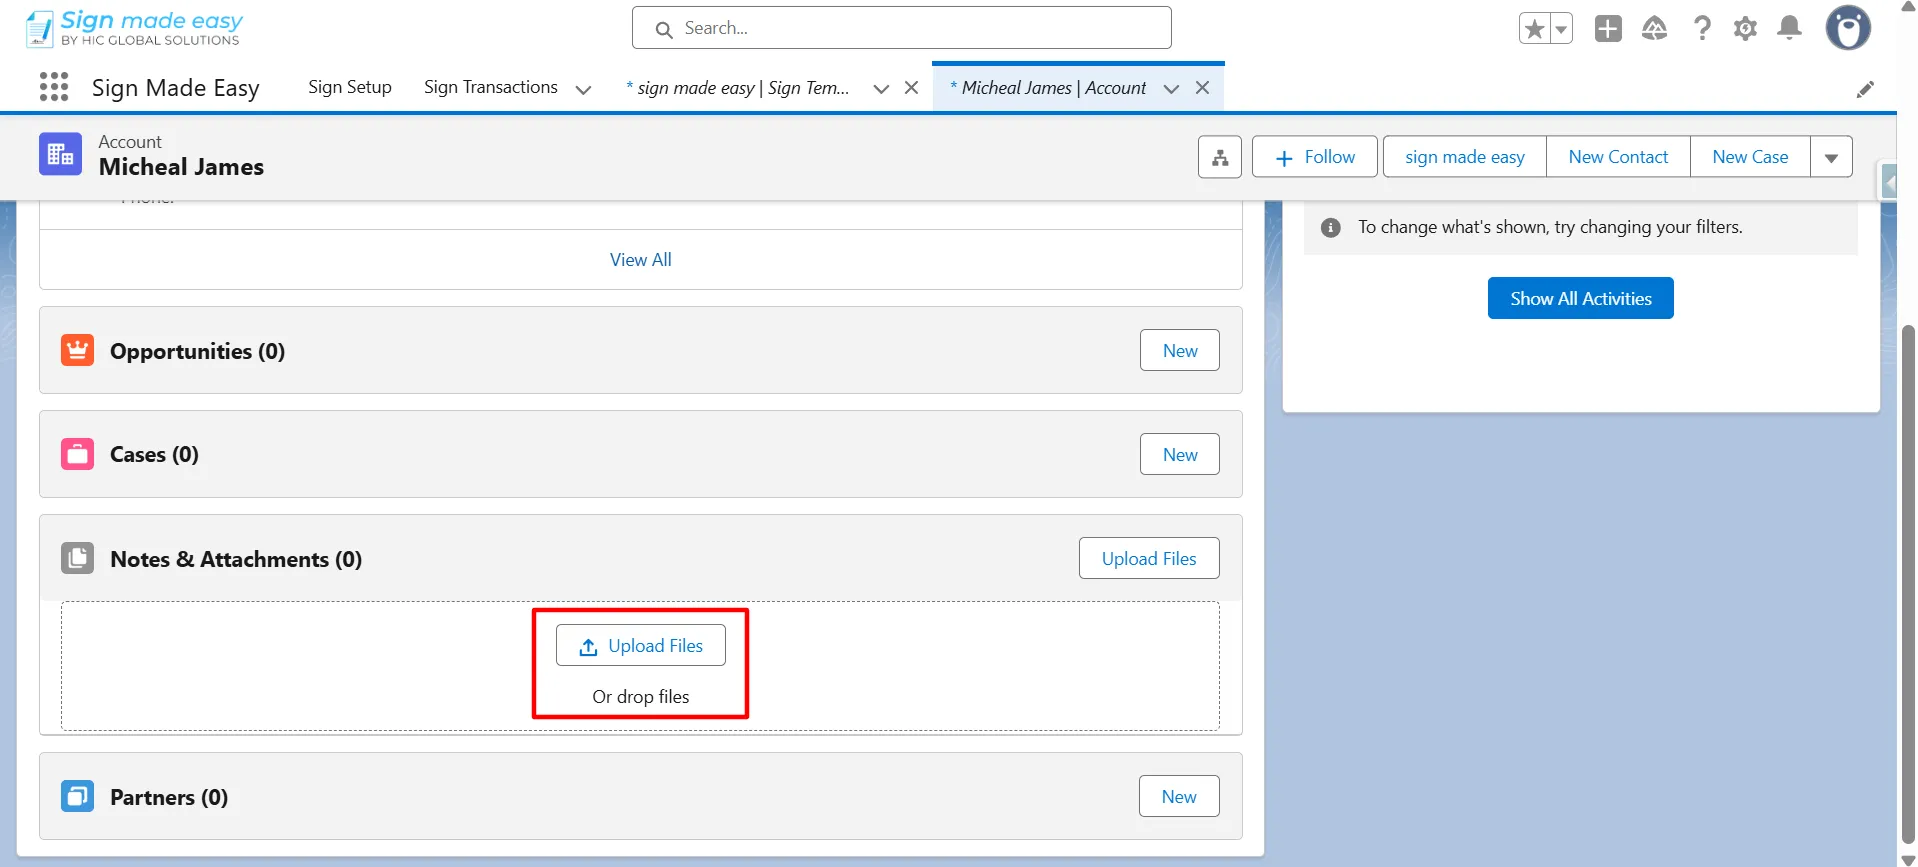
Step 9: Upload the document
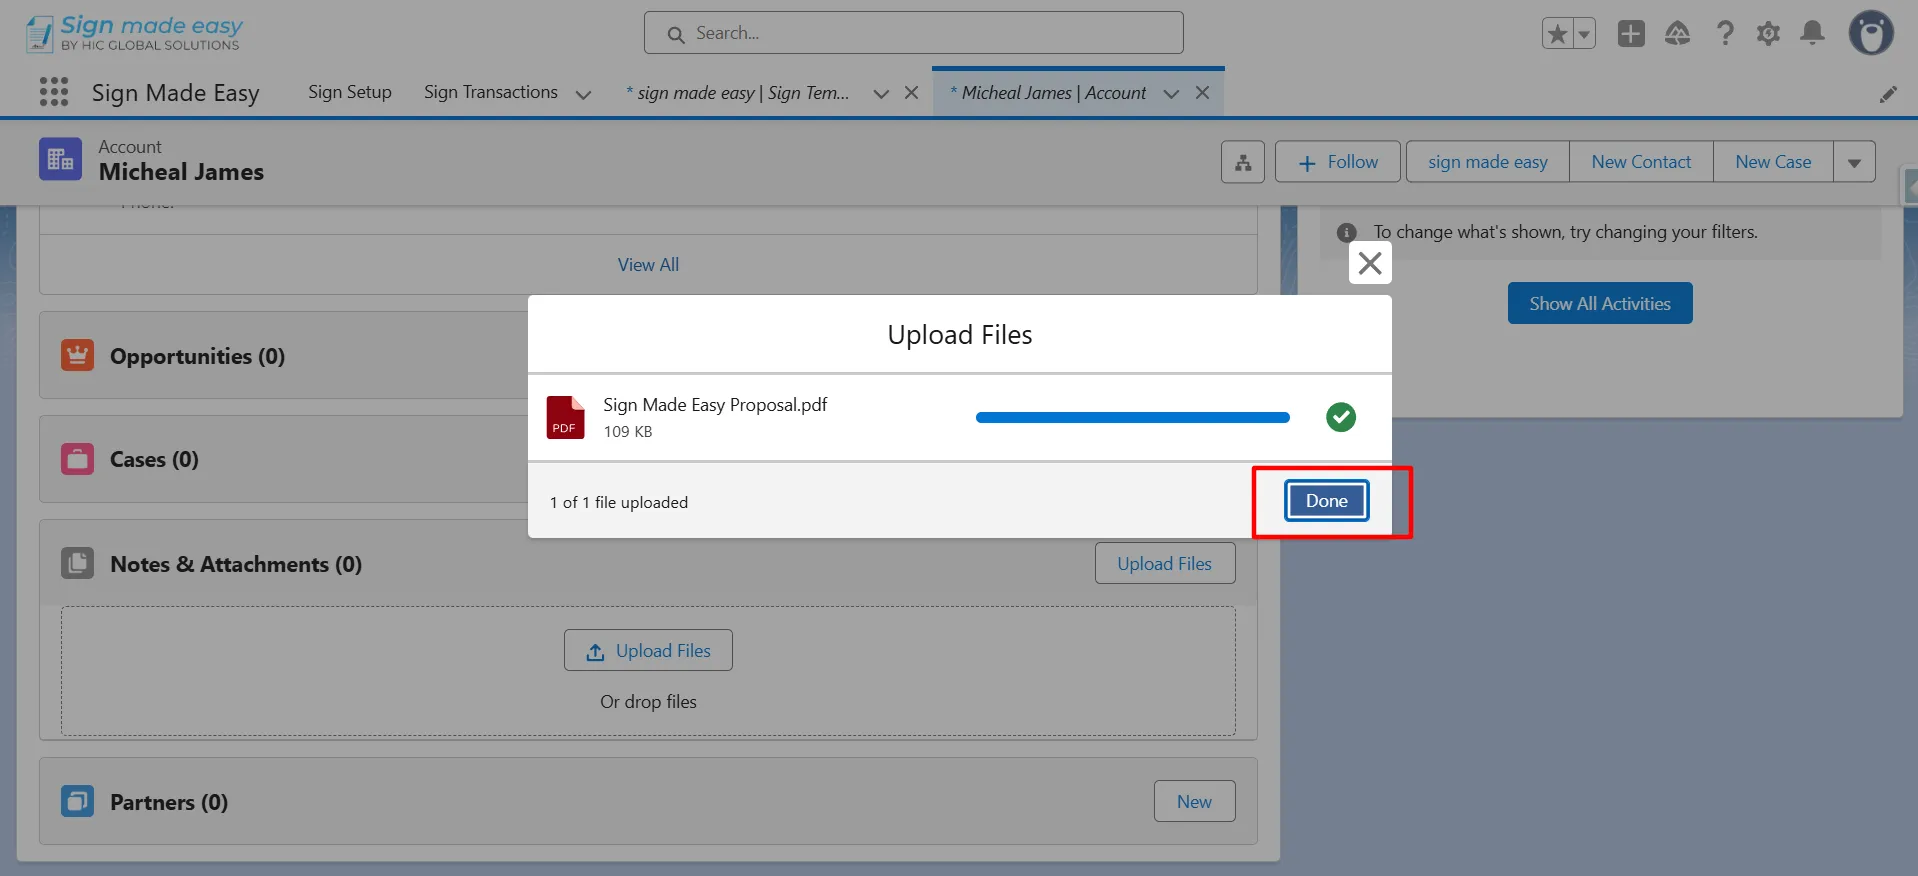
- Upload the document you want to send for signing to the Notes & Attachments section.
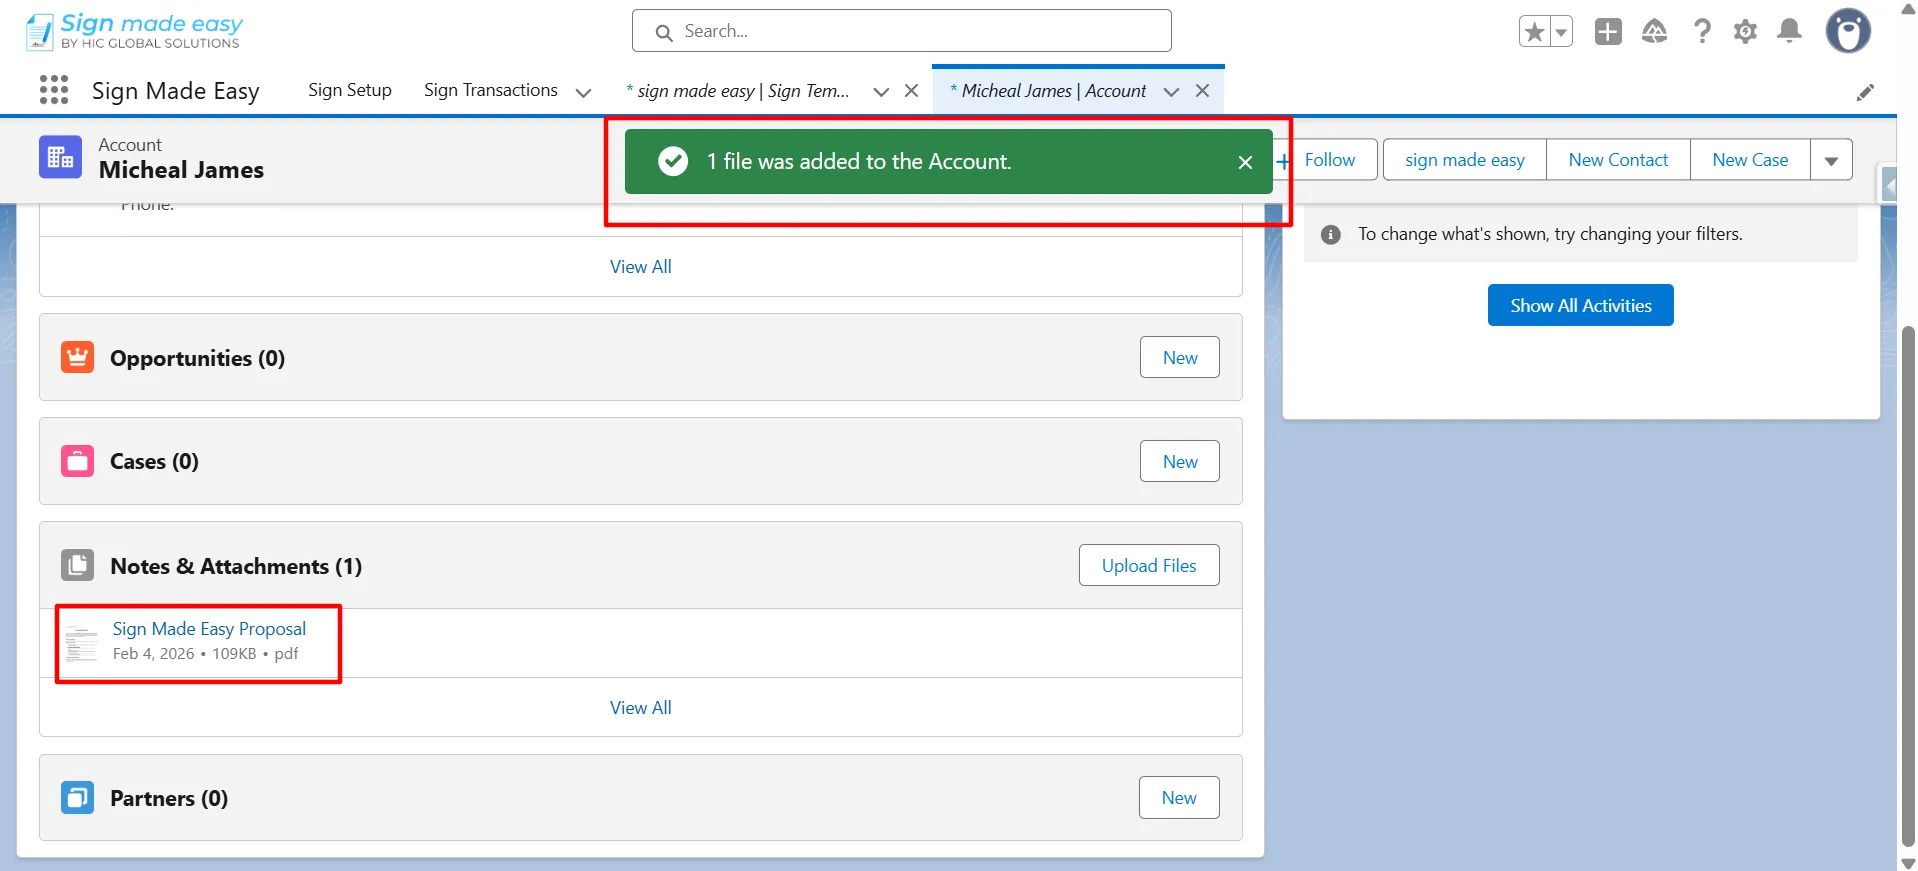
- Once the upload is complete, click Done.
The document is now available on the Salesforce record and can be retrieved through the configured Sign Template.
Step 10: Launch the Sign Template
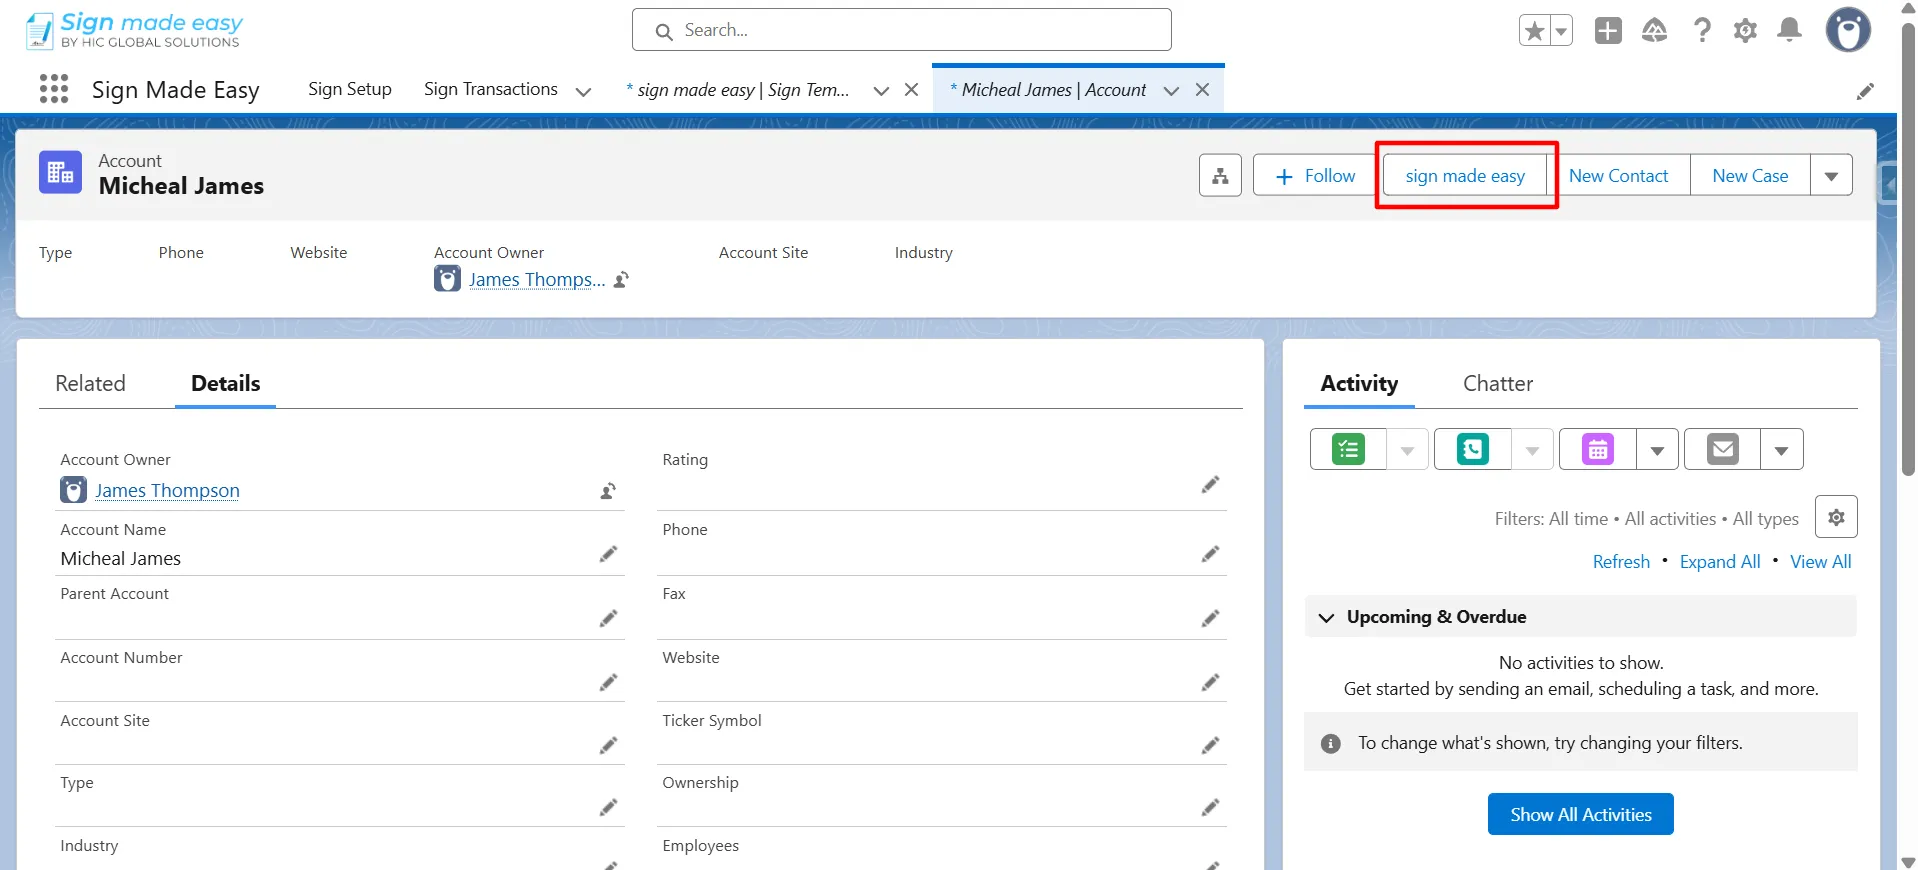
- Navigate to the record details page.
- Locate and click the Sign Template button you added to the page layout.
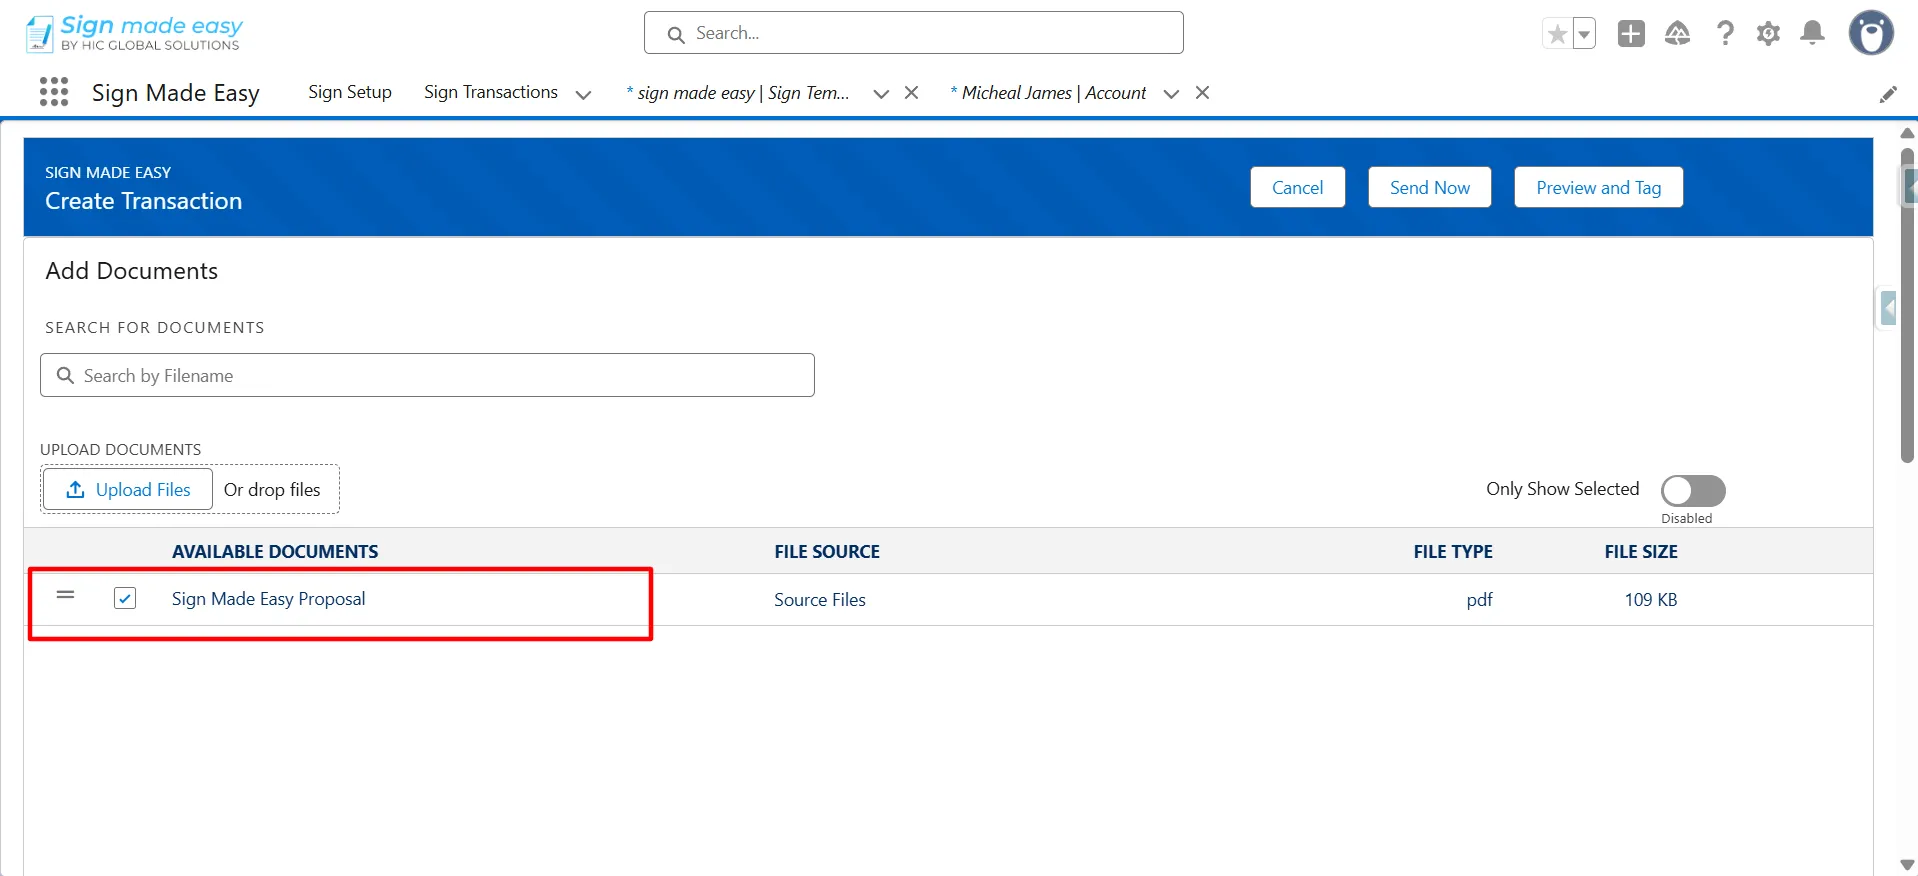
The Create Transaction interface opens, with the document retrieved from the source Salesforce record.
Step 11: Send the document for signing
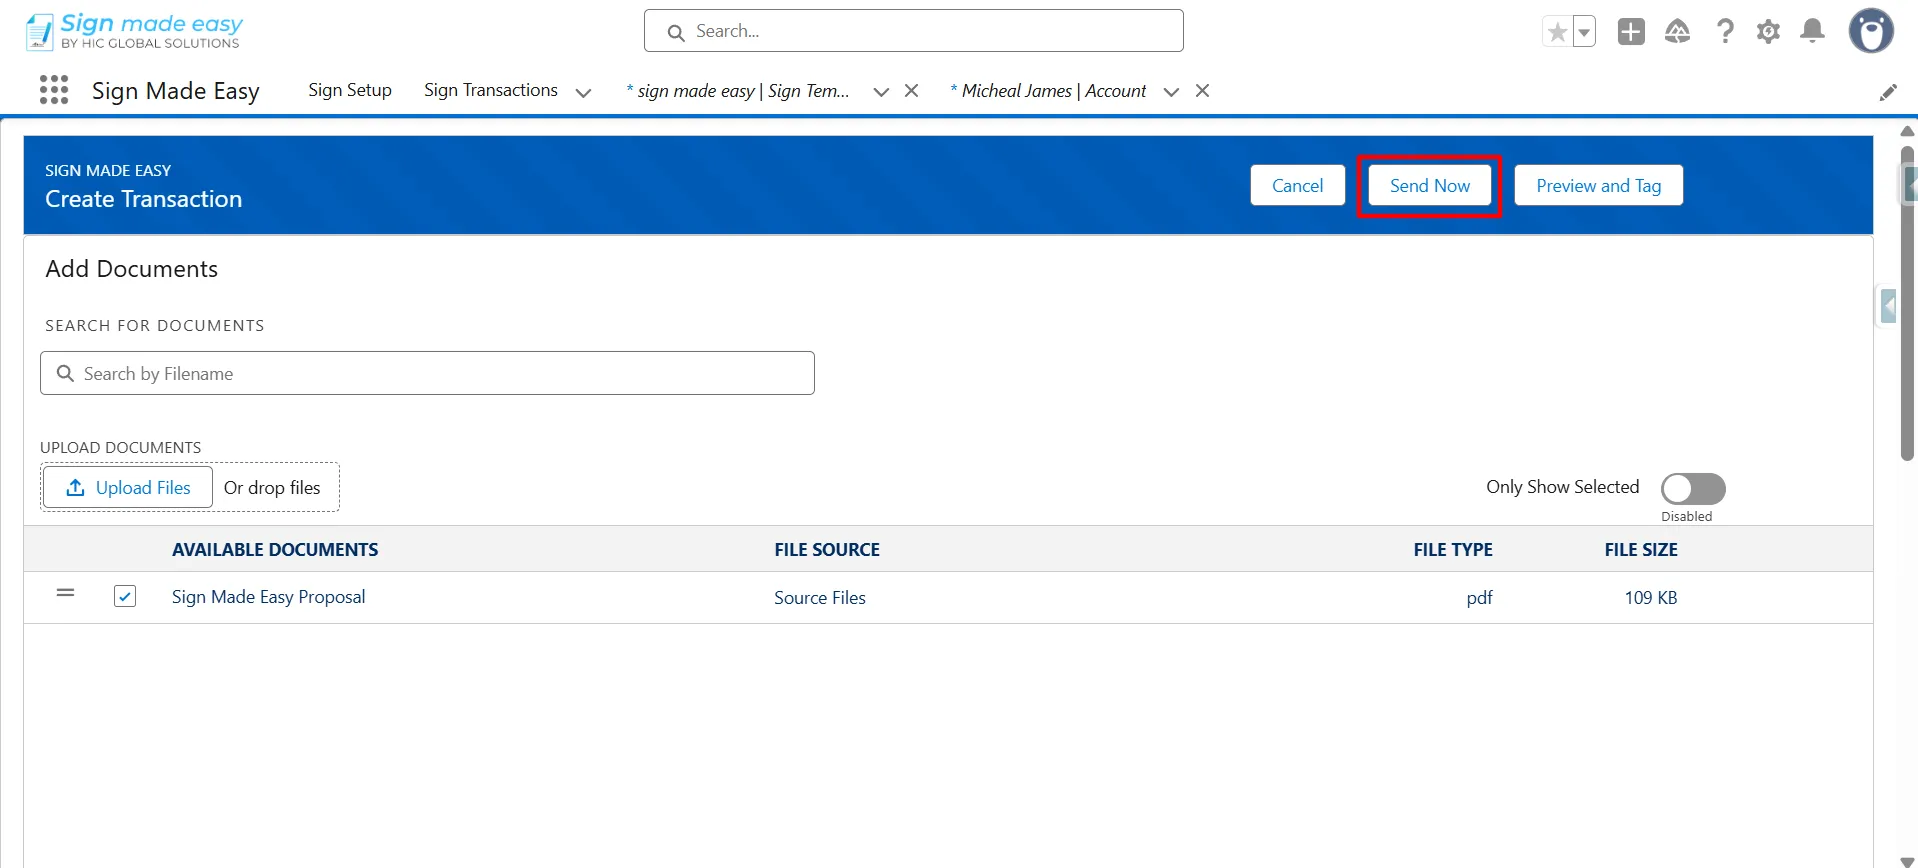
- Review the document and recipient details in the Create Transaction interface.
- Click Send Now to initiate the signing process.
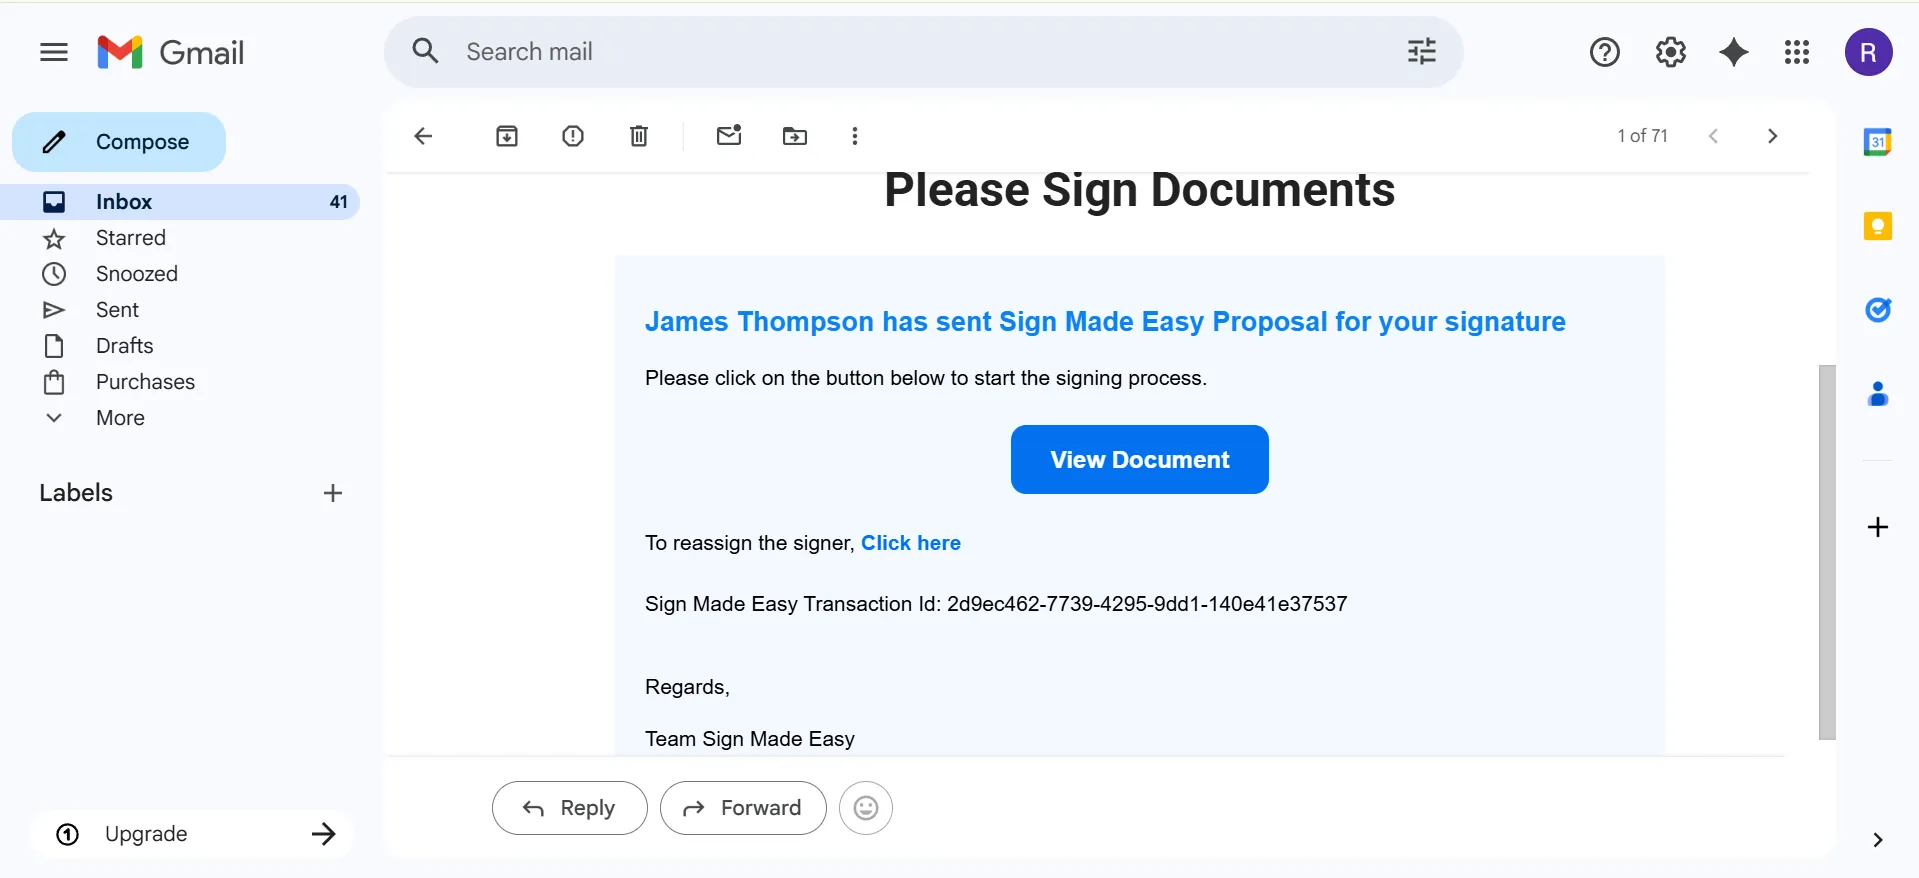
An email notification is sent to the recipient with the document, allowing them to review and sign it electronically.
Conclusion
Sending documents directly from Salesforce records makes the signing process easier to manage. Instead of repeatedly downloading and uploading files, users can retrieve the latest document through a configured Sign Template.
With Sign Made Easy, businesses can simplify Salesforce Document Signing, reduce repeated file handling, and send documents for eSignature while keeping the process connected to their Salesforce records.