







Managing follow-ups manually can slow down document approval workflows and increase the chances of missed signatures. With Sign Made Easy, you can simplify this process by automatically configuring transaction reminder dates directly through the button URL parameters in Salesforce.
This feature helps teams streamline eSignature workflows, improve response times, and ensure recipients receive timely reminders without manual intervention. Whether you want to define a fixed reminder duration or dynamically calculate reminder dates using Salesforce record fields, Sign Made Easy provides a flexible and efficient solution.
In this guide, you will learn how to auto-populate transaction reminder dates by updating your Sign Made Easy button configuration using the &transRemDays parameter.
To auto-populate transaction reminder details, you need to include the required reminder parameters in the Sign Made Easy button configuration. If the button already exists, simply update it by adding these parameters. If not, create a new Sign Made Easy button and configure it accordingly by following the steps below.
Let’s check out the step-by-step guide:
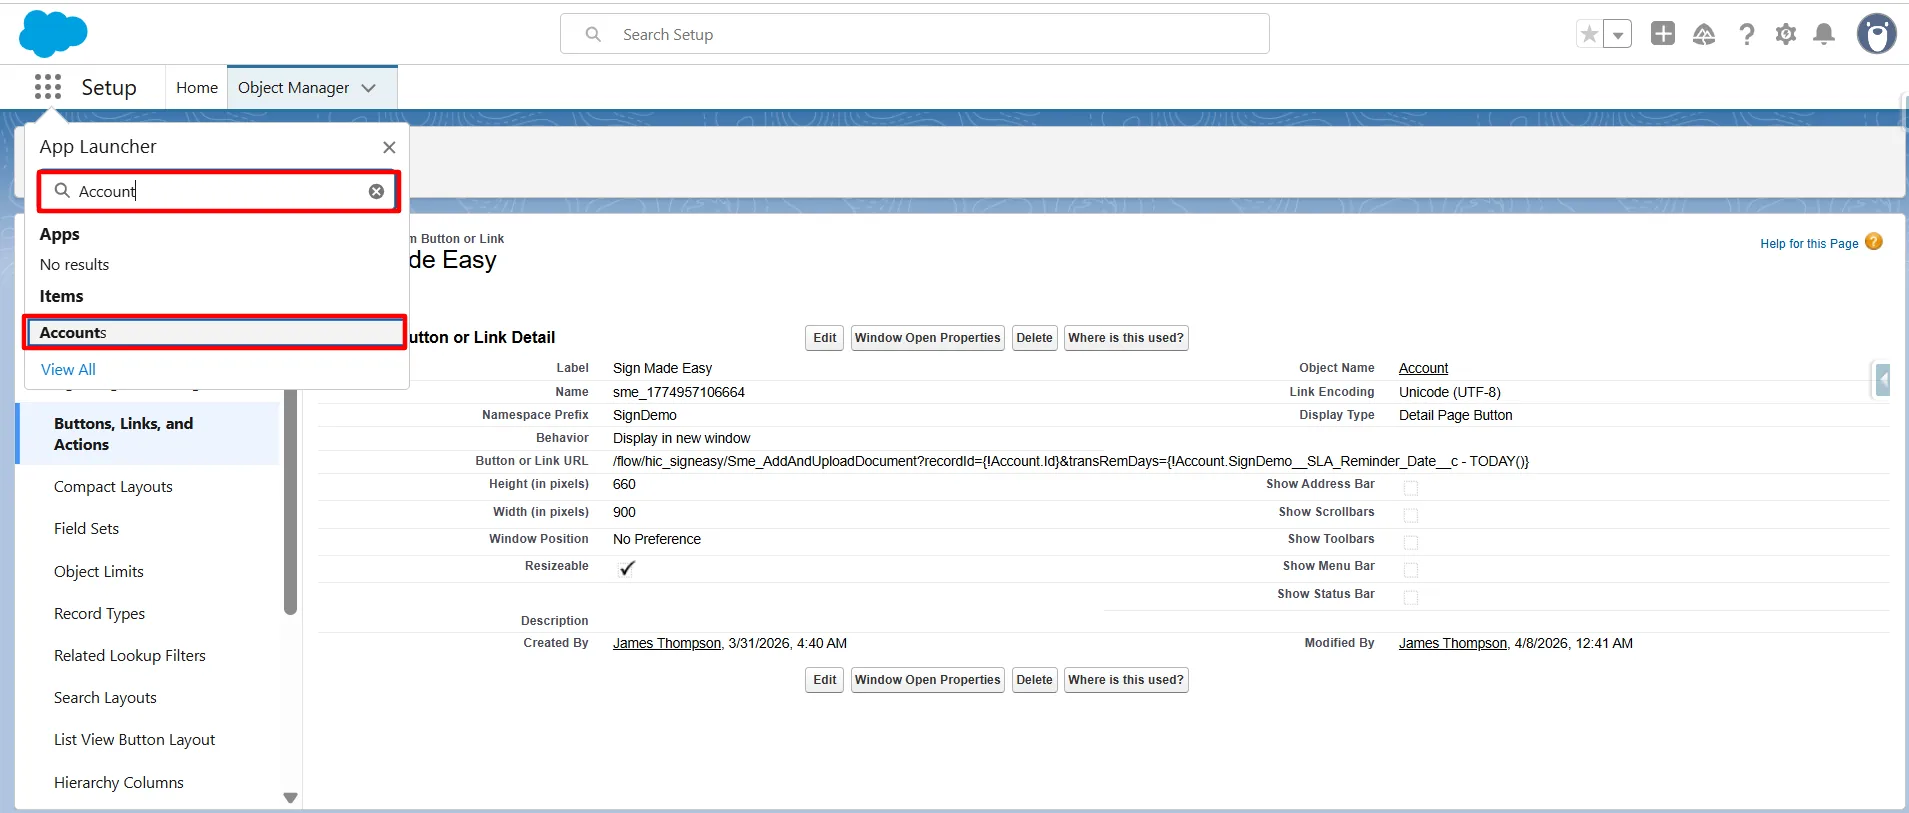
Step 1: Navigate to Setup, then access Object Manager. Search for the relevant object (like Account) where the Sign Made Easy button is configured and select it to open its settings.
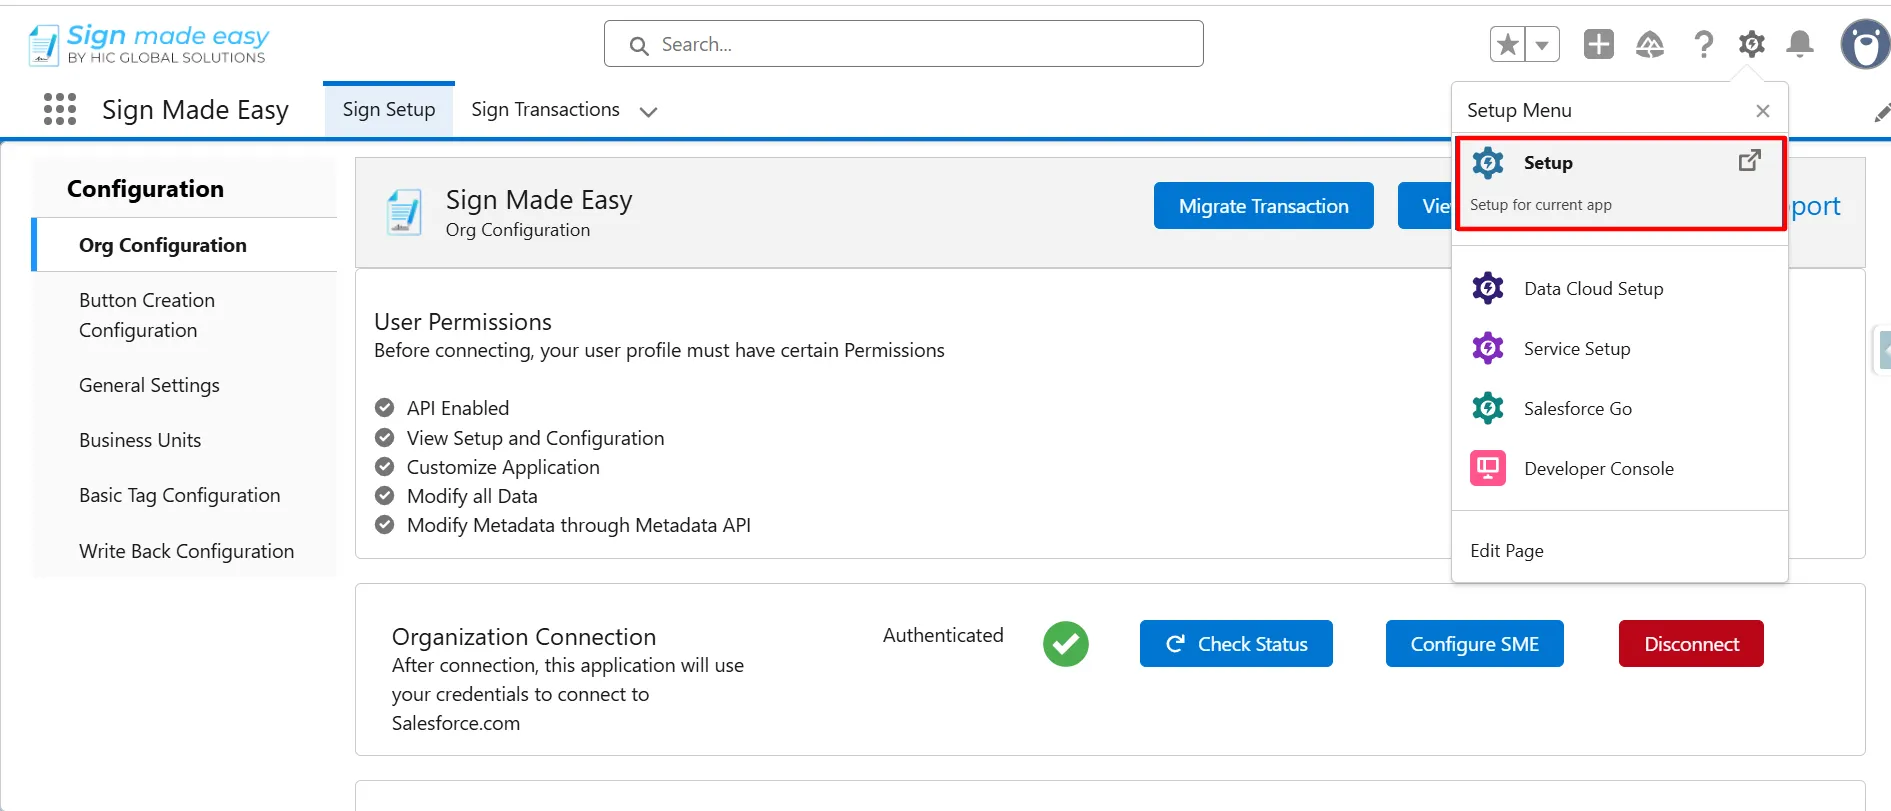
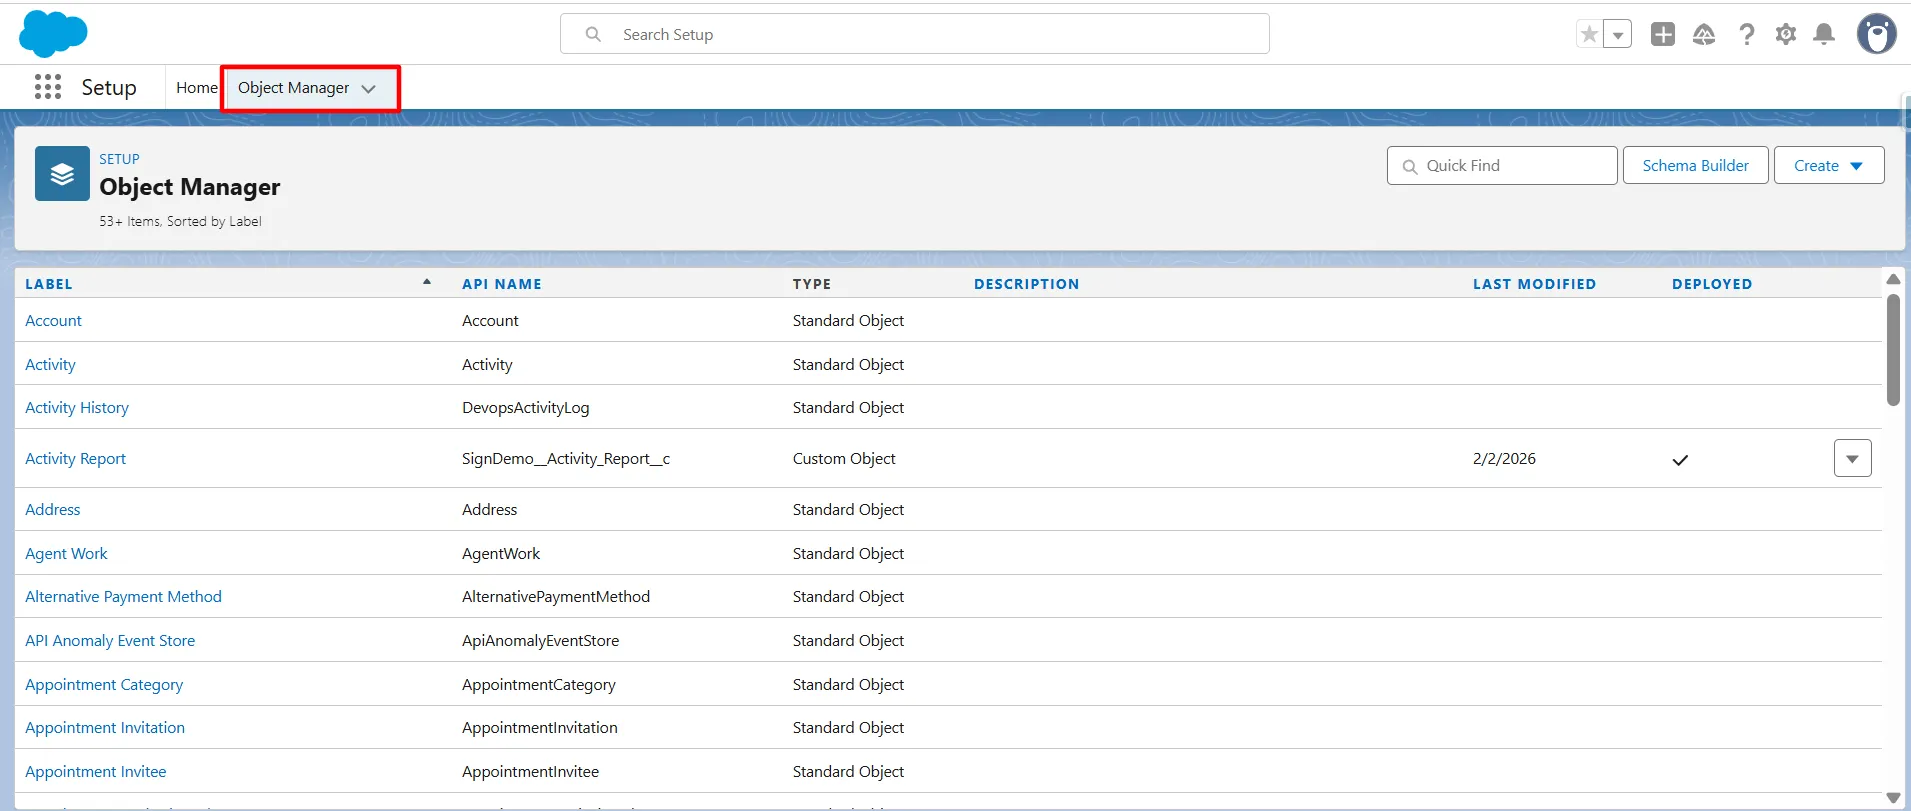
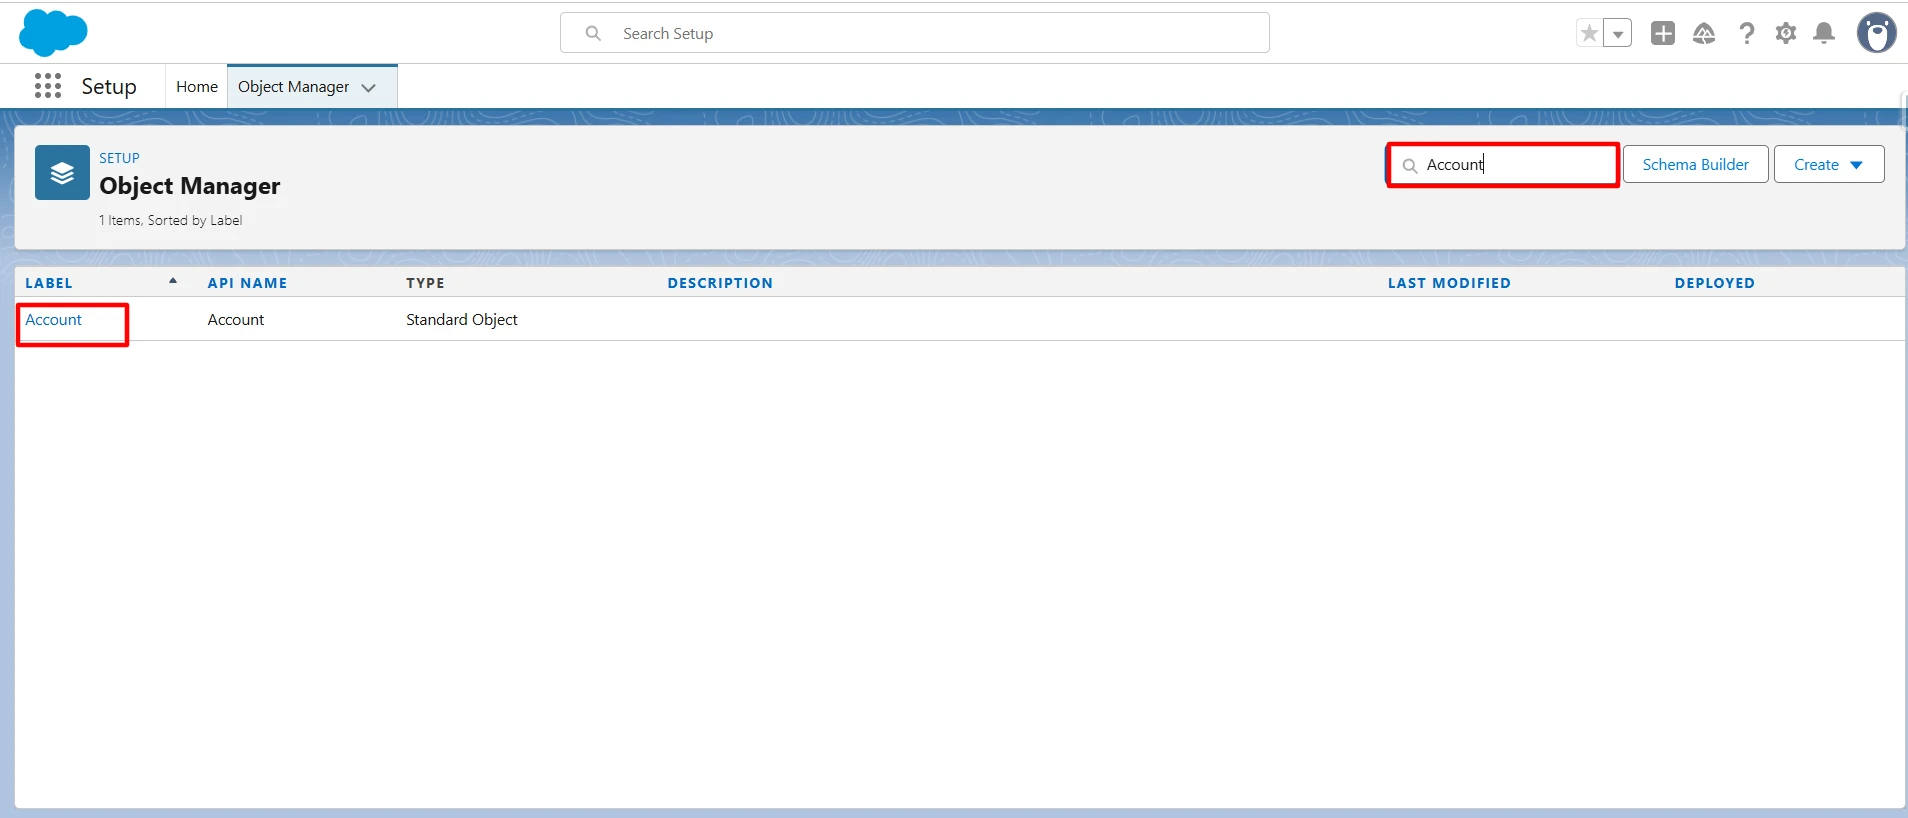
Step 2: Within the selected object, navigate to Buttons, Links, and Actions, then locate and select the previously created Sign Made Easy button.
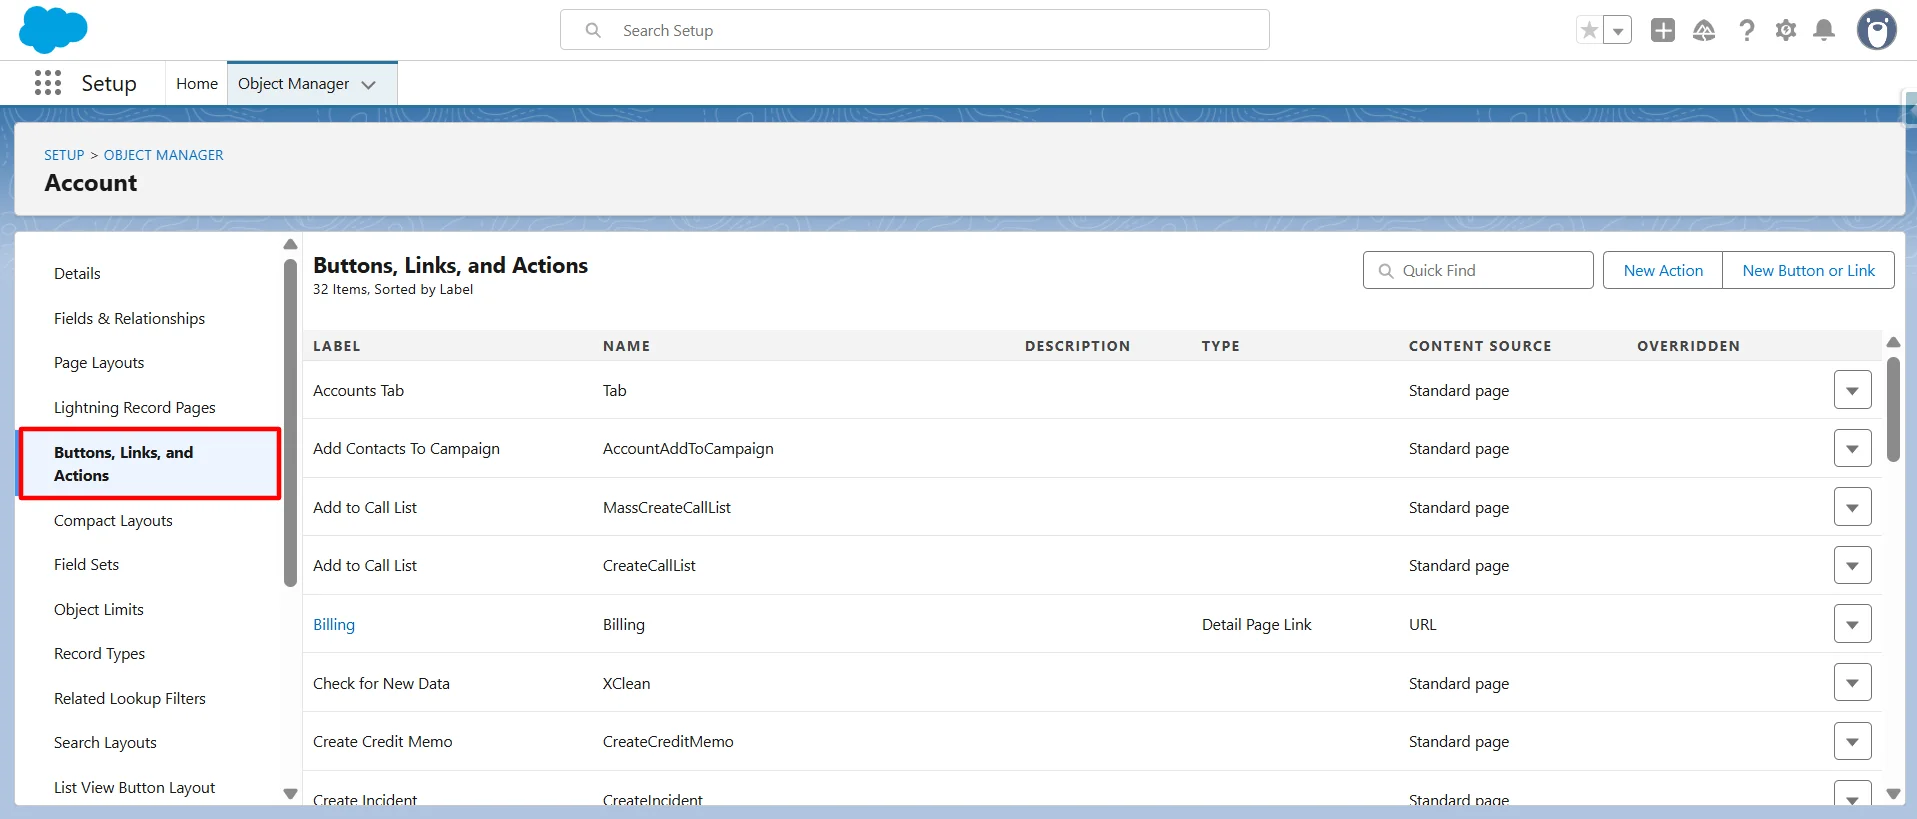
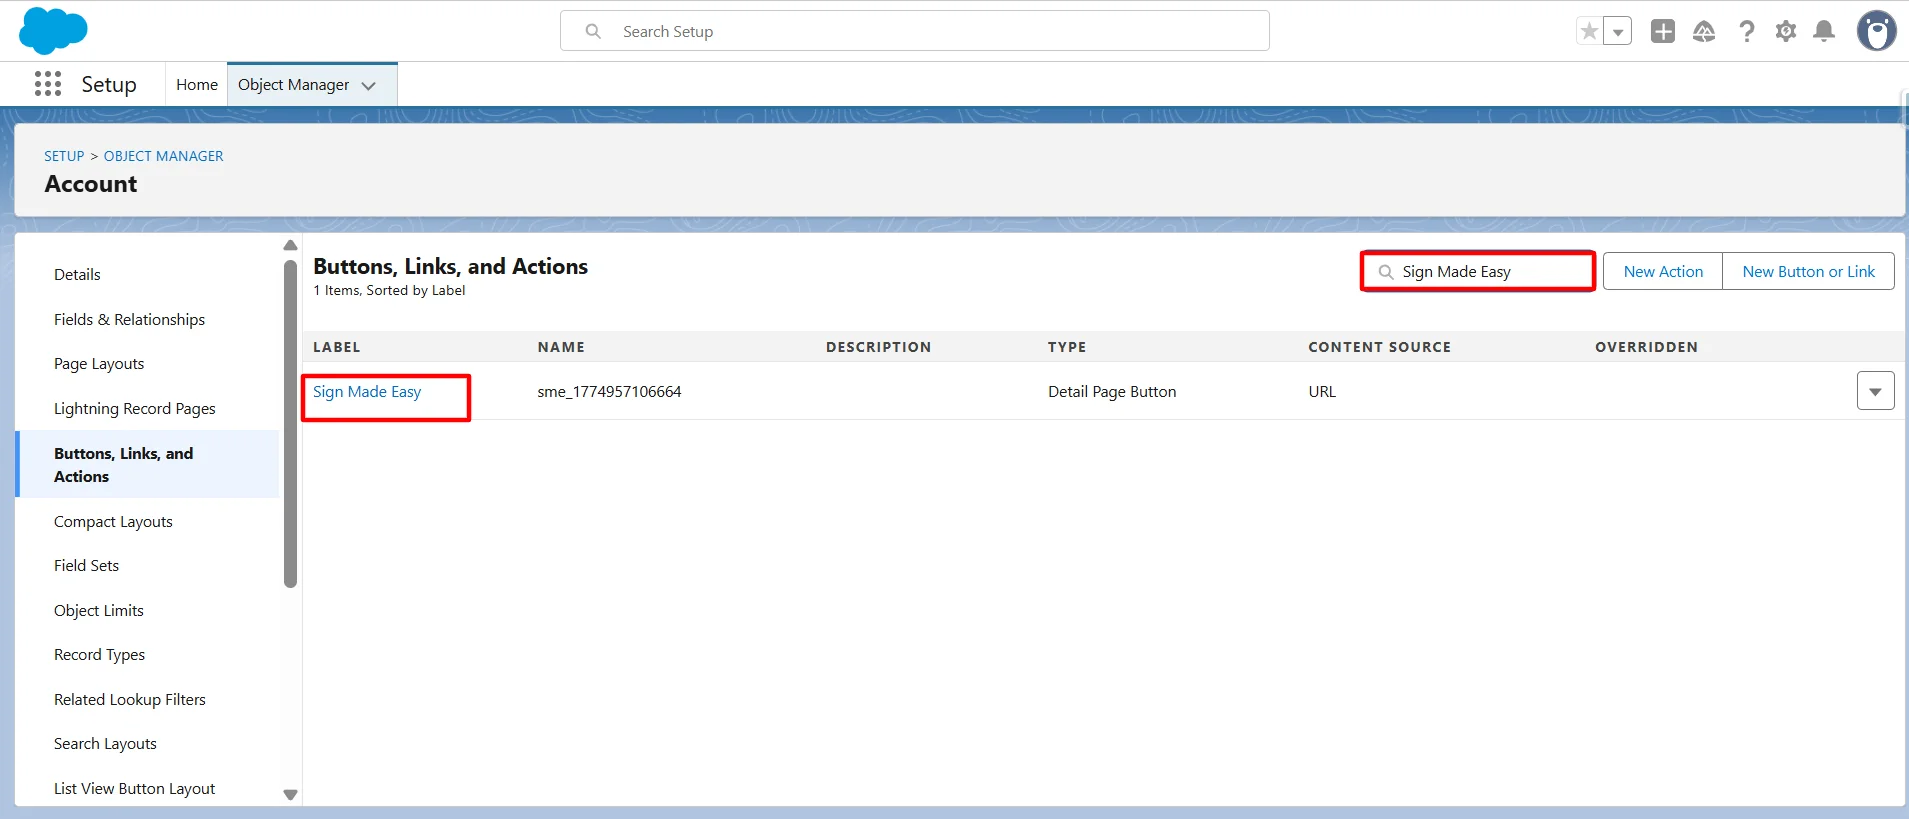
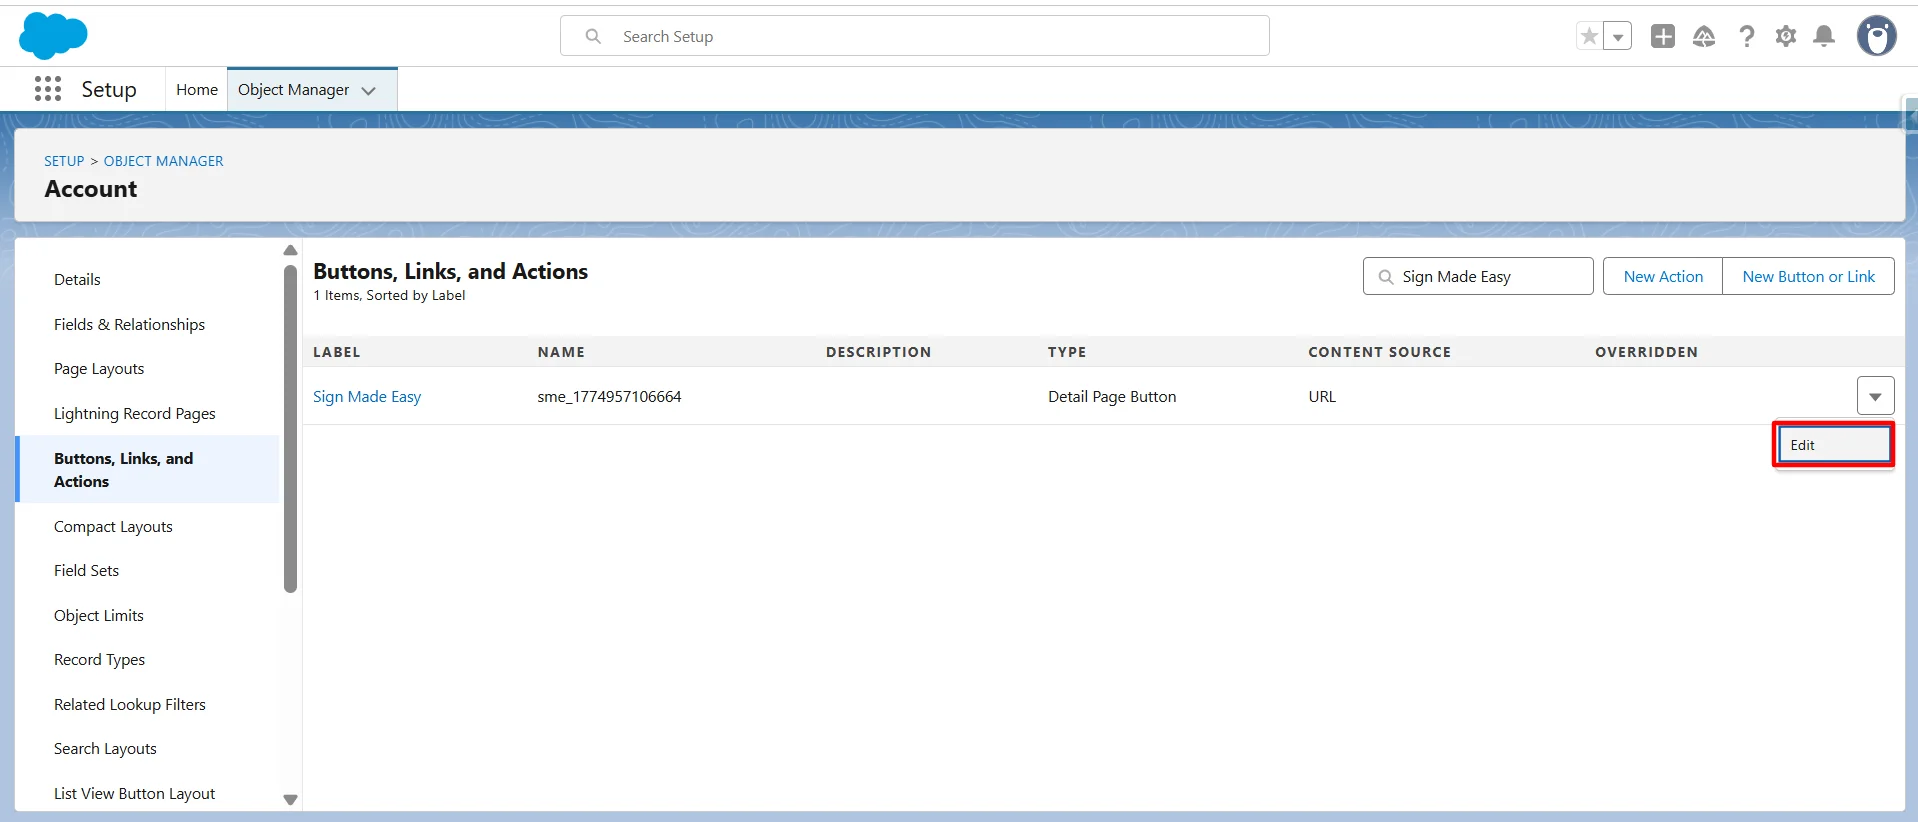
Step 3: Click Edit to modify the Sign Made Easy button parameters.
Step 4: Add the following parameters to the Sign Made Easy button configuration to enable automatic population of transaction Reminder details.
Parameter Name: &transRemDays
Parameter Description: Parameter is used to automatically populate the transaction reminder date based on the specified number of days.
If you want to auto-populate the Transaction Reminder Date exactly based on the date field of the parent record (from which the e-signature process is initiated), then you need to calculate the difference by subtracting the current date (today) from that parent record’s date field value. Alternatively, you may provide a predefined number of days to calculate the reminder date.
Here are examples for both approaches:
1. Using a predefined number of days – You can directly pass the number of days to calculate the Reminder date from today.
Example:
/flow/hic_signeasy/Sme_AddAndUploadDocument?recordId={!Account.Id}&transRemDays=10
This sets the transaction expiration date to 10 days from the current date.
2. Using a dynamic date field from the record – You can reference a date field from the selected record and calculate the reminder accordingly.
Example:
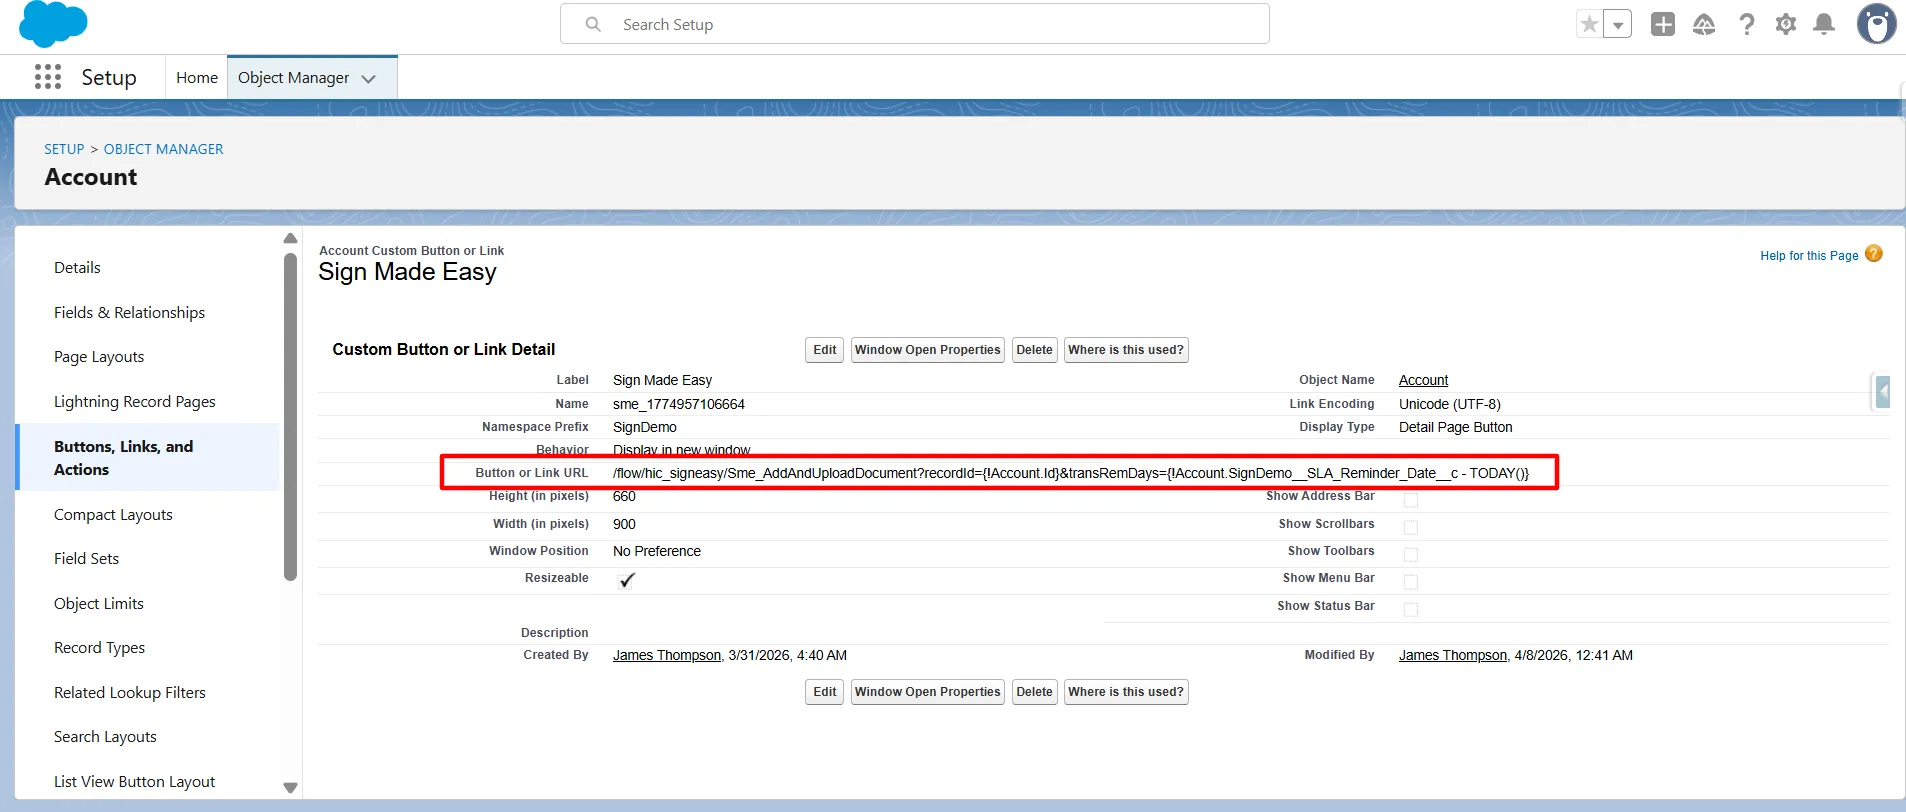
/flow/hic_signeasy/Sme_AddAndUploadDocument?recordId={!Account.Id}&transRemDays={!Account.SignDemo__SLA_Reminder_Date__c – TODAY()}
Here, SignDemo__SLA_Reminder_Date__c is a custom date field created on the parent object. If its value is 30/04/2026, the transaction reminder is calculated based on the difference between this date and the current date (Today).
To calculate this manually:
- Today’s date: 08/04/2026
- Reminder date: 30/04/2026
Now calculate the difference in days:
- Total days remaining in April after 8th = 22 days
So, transRemDays = 22 days and final Transaction Reminder Date = 30/04/2026
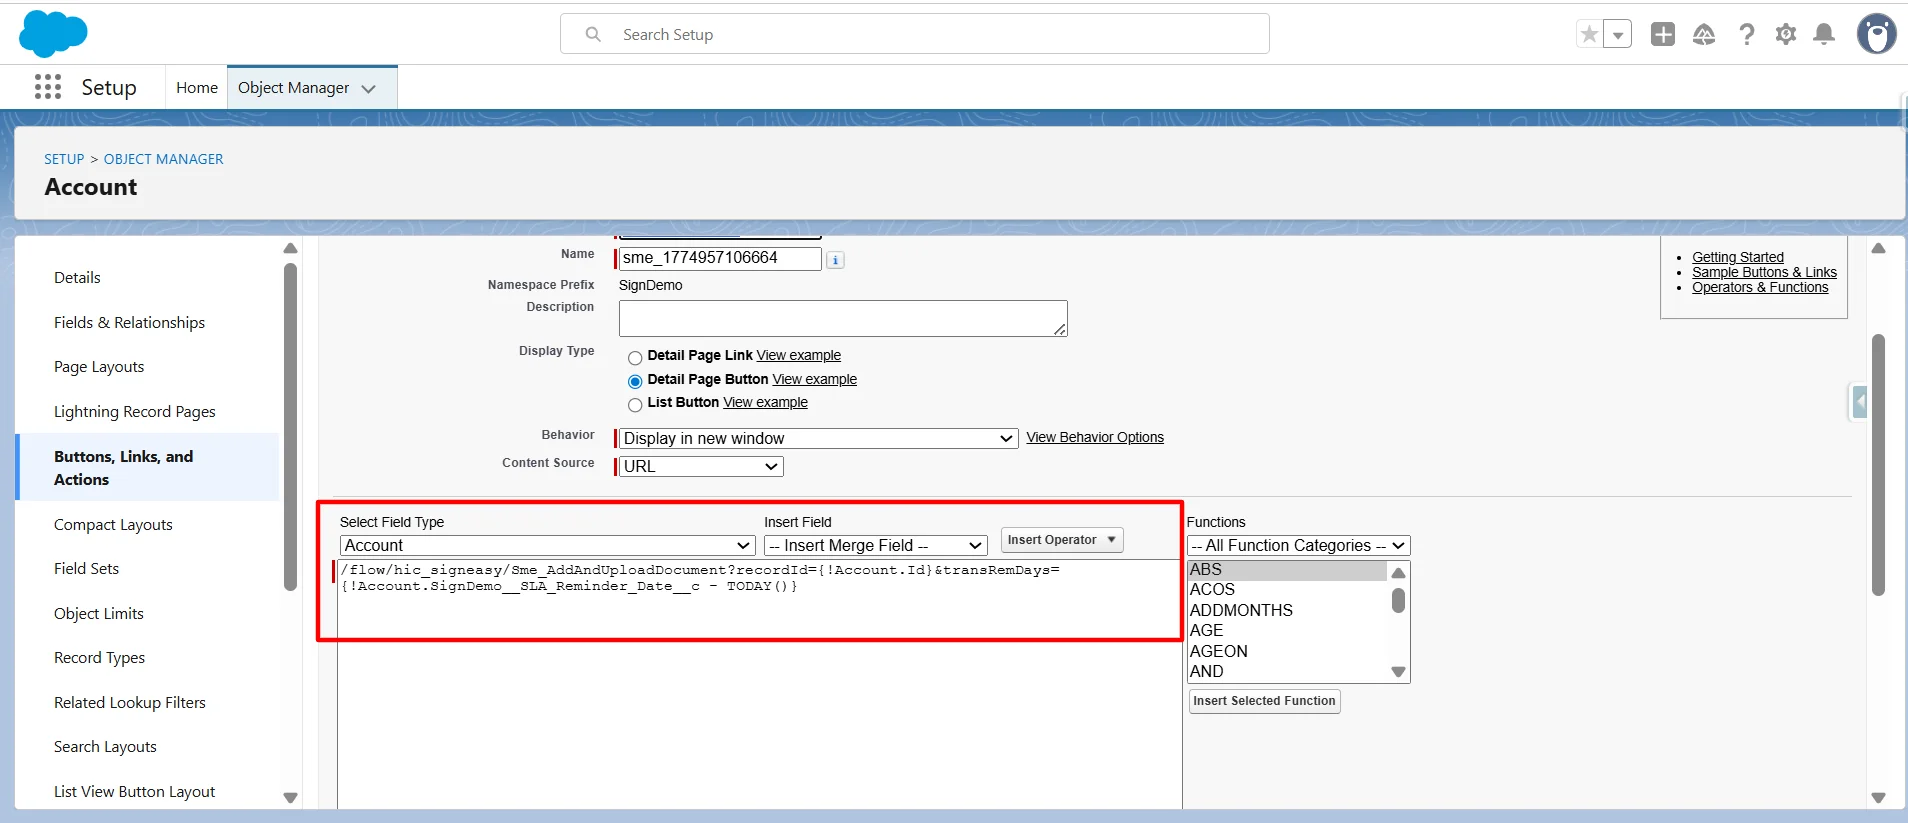
Final Transaction Reminder date Button URL
/flow/hic_signeasy/Sme_AddAndUploadDocument?recordId={!Account.Id}&transRemDays={!Account.SignDemo__SLA_Reminder_Date__c – TODAY()}
Step 5: Open the App Launcher, search for the Object where the SME button was created, and select it to proceed.
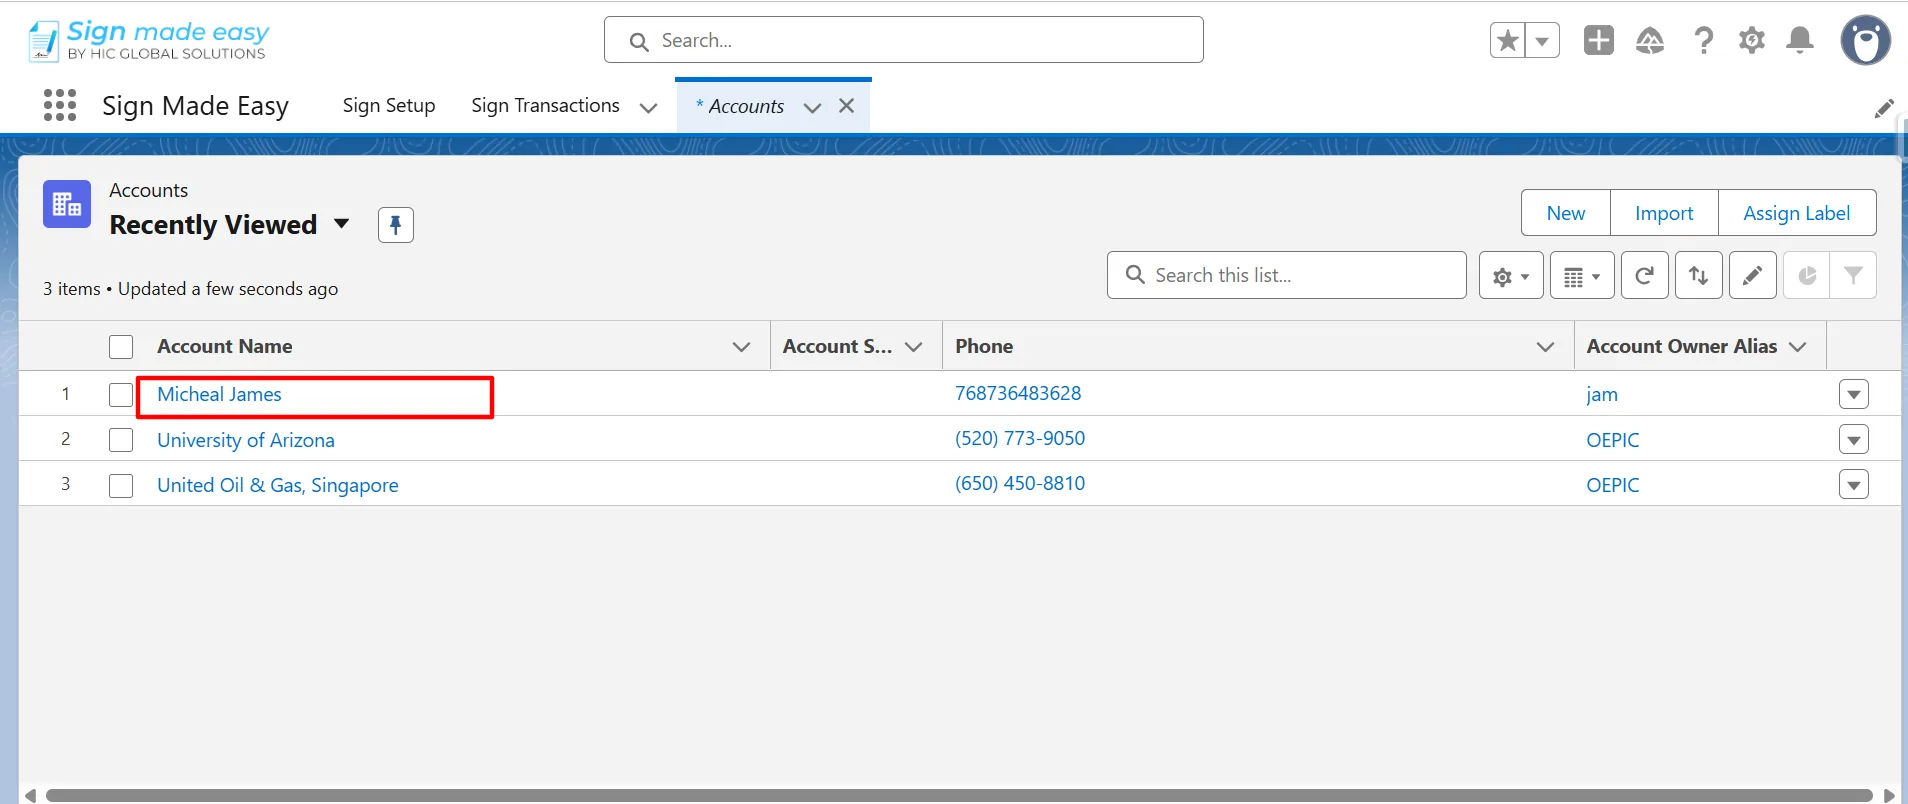
Step 6: Navigate to the record page of the selected object from which you intend to initiate the SME process. If no record exists, create a new one by clicking the New button before proceeding.
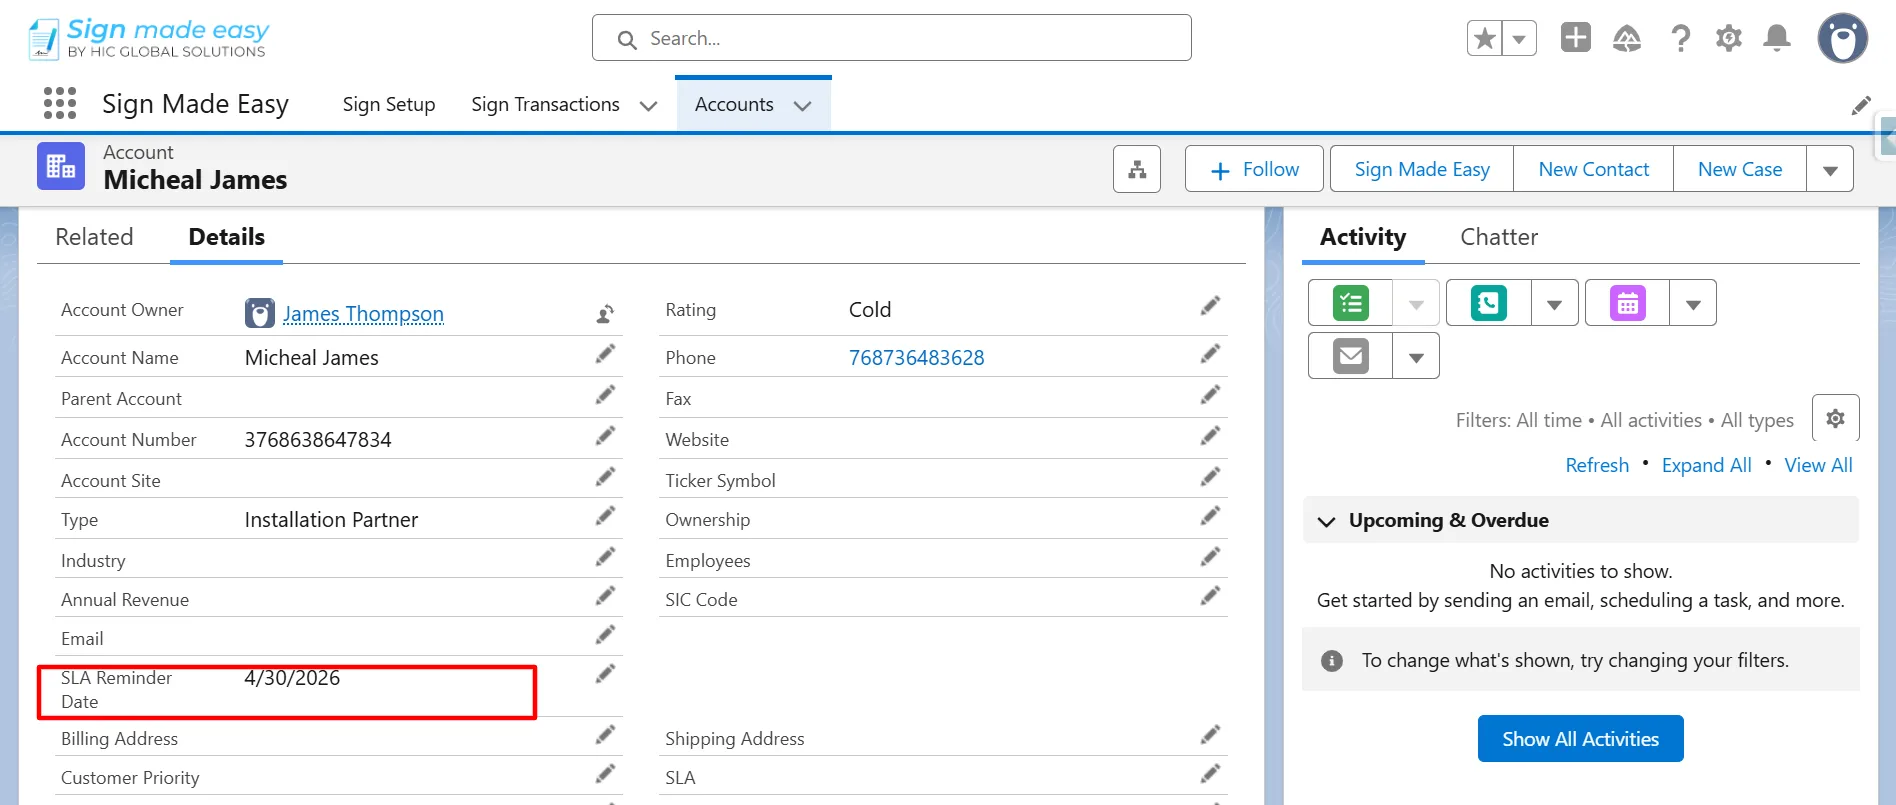
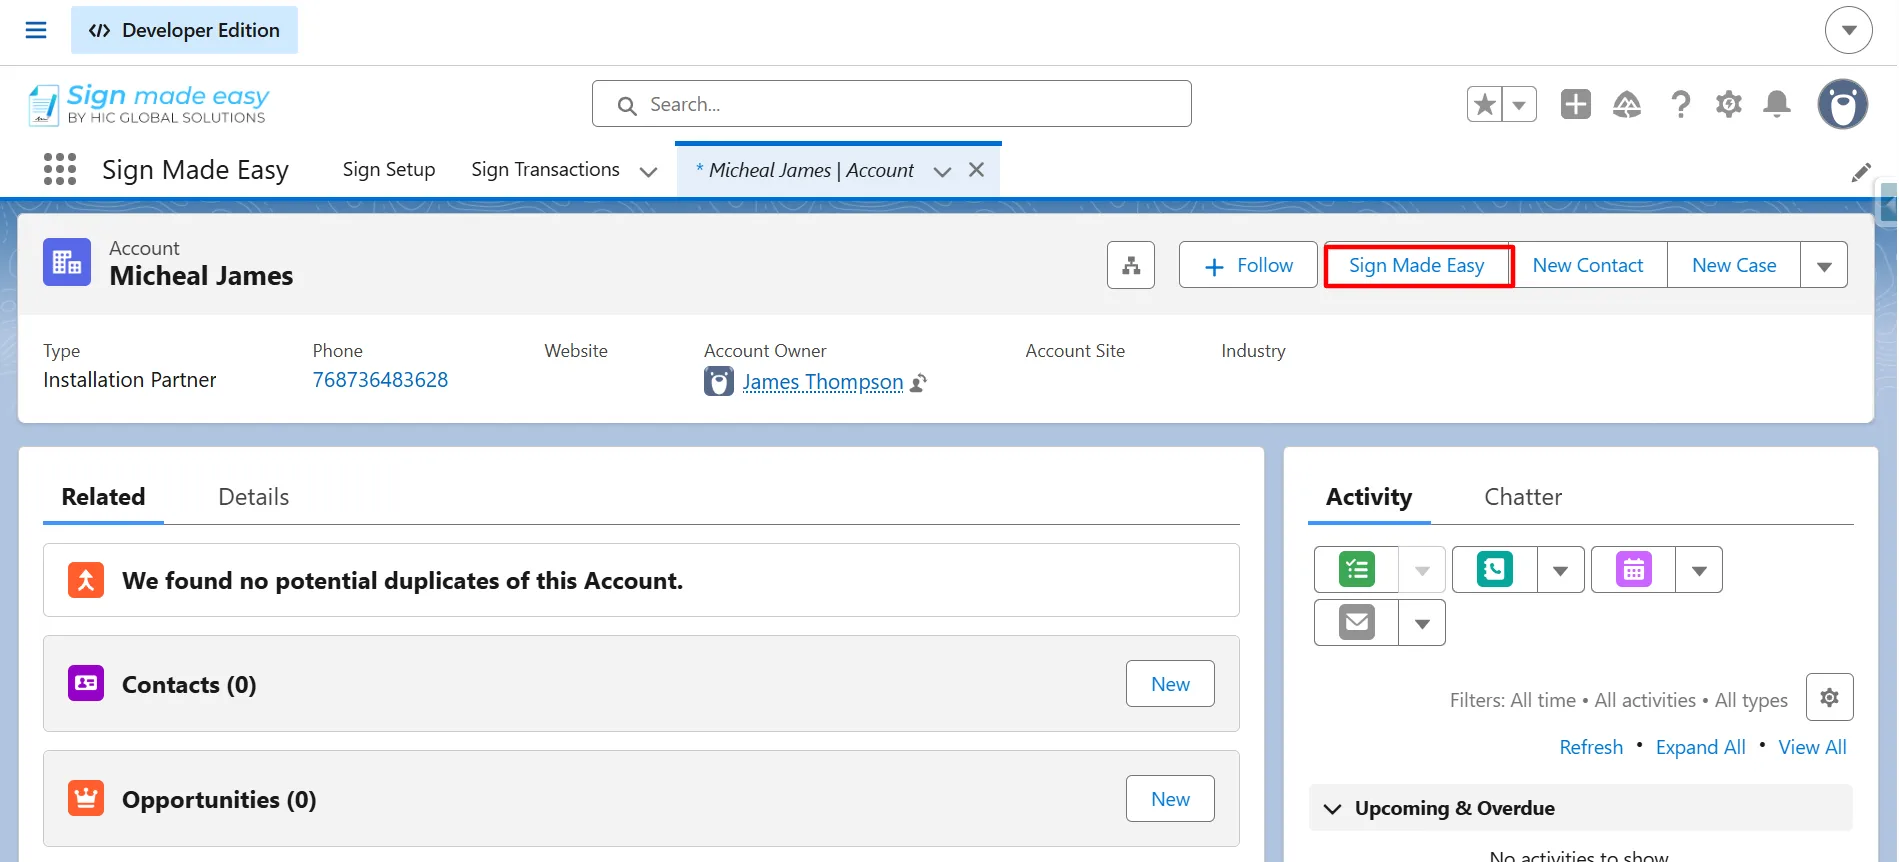
Step 7: Next, click the button you created. The Create Transaction interface will appear, allowing you to add documents and recipient details.
Recipient and document details can be included in the button URL, or alternatively, they can be added and uploaded manually during the process. For more information, please refer to Button URL parameters.
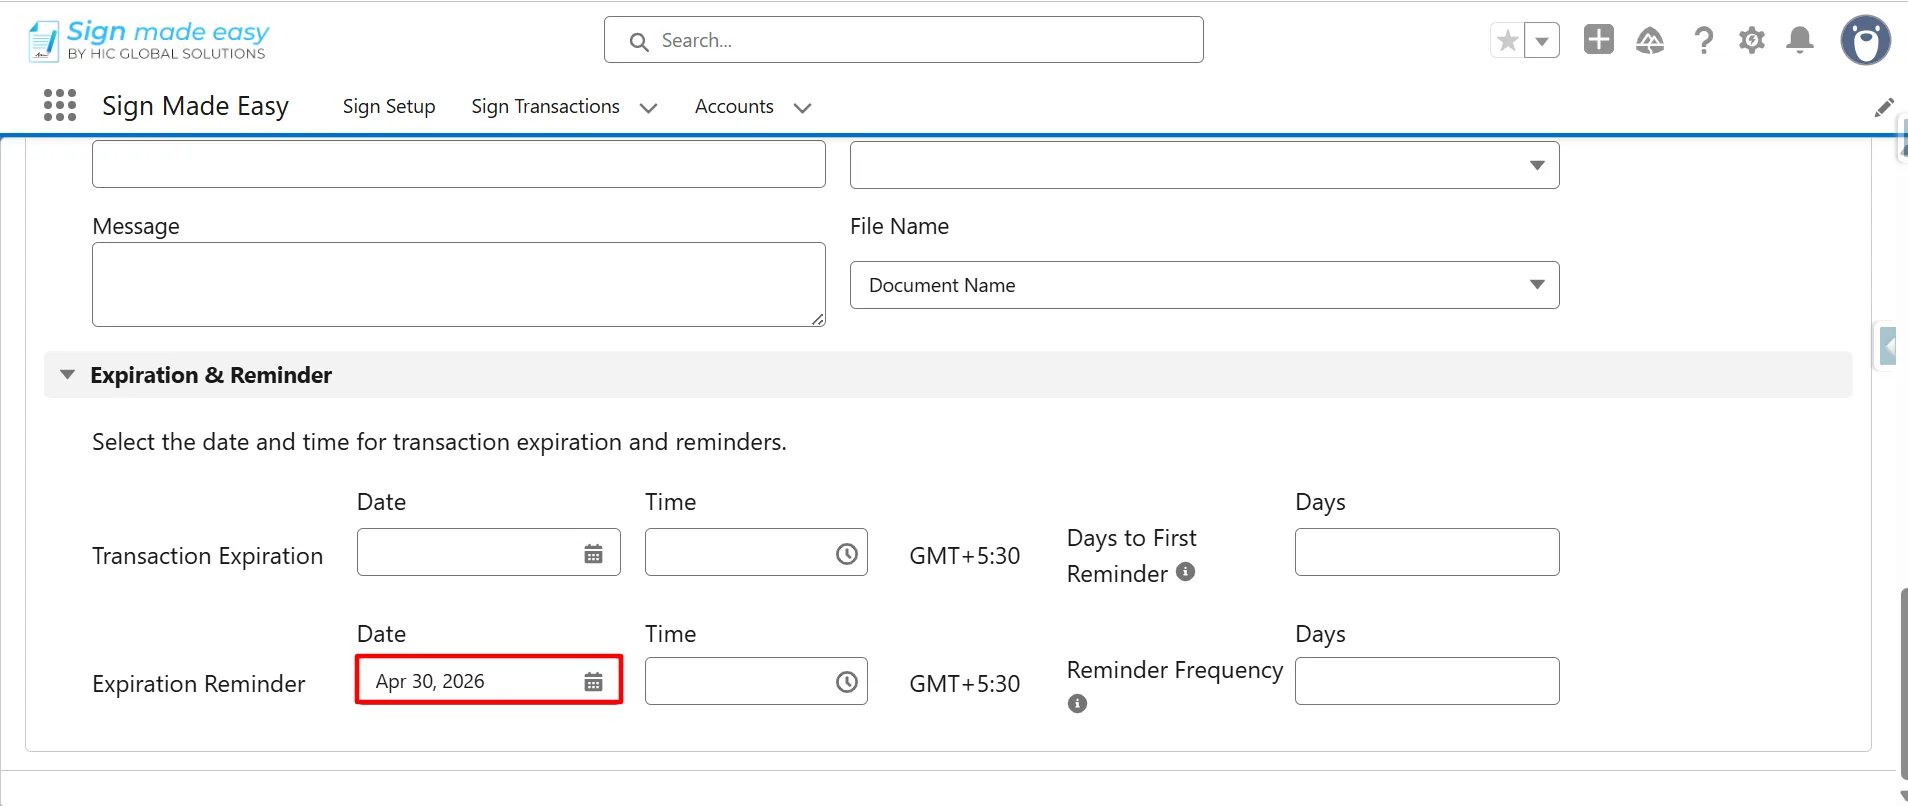
You have successfully auto-populated the transaction reminder details.
Conclusion
Auto-populating transaction reminder dates in Sign Made Easy helps organizations automate follow-ups, reduce delays, and improve overall document completion efficiency within Salesforce. By configuring the &transRemDays parameter, businesses can create smarter eSignature workflows that adapt to both predefined timelines and dynamic record-based dates.
This flexibility not only minimizes manual effort but also ensures a smoother signing experience for recipients and internal teams alike. To explore more advanced button URL parameters, workflow automation capabilities, and Salesforce eSignature configurations, visit the Sign Made Easy Help Center.