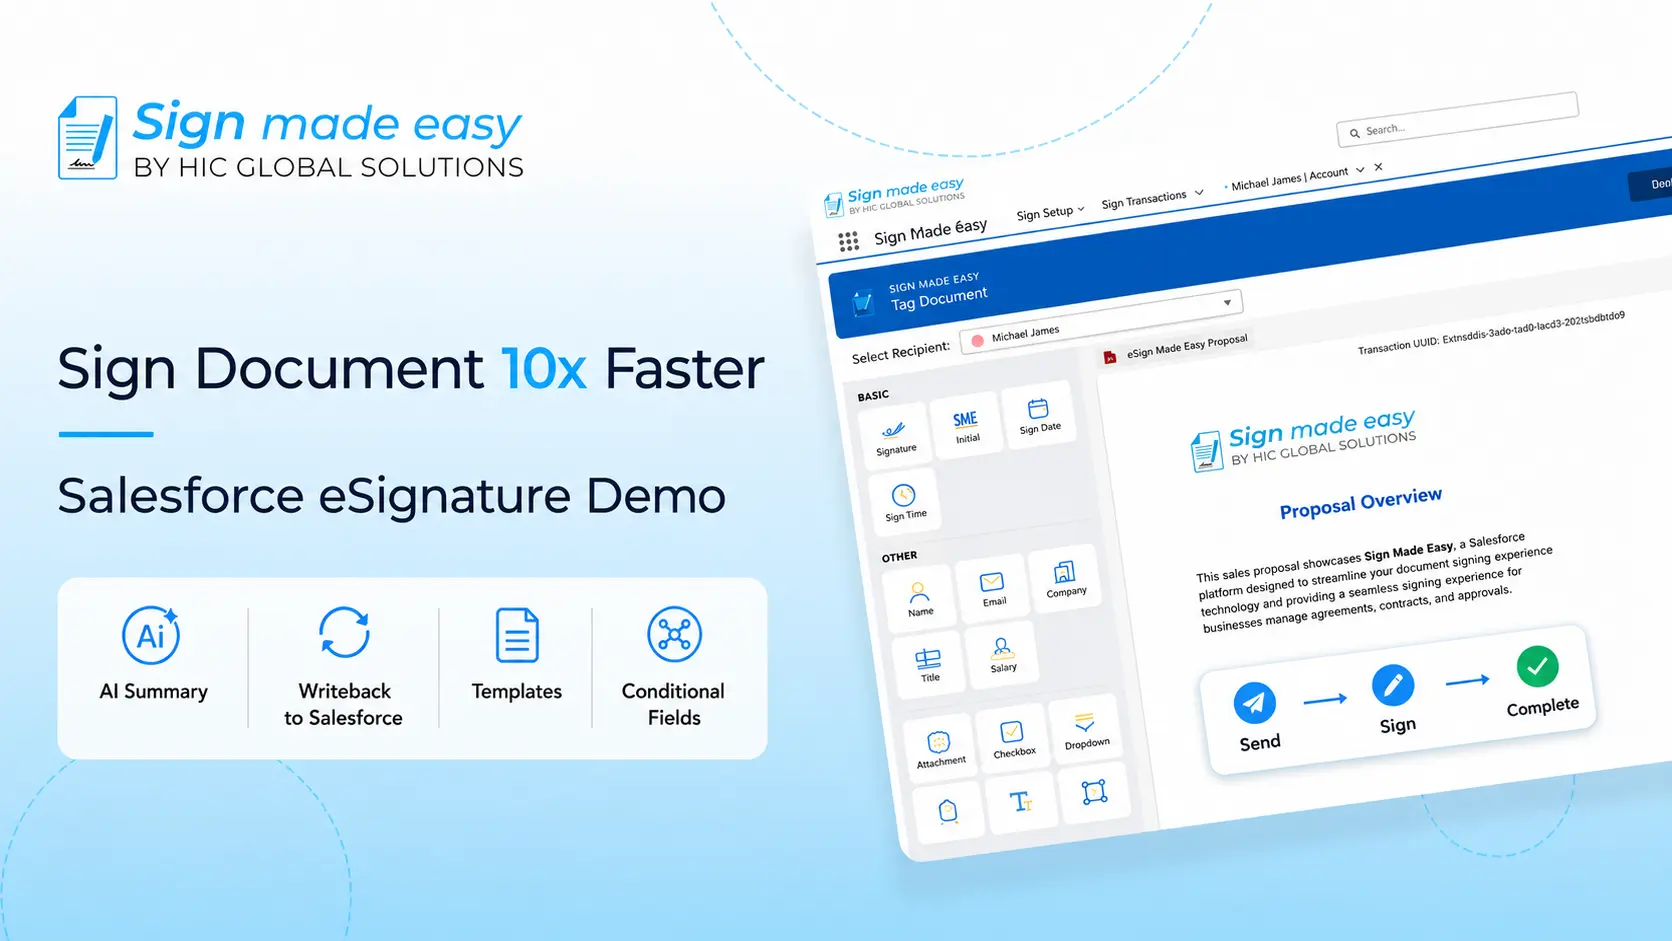


eSignature has become an everyday part of our lives, whether you are running a business or working as a freelancer, helping you close deals and get approvals signed off faster. However, managing them across multiple teams and departments isn’t always a smooth process. Sometimes you might forget to add your company logo, custom message, or send an email that looks on-brand, and in the end, you spend time setting up the same preferences again and again.
To streamline eSignature for Salesforce, there is a function called Business Unit that is specifically designed to remove the hassle of managing eSign operations by letting you customize everything – branding, sender details, and more – all in one place.
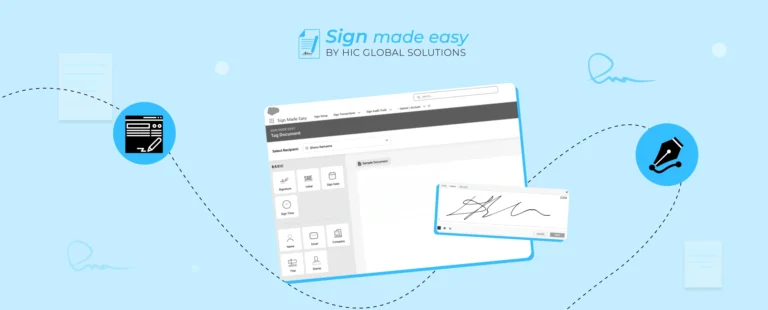
You can tailor the look and feel of your Salesforce electronic signature experience to effectively accelerate your branding. With this, you can even control how notifications are sent. Thus, in this guide, we will dig deeper into the process of customizing your documents in Salesforce using Sign Made Easy. It is a Salesforce native app engineered to unify and automate the entire eSignature workflow, from secure document preparation and precise branding control to intelligent routing, real-time tracking, and compliance enforcement.
Therefore, the Business Units feature helps administrators personalize the Sign Made Easy experience for different departments, organizations, or entities within a Salesforce org. Let’s start by creating a new Business Unit!
Smart Steps to Make Every Document Personal with Business Units
To avail the benefits of Business Unit customization, you need to upgrade your current Sign Made Easy free plan or buy the Pro plan. Get in touch with our Support Team to unlock the advanced features available in the SME PRO package.
- The process starts by downloading the Sign Made Easy App in your Salesforce Org, then searching for it in the app launcher.
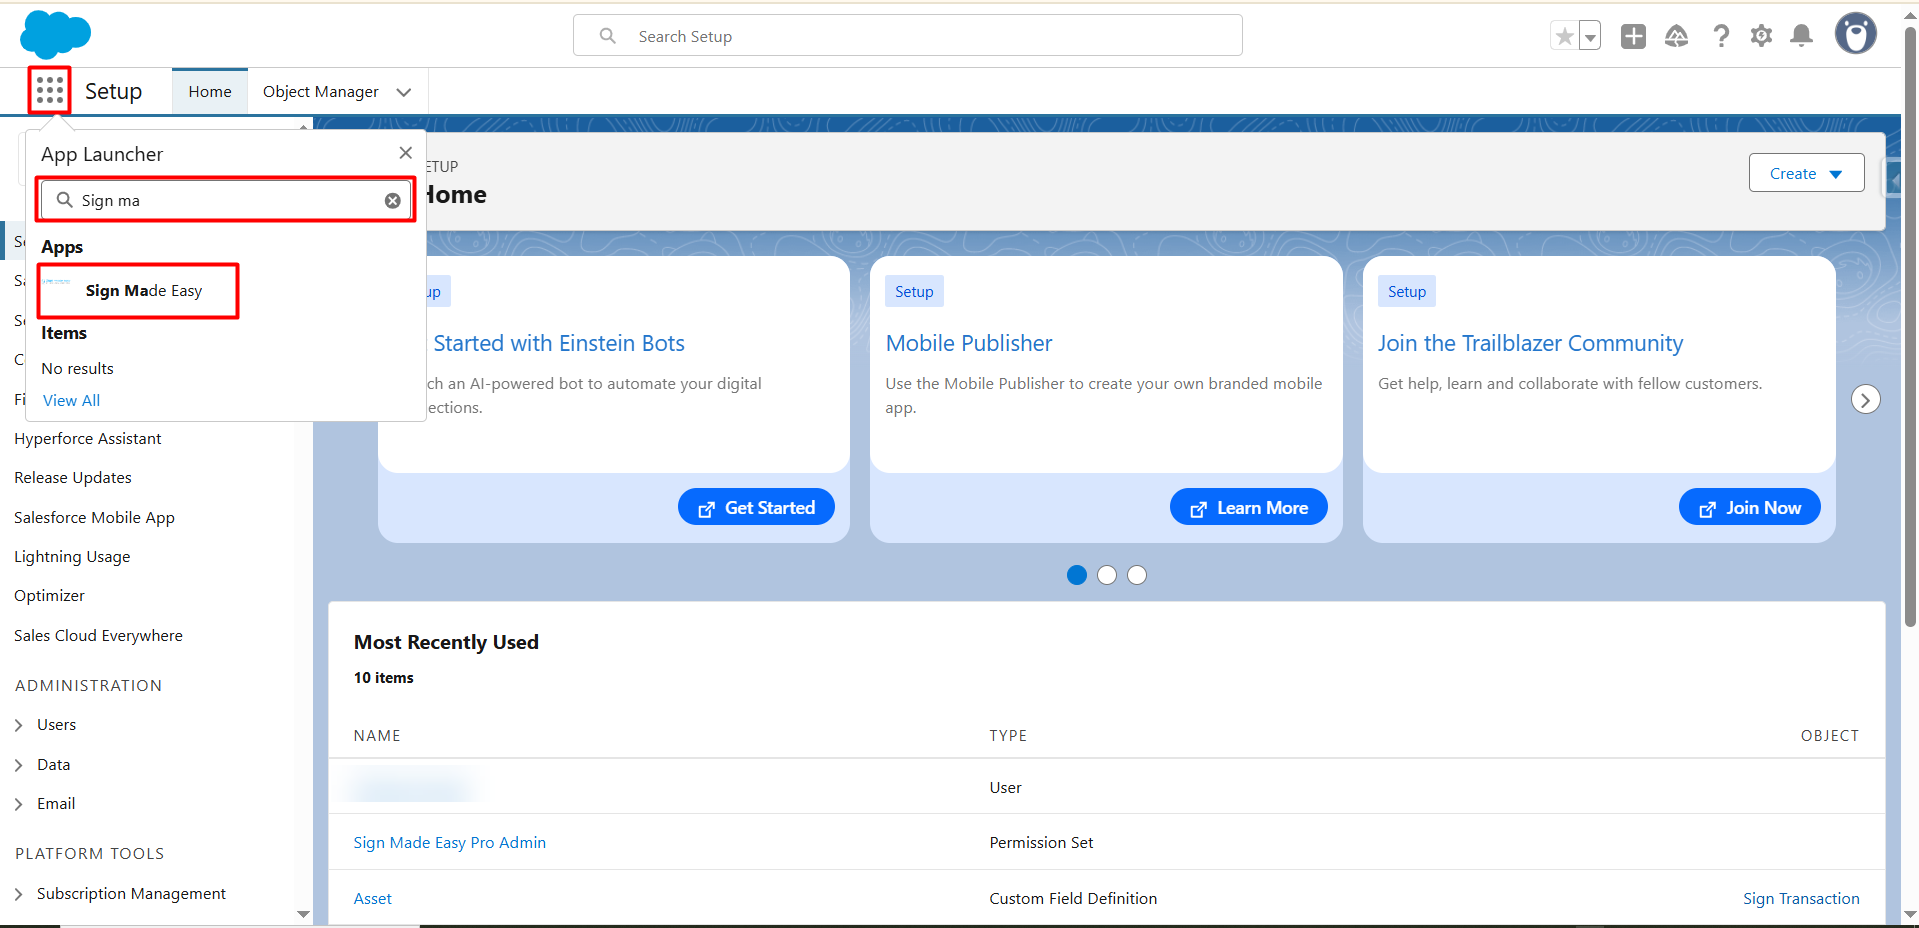
- Then click on the Sign Setup tab and, followed by tapping on Business Units.
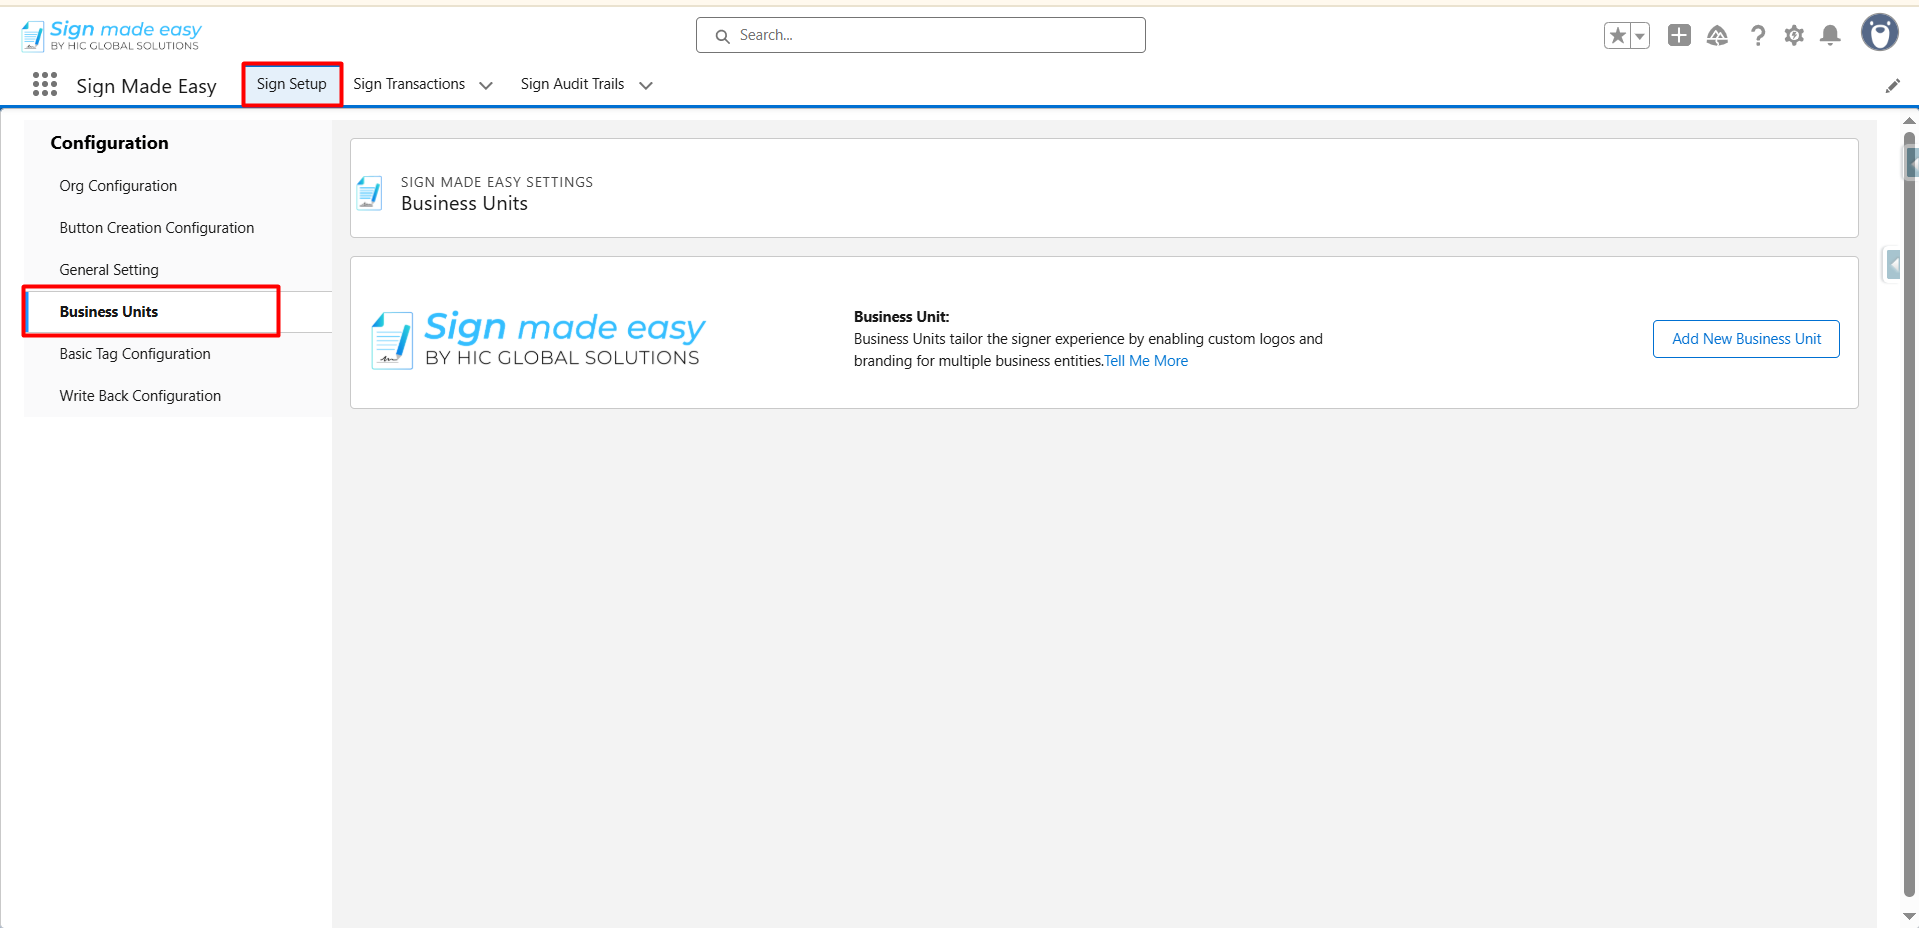
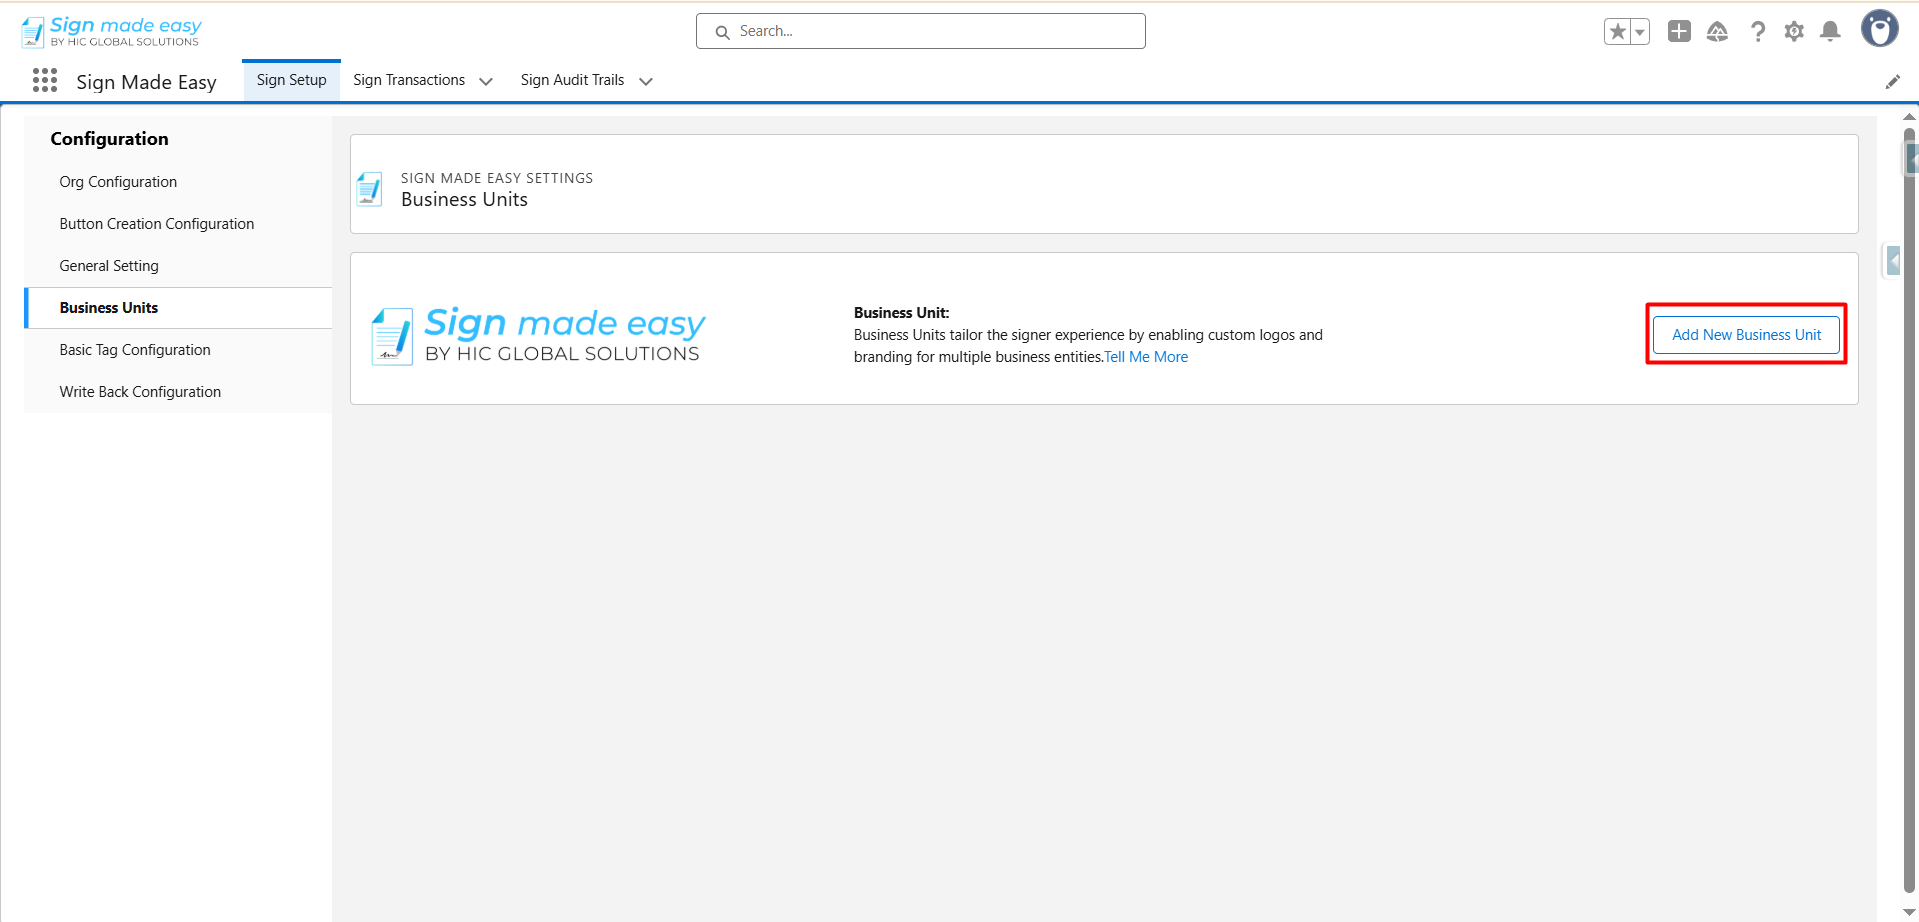
- Now, to set up a new Business Unit, start by clicking on the Add New Business Unit button.
Here, you will need to enter a clear and unique name in the Business Unit Name field. For example, you can name it Sales, Marketing, or by any Team, whatever best represents that department.
This name will later appear in the Business Unit dropdown menu whenever someone creates a new transaction.
Additionally, on this page, you will see three action buttons, each serving different purposes.
- The Go Back Button basically navigates you to the previous page without saving and changes.
- The Cancel Button abandons edits and exits the page.
- The Save Button allows you to save the record you have created and apply the configuration.
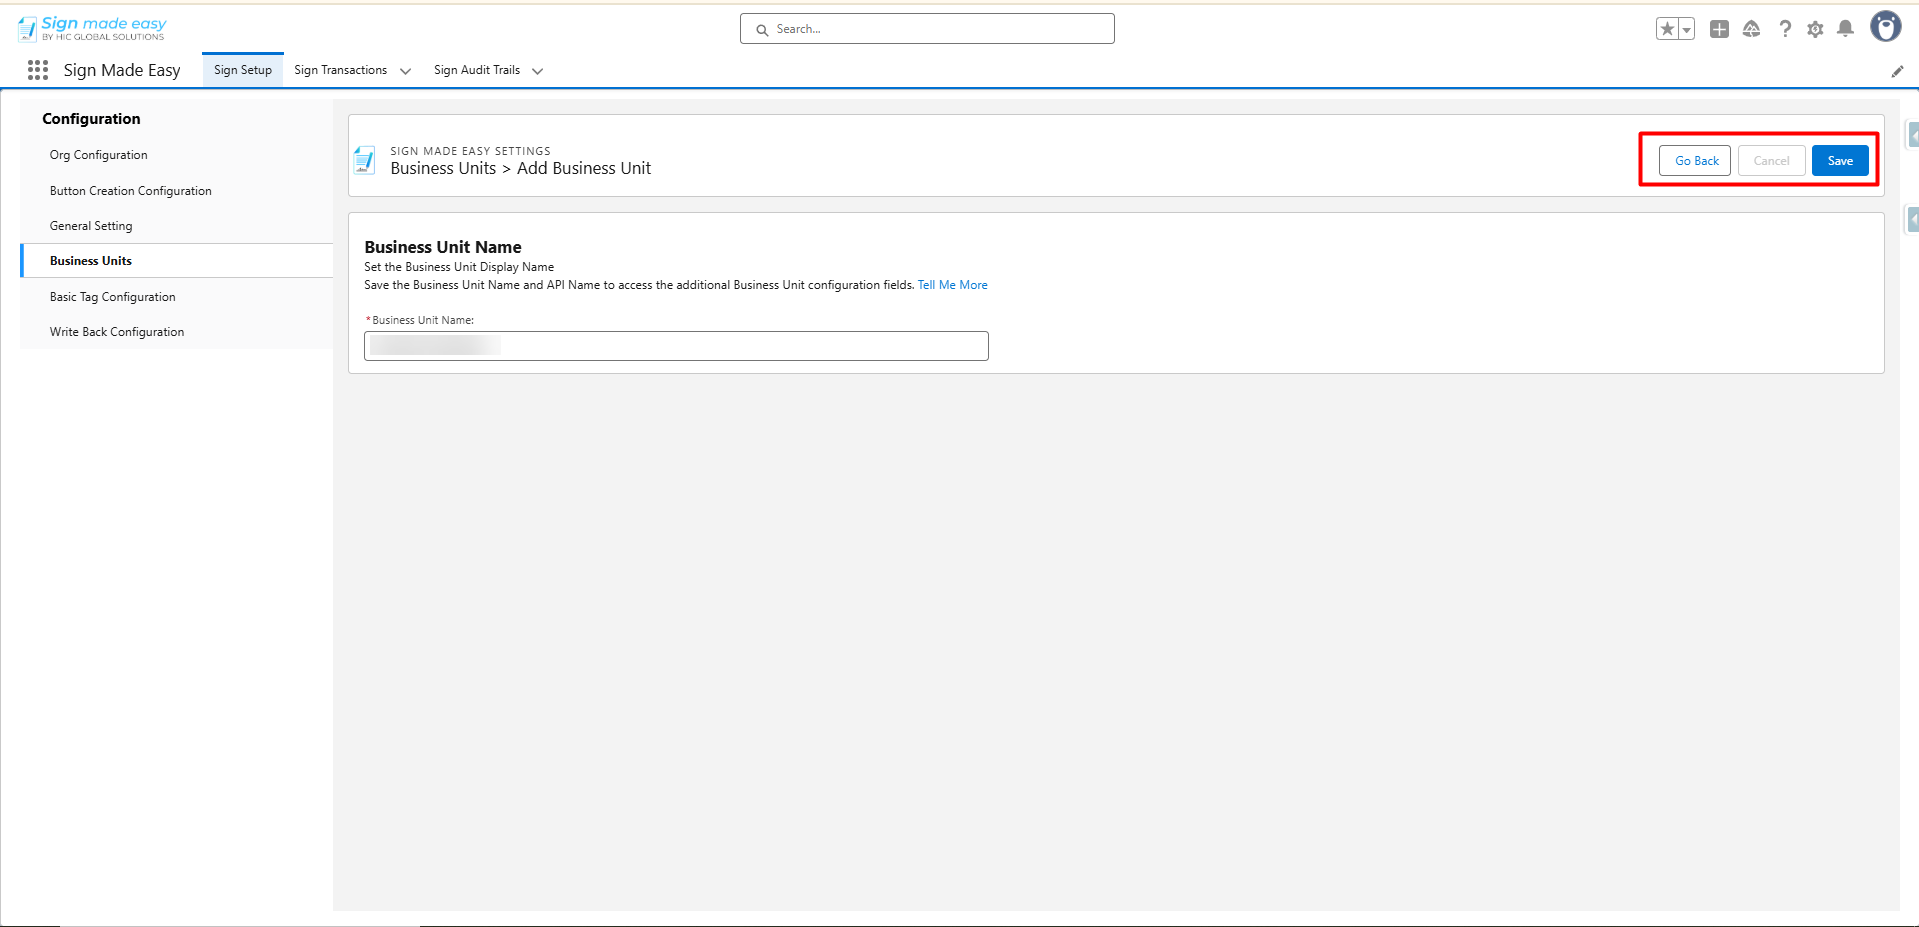
- Once you have entered the name, click Save to finish creating it.

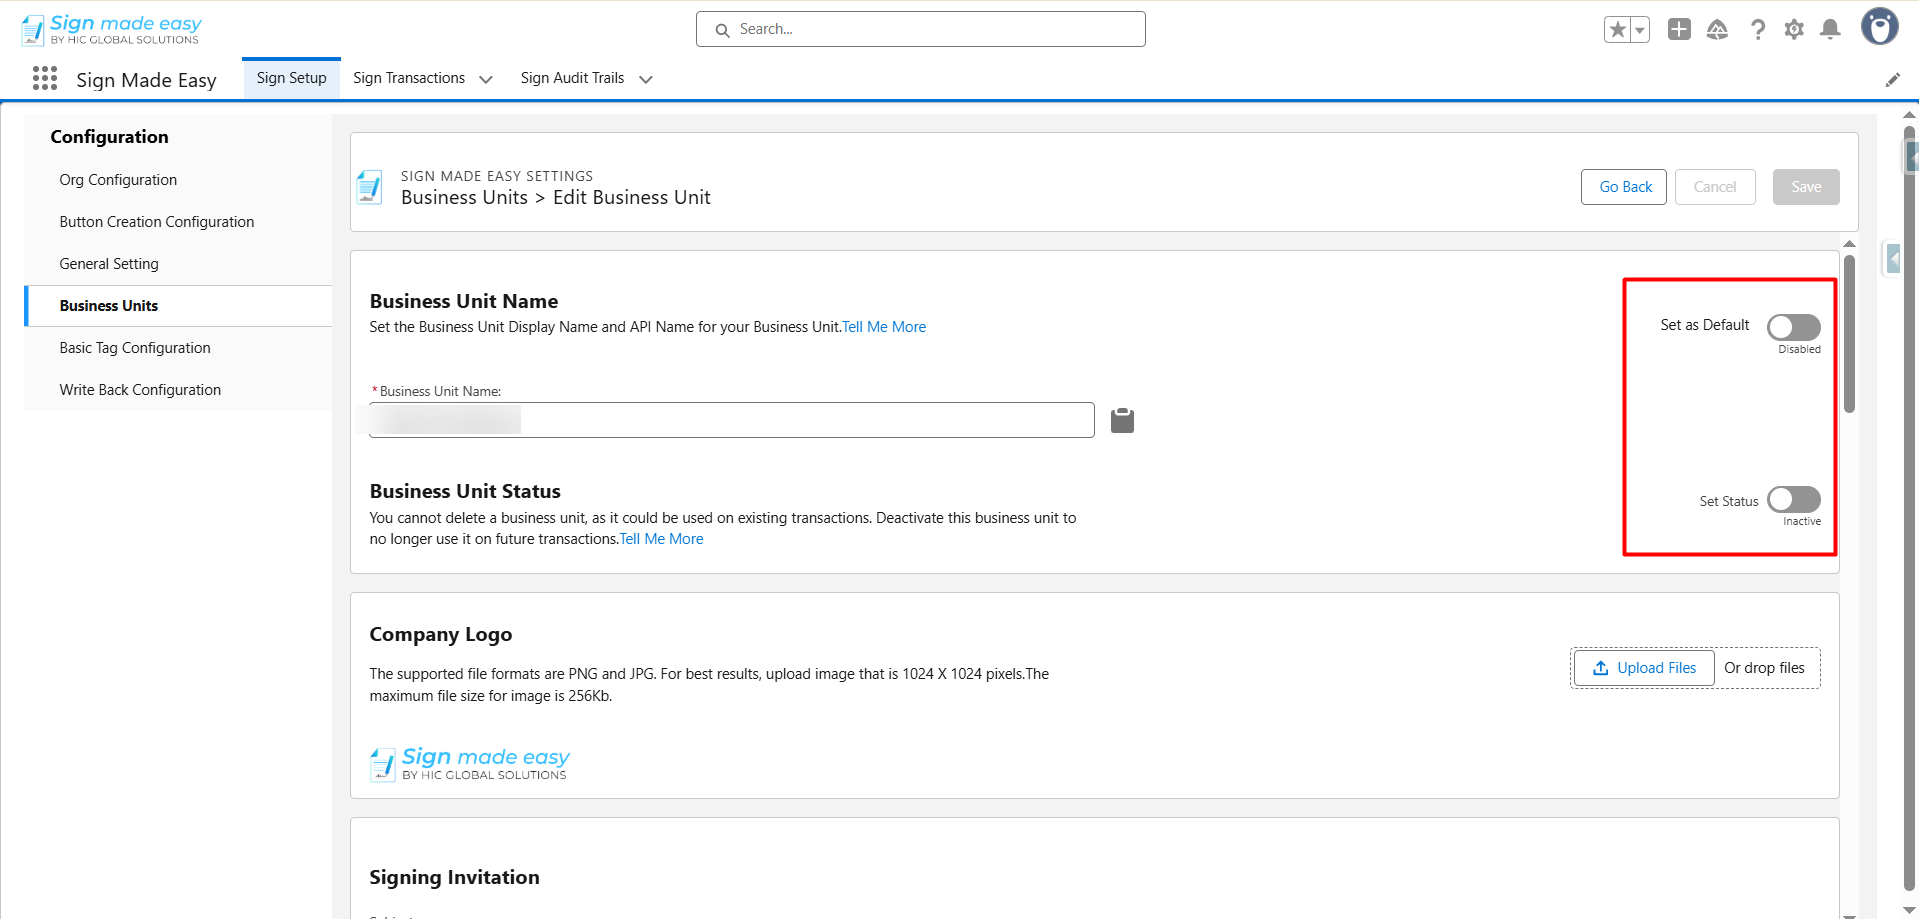
If you need to rename it later, that’s completely fine, just make sure it remains unique. And if a Business Unit is no longer needed, it’s best to deactivate it instead of deleting it, especially if it’s already used in previous transactions.
By default, the Business Unit is selected for all transactions and emails.
If Multiple Business Units are enabled, you can pick a different one when creating a transaction.
Next step, you need to activate the Business Unit to use it in Sign Made Easy transactions and emails.
Adding Business Unit Branding: Logo
- Now, you have to upload the business logo by clicking on Upload Files. You can either choose a file from your system or simply drag and drop it into the upload area.
It’s best to use a PNG or JPG file, with a 1024 × 1024 px size and a maximum of 256 KB.
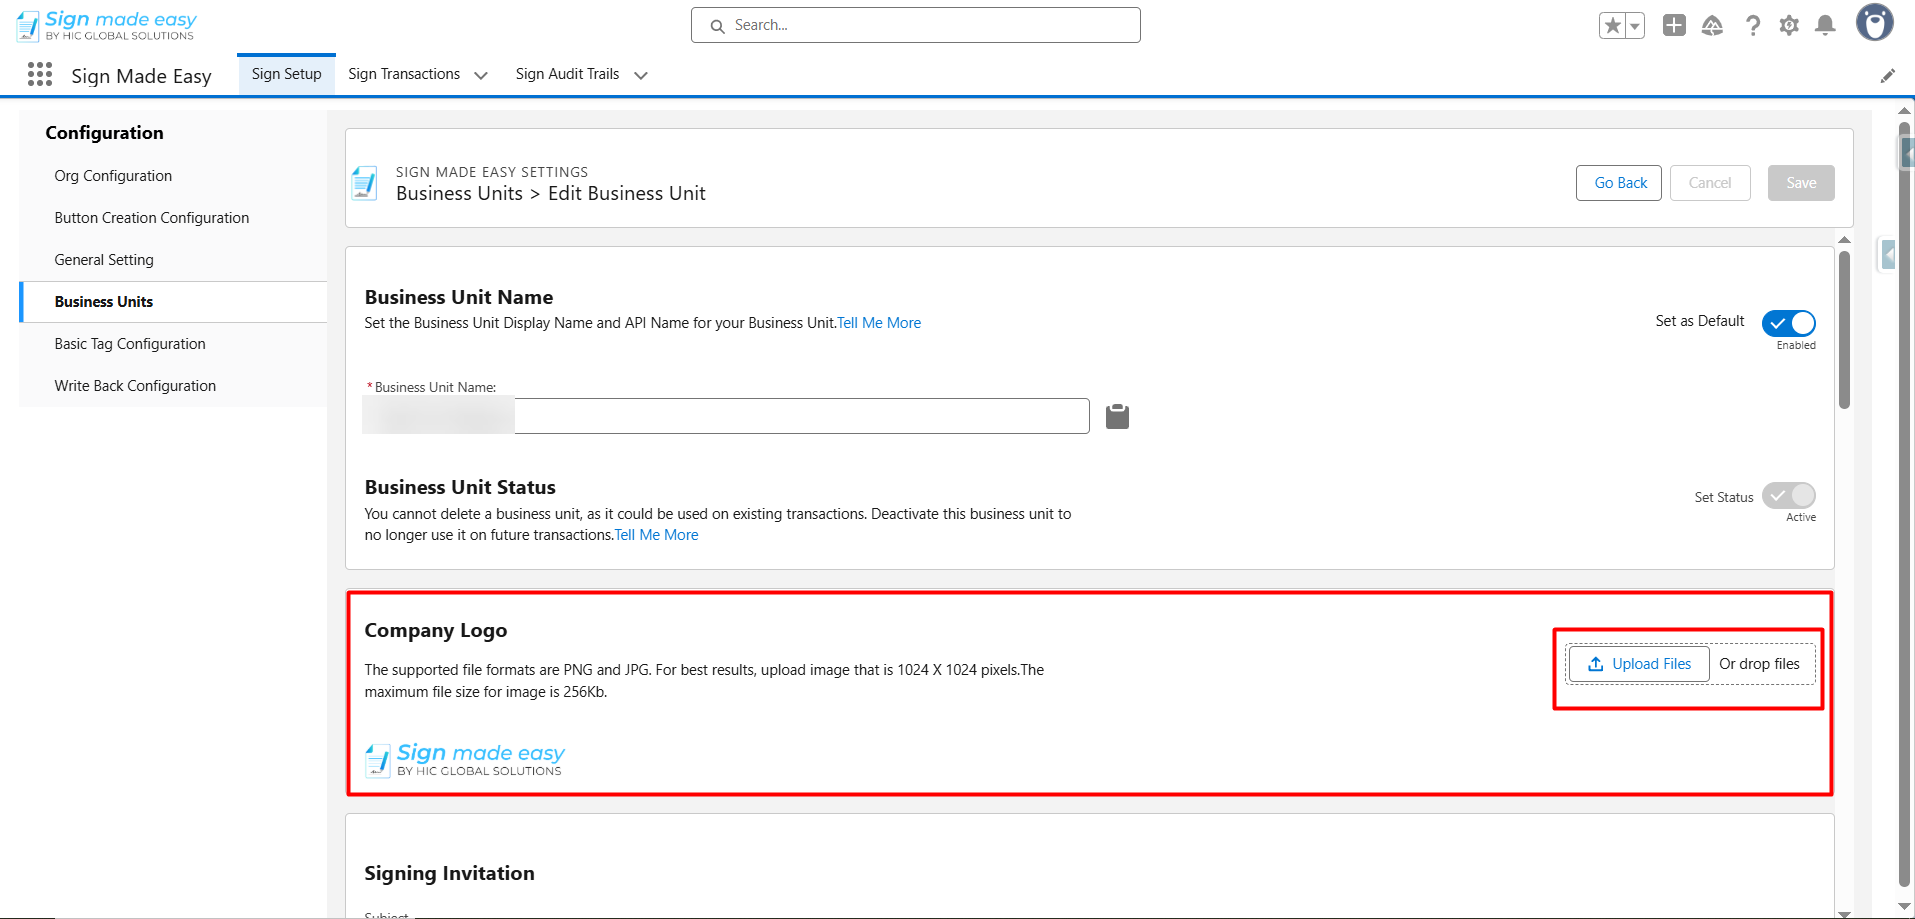
After you upload the logo, it will automatically appear in all the emails being sent from this Business Unit.
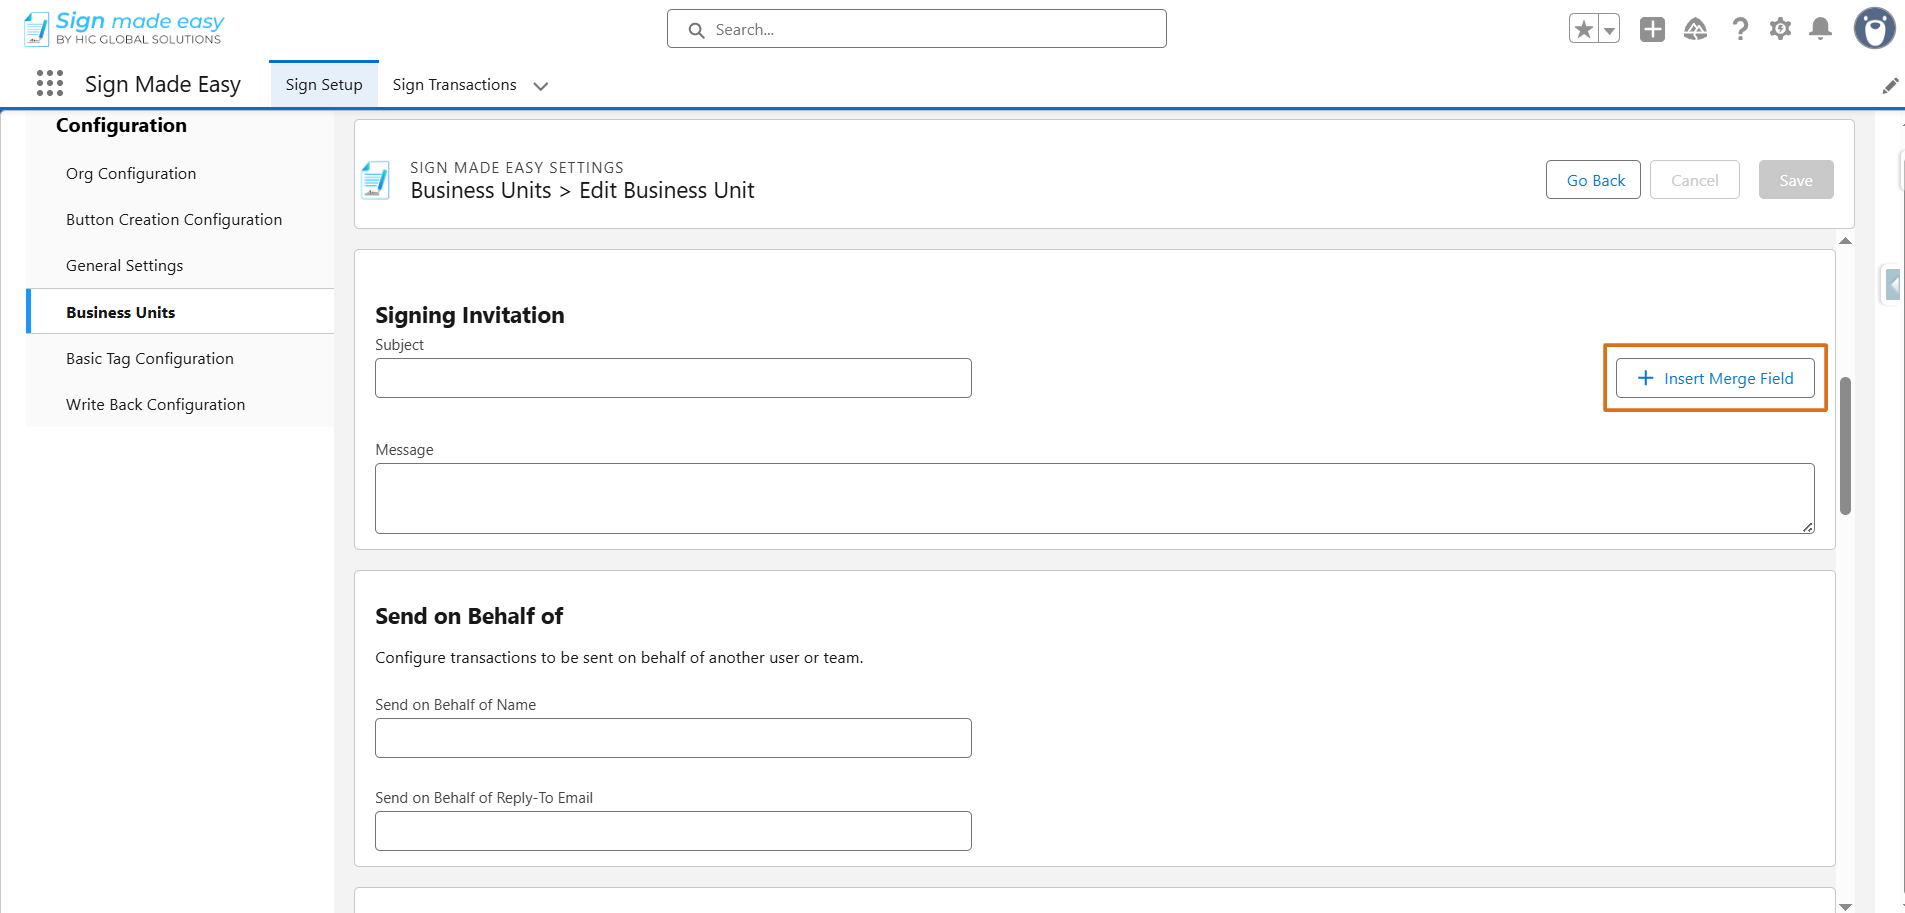
Customizing Email Content
You can personalize the email messages that you send to your recipients.
- Firstly, in the Email Subject field, write a short and clear subject line.
Then, in the Email Message box, type the message you want your recipients to see when they receive the document for signing.
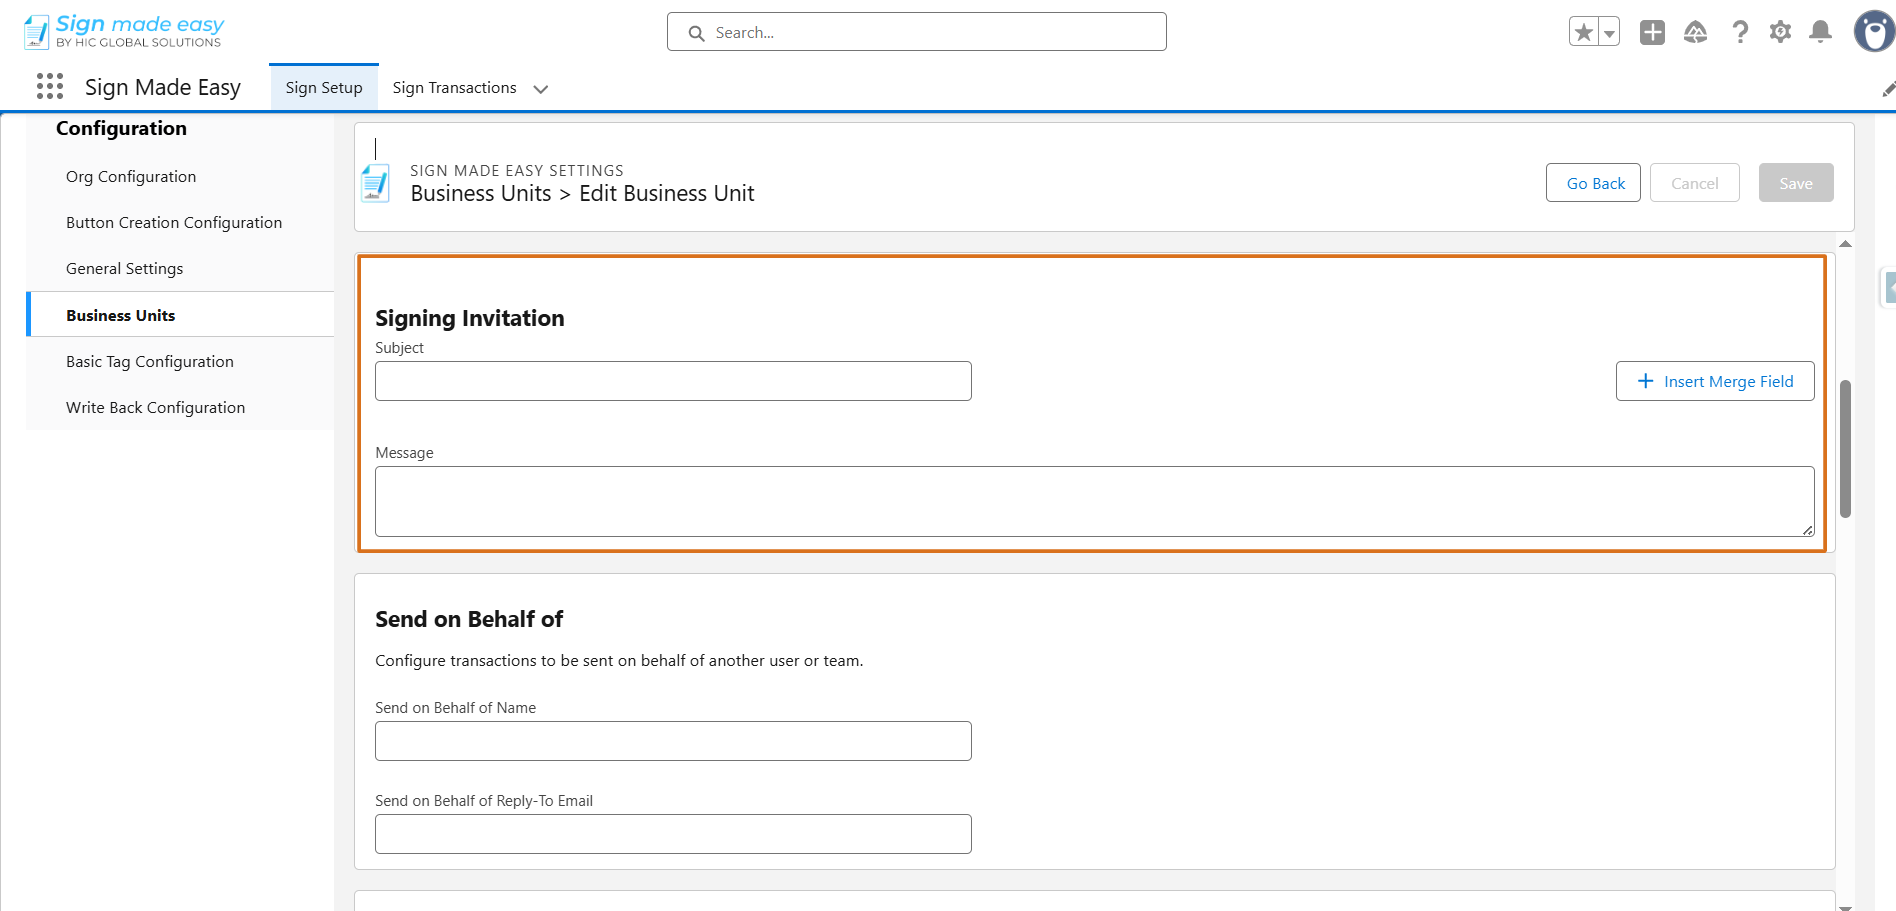
- If you want these emails to feel even more personal, you can use merge fields.
These automatically pull details such as recipient names or transaction information into your message. Simply copy the merge field syntax and paste it where you want that dynamic information to appear.
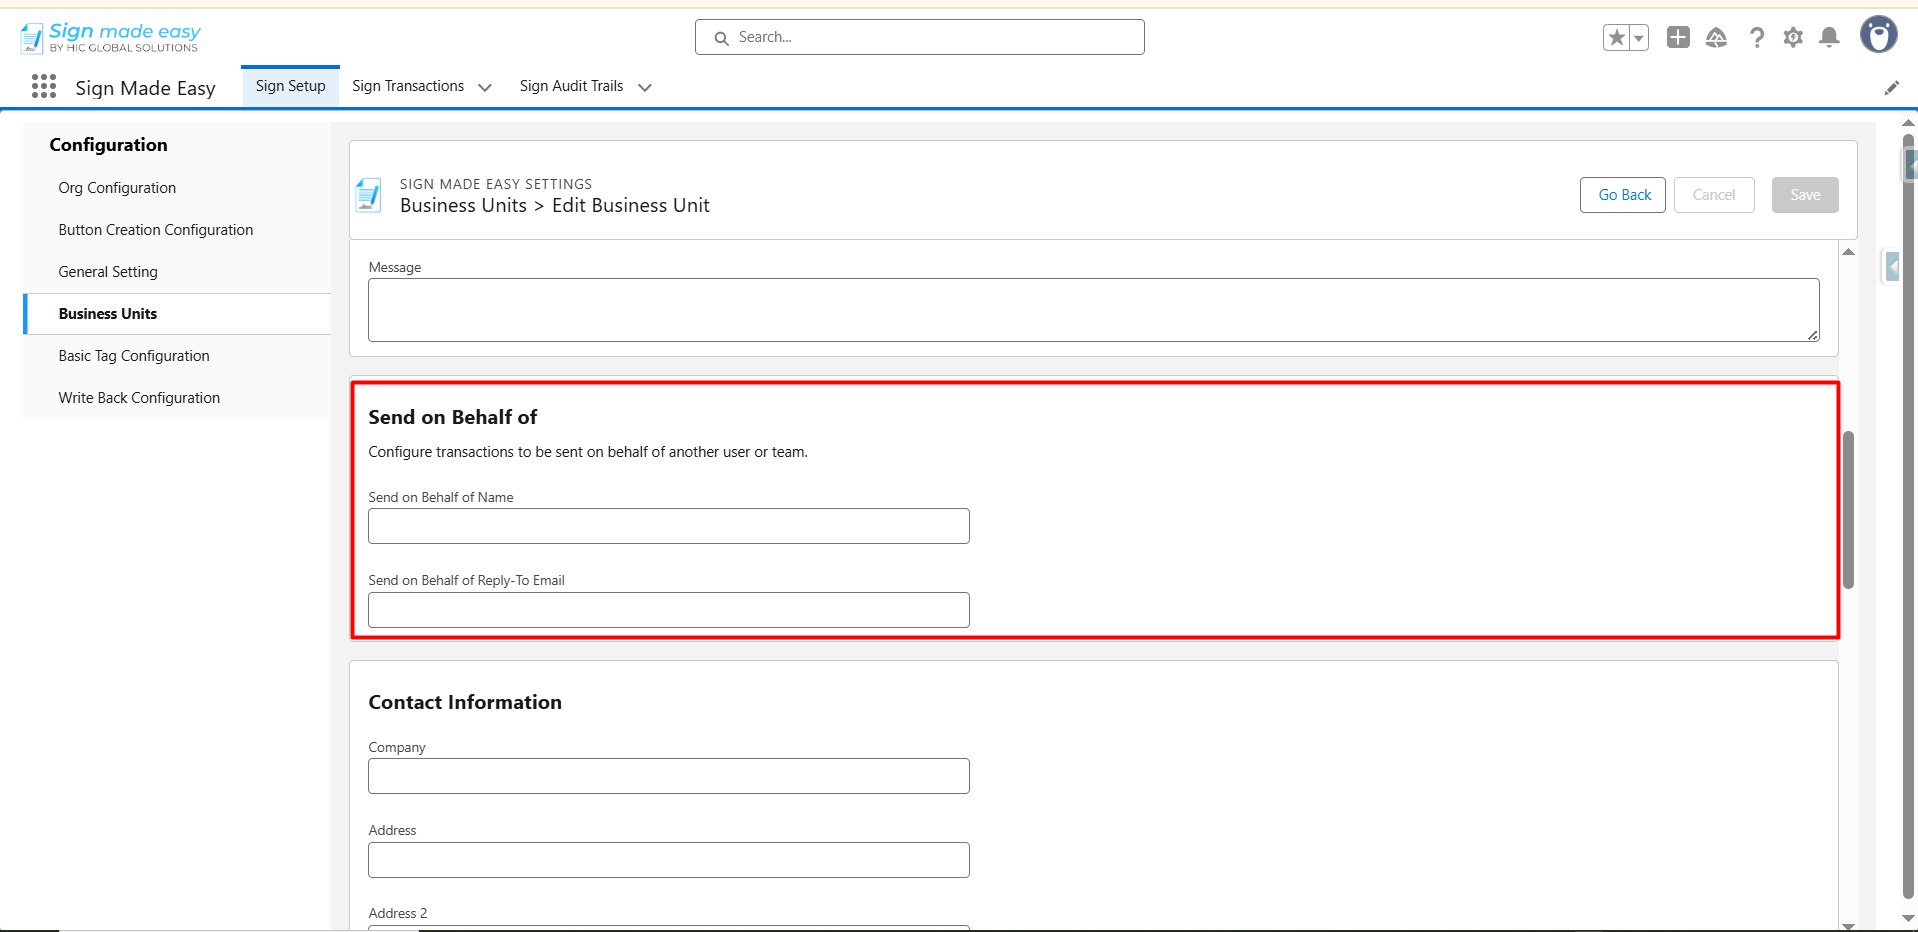
Adding Sender and Contact Information
This section helps you define who the email should appear to be from.
In the Send On Behalf Of Name field, type the name you want recipients to see as the sender. Then, add the sender’s email address in the Send On Behalf Of Email field.
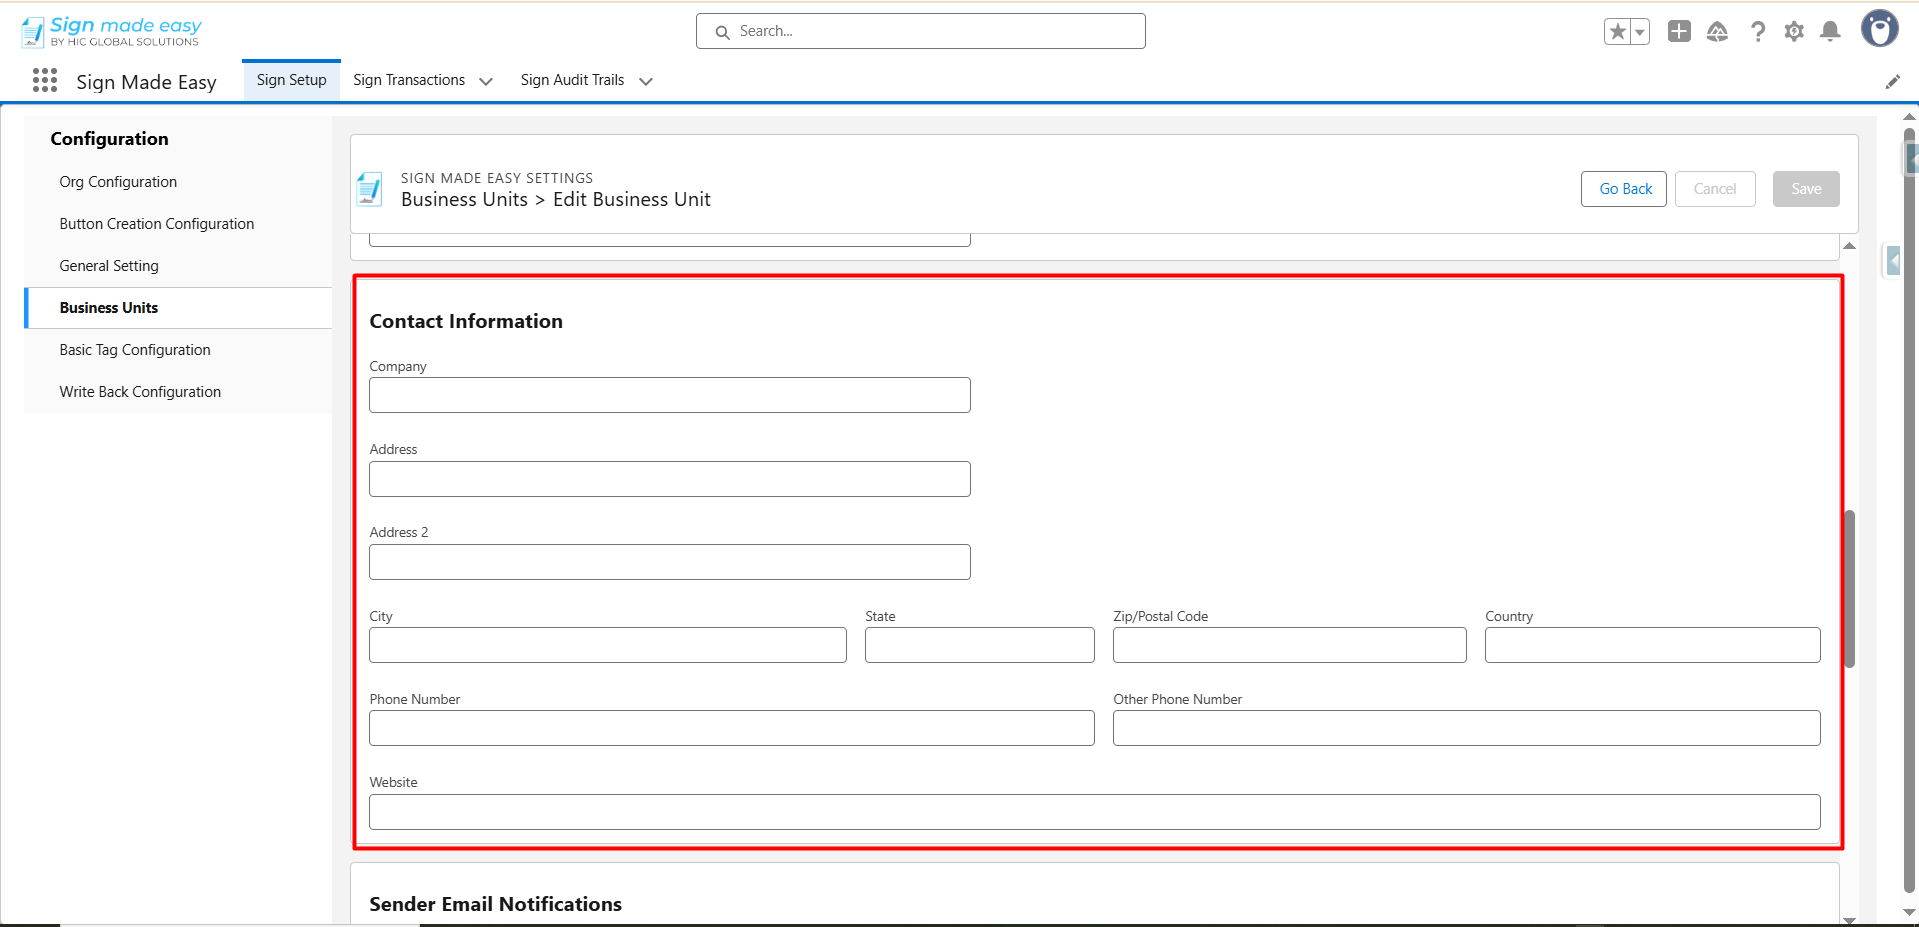
Below that, you can fill in your contact details, such as:
- Company Name
- Address
- City, State, and Zip/Postal Code
- Country
- Phone Number
- Website
These details appear at the bottom of outgoing emails.
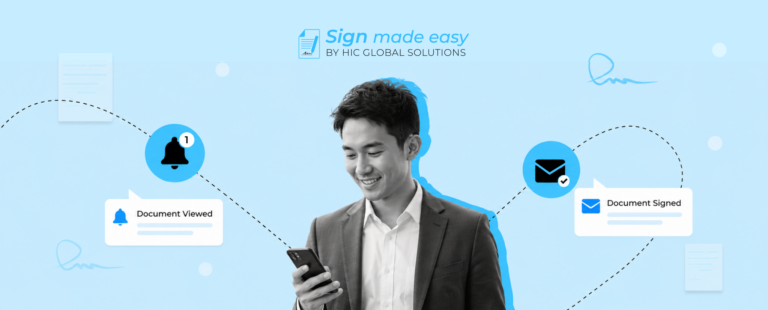
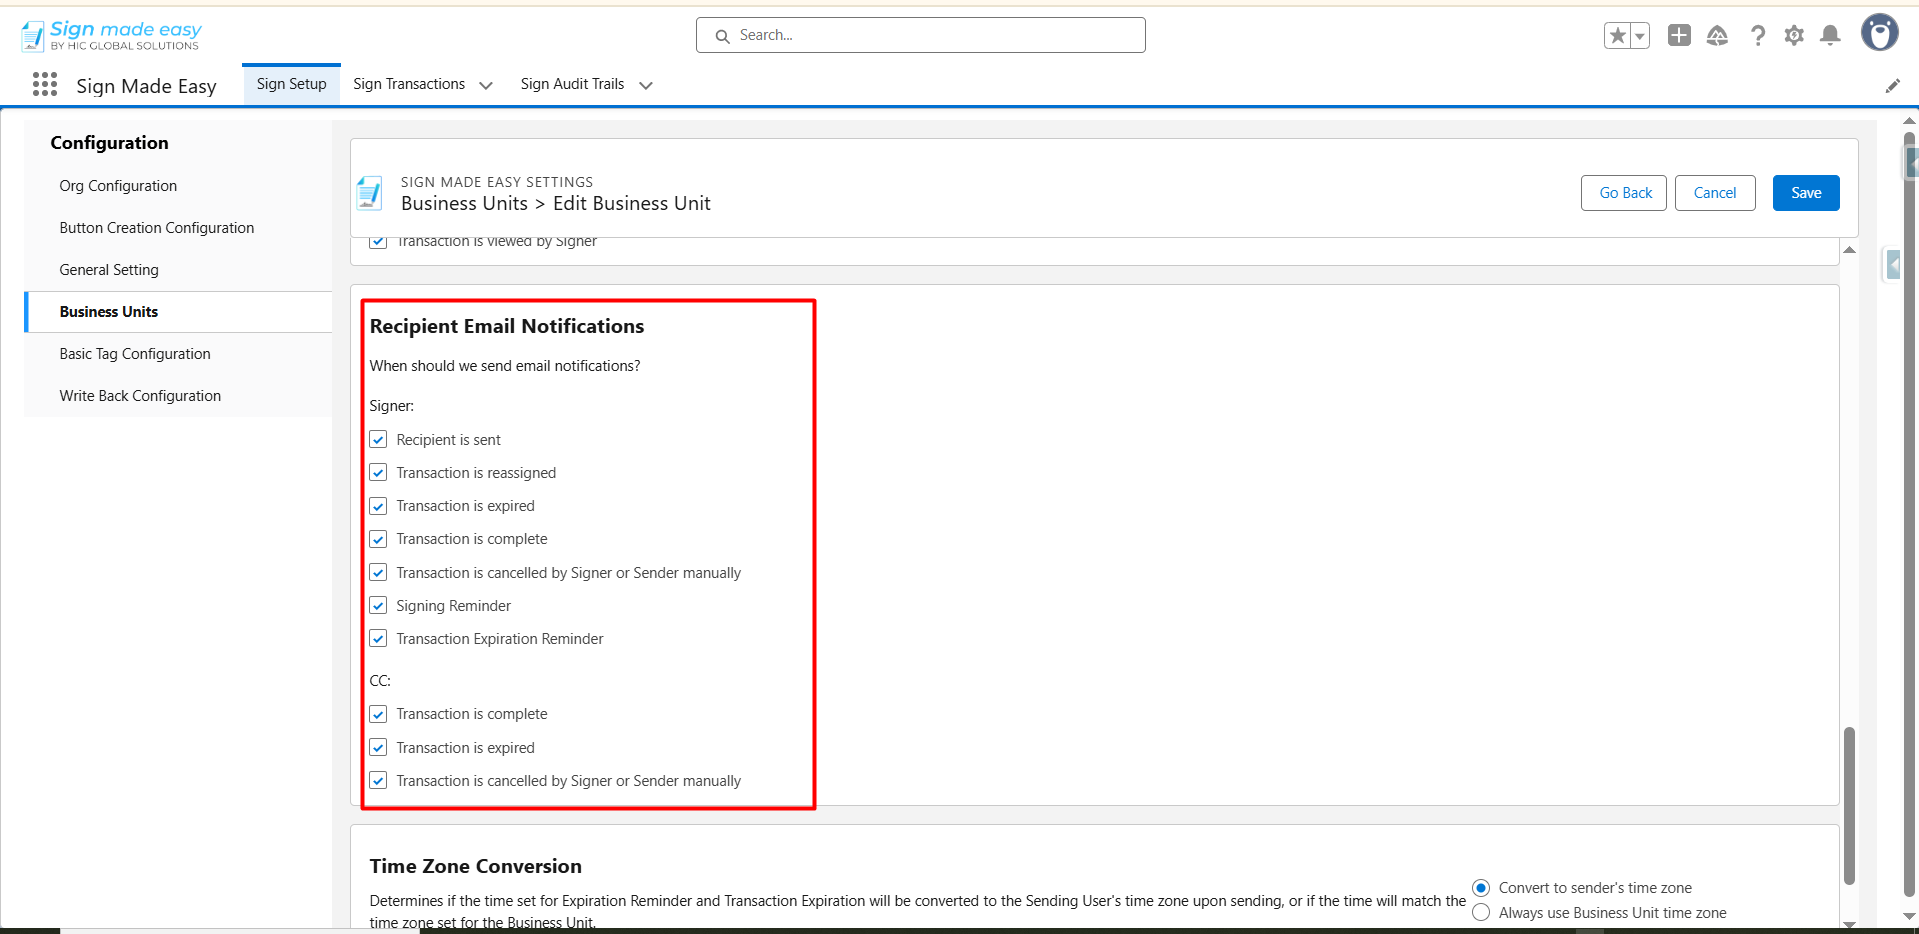
Managing Email Notifications
After adding the sender’s details, you have to move towards the email notification section. Notifications help keep everyone updated on the progress of a document. You can choose when and to whom these emails should be sent.
For Senders, notifications can be sent when:
- Transaction is sent
- Transaction is complete
- Transaction is reassigned by signer
- Transaction is expired
- Transaction is cancelled by Signer or Sender manually
- Transaction is completed by Signer
- Transaction is viewed by Signer
For Recipients/Signers, notifications can be sent when:
- Recipient is sent
- Transaction is reassigned
- Transaction is expired
- Transaction is complete
- Transaction is cancelled by the Signer or Sender manually
- Signing Reminder
- Transaction Expiration Reminder
CC, notifications can be sent when:
- Transaction is complete
- Transaction is expired
- Transaction is cancelled by Signer or Sender manually
This way, everyone stays informed without needing manual follow-ups. Now, you move further towards setting up the time zone preferences.
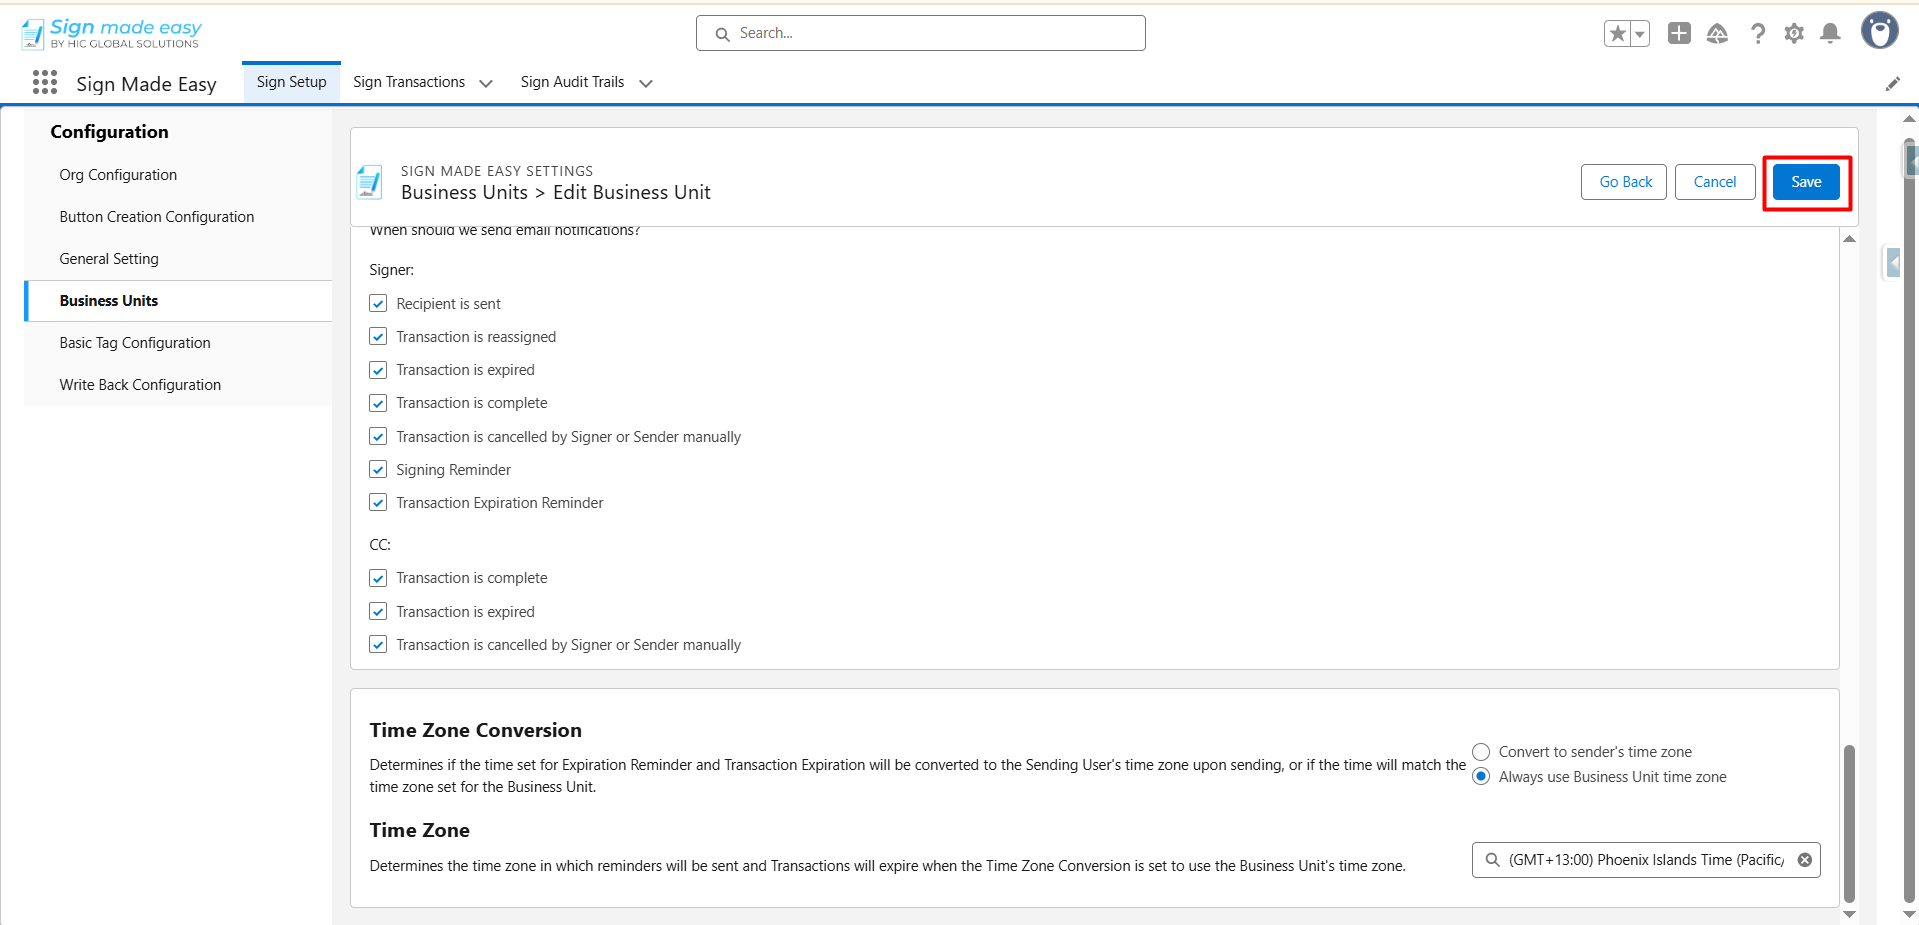
Setting Time Zone Preferences
If your organization works across regions, you can decide how time-based alerts behave.
You can choose whether reminders and expiration alerts should follow the sender’s time zone or the Business Unit’s time zone.
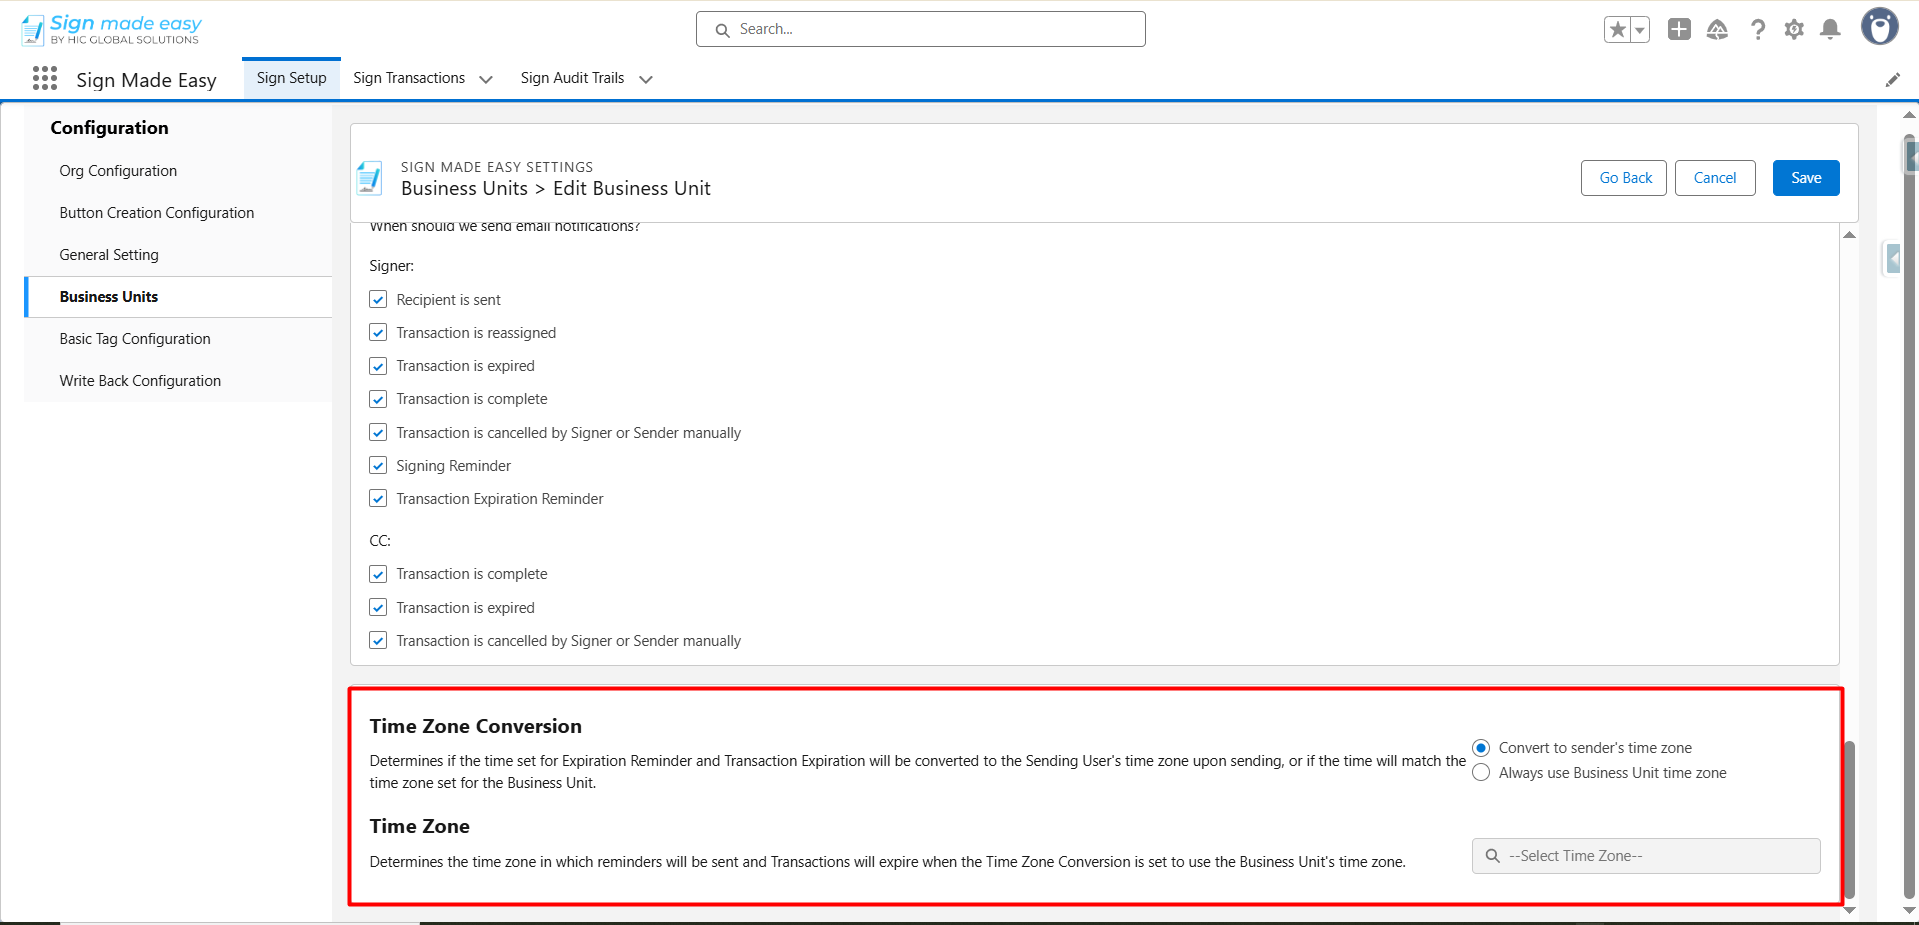
- Once you select your preferred option, click Save to apply the settings.
- When you are ready to return to the main list, just click on the Business Unit tab again.
Now you have successfully created your Business Unit in Salesforce using Sign Made Easy. Furthermore, we will explore the easy steps of sending a document for eSign with the business unit we have created.
Sending a Document Using a Business Unit
Now that your Business Unit is ready, let’s use it while sending a document.
- First, you have to create an SME (Sign Made Easy) button; if you haven’t created one yet, click here to get clear instructions.
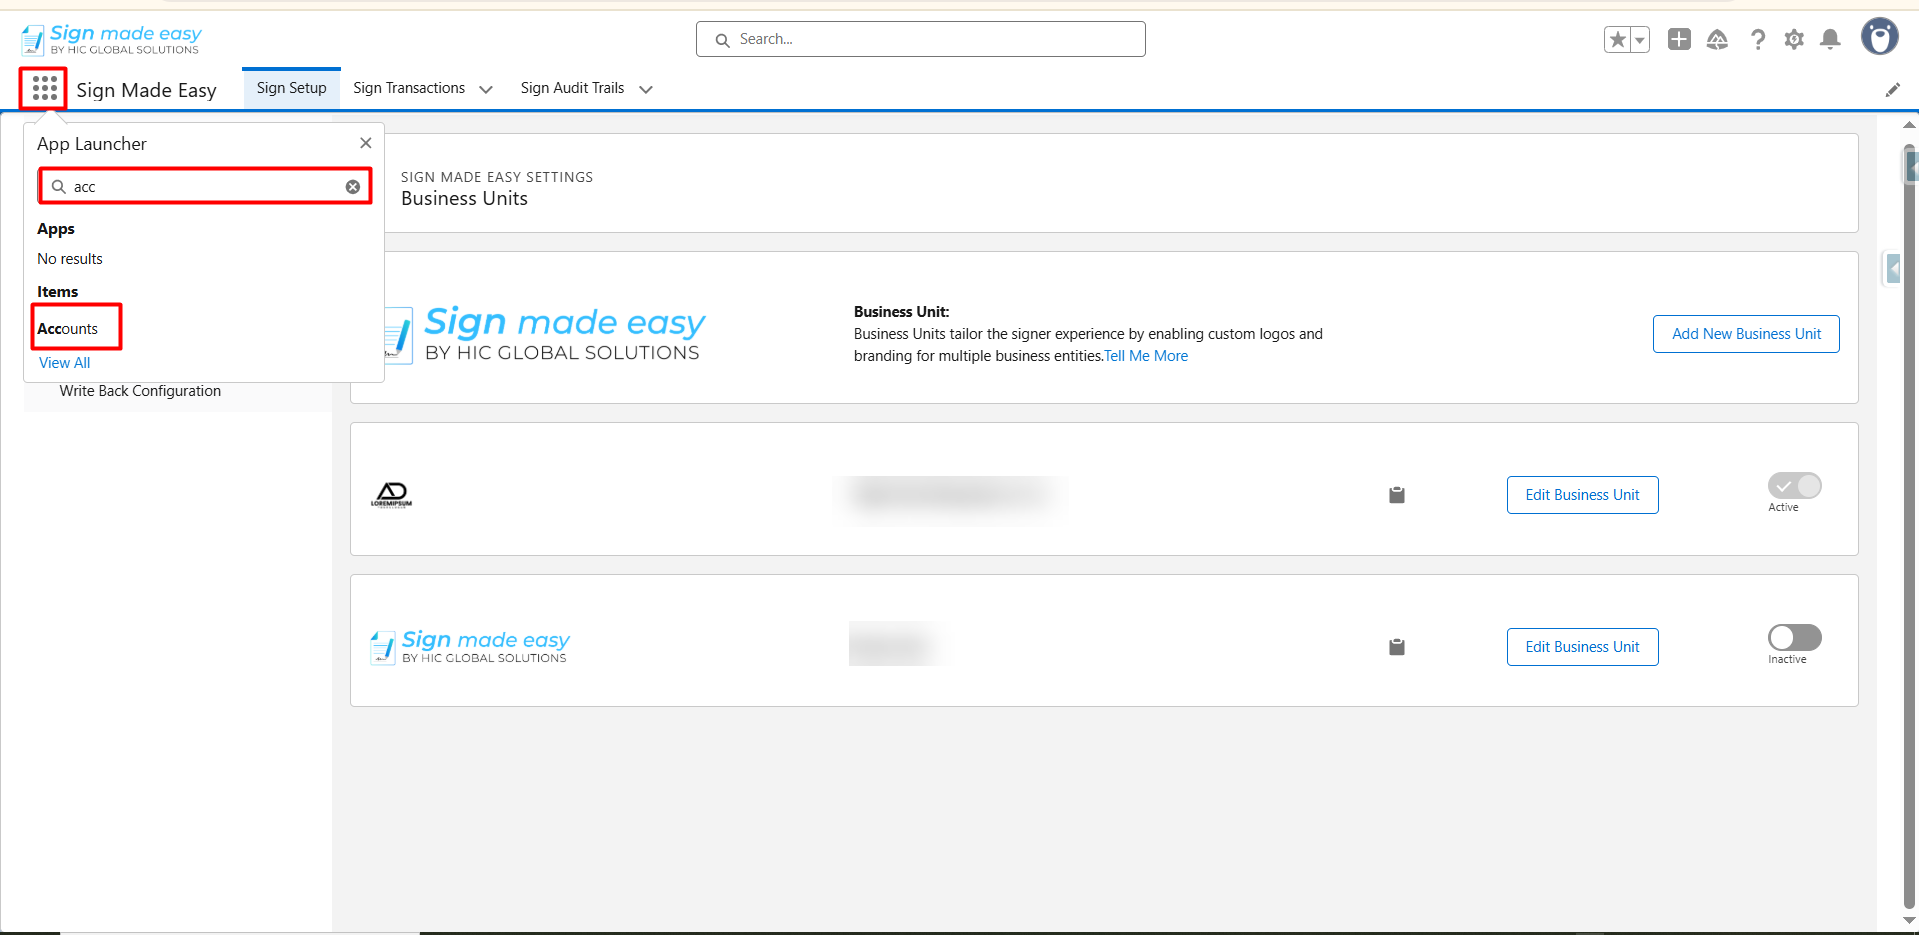
- Now, open the App Launcher, and search for the object like Account, Asset, Opportunity, or any other.
- After clicking on the object, you will navigate to the record page of that object. Now select the record from which you want to initiate the SME process.
- If there is no record, create a new record by clicking on the New button. Then fill out the details and tap the Save button.
- Thus, open the record you have created or already have, followed by clicking the button you created.
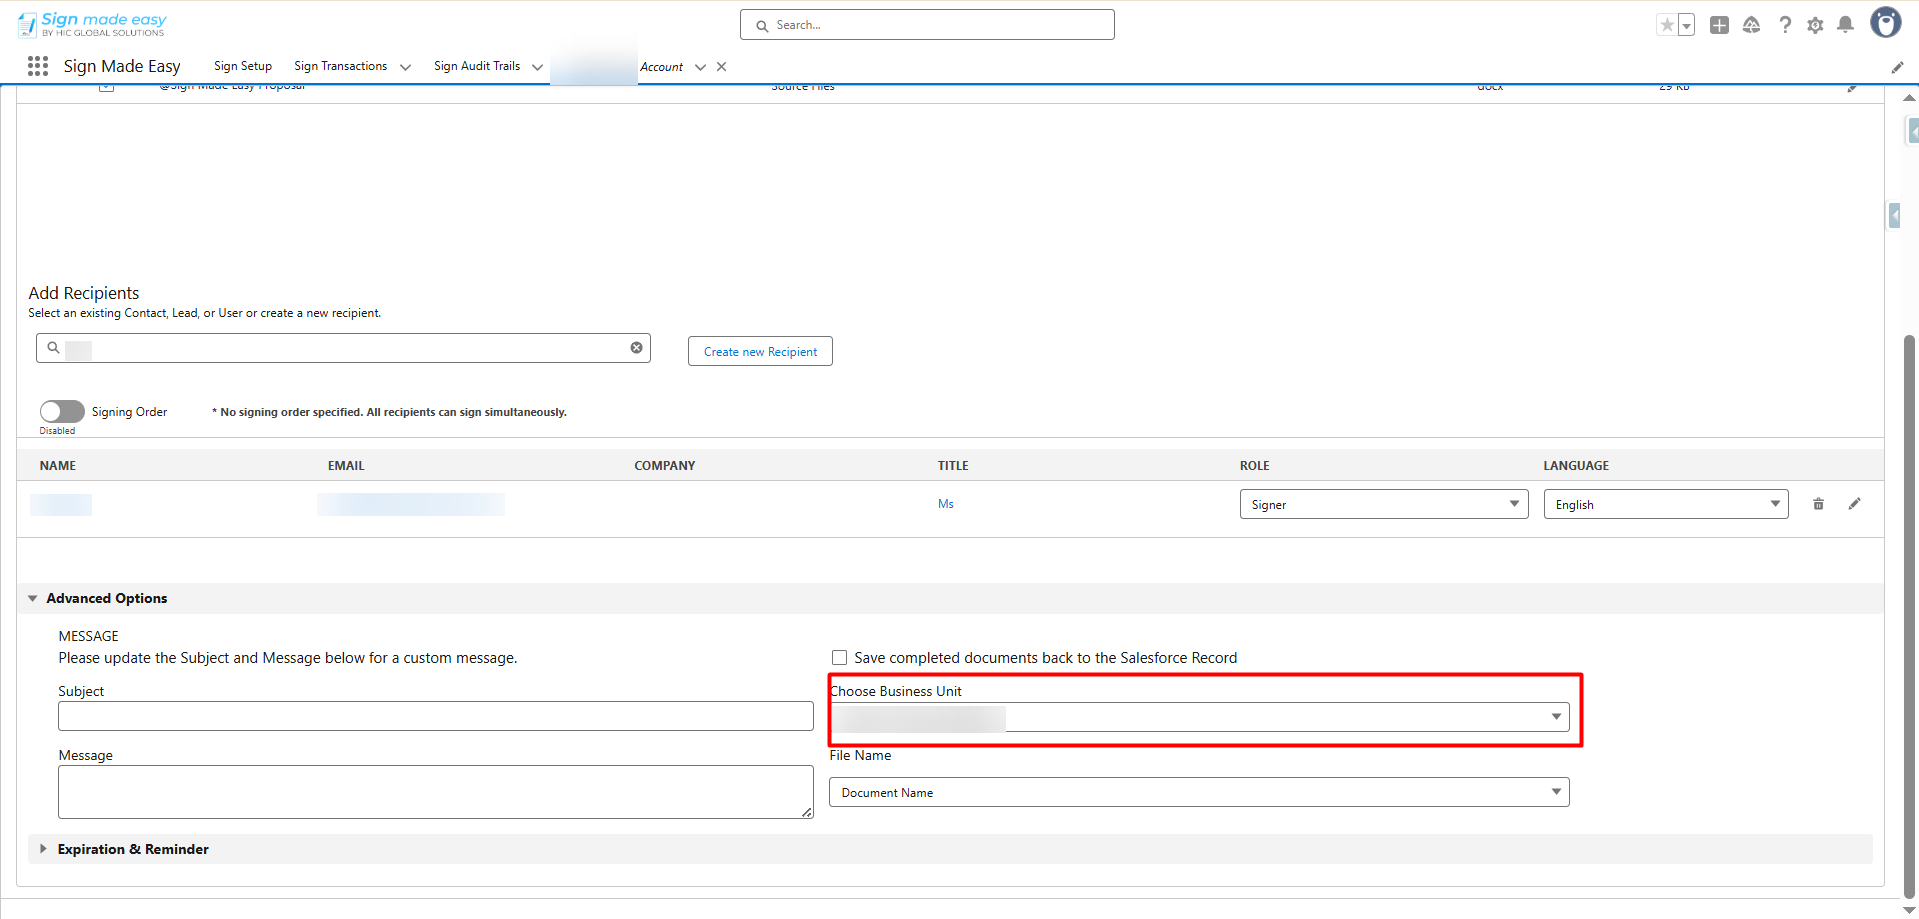
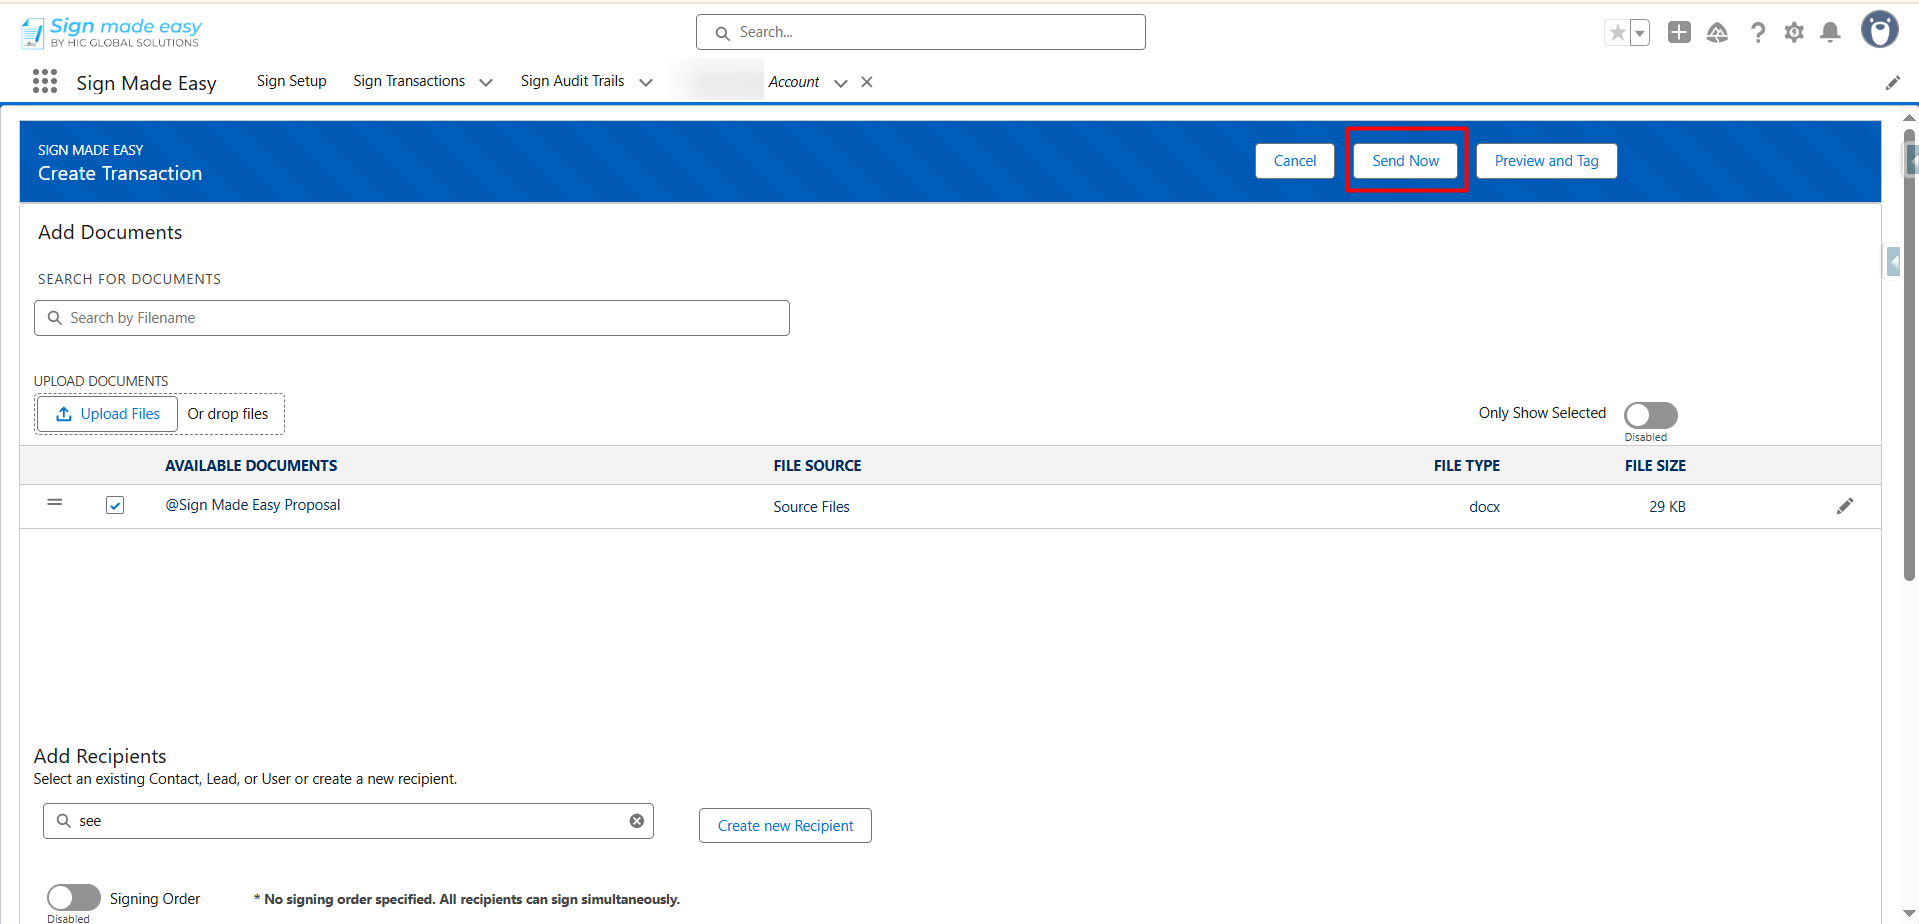
- Now Create Transaction interface will appear. Here, you have to add the documents you want to send for eSignature and fill out the recipient information. A maximum of three documents and up to five recipients can be added to each transaction.
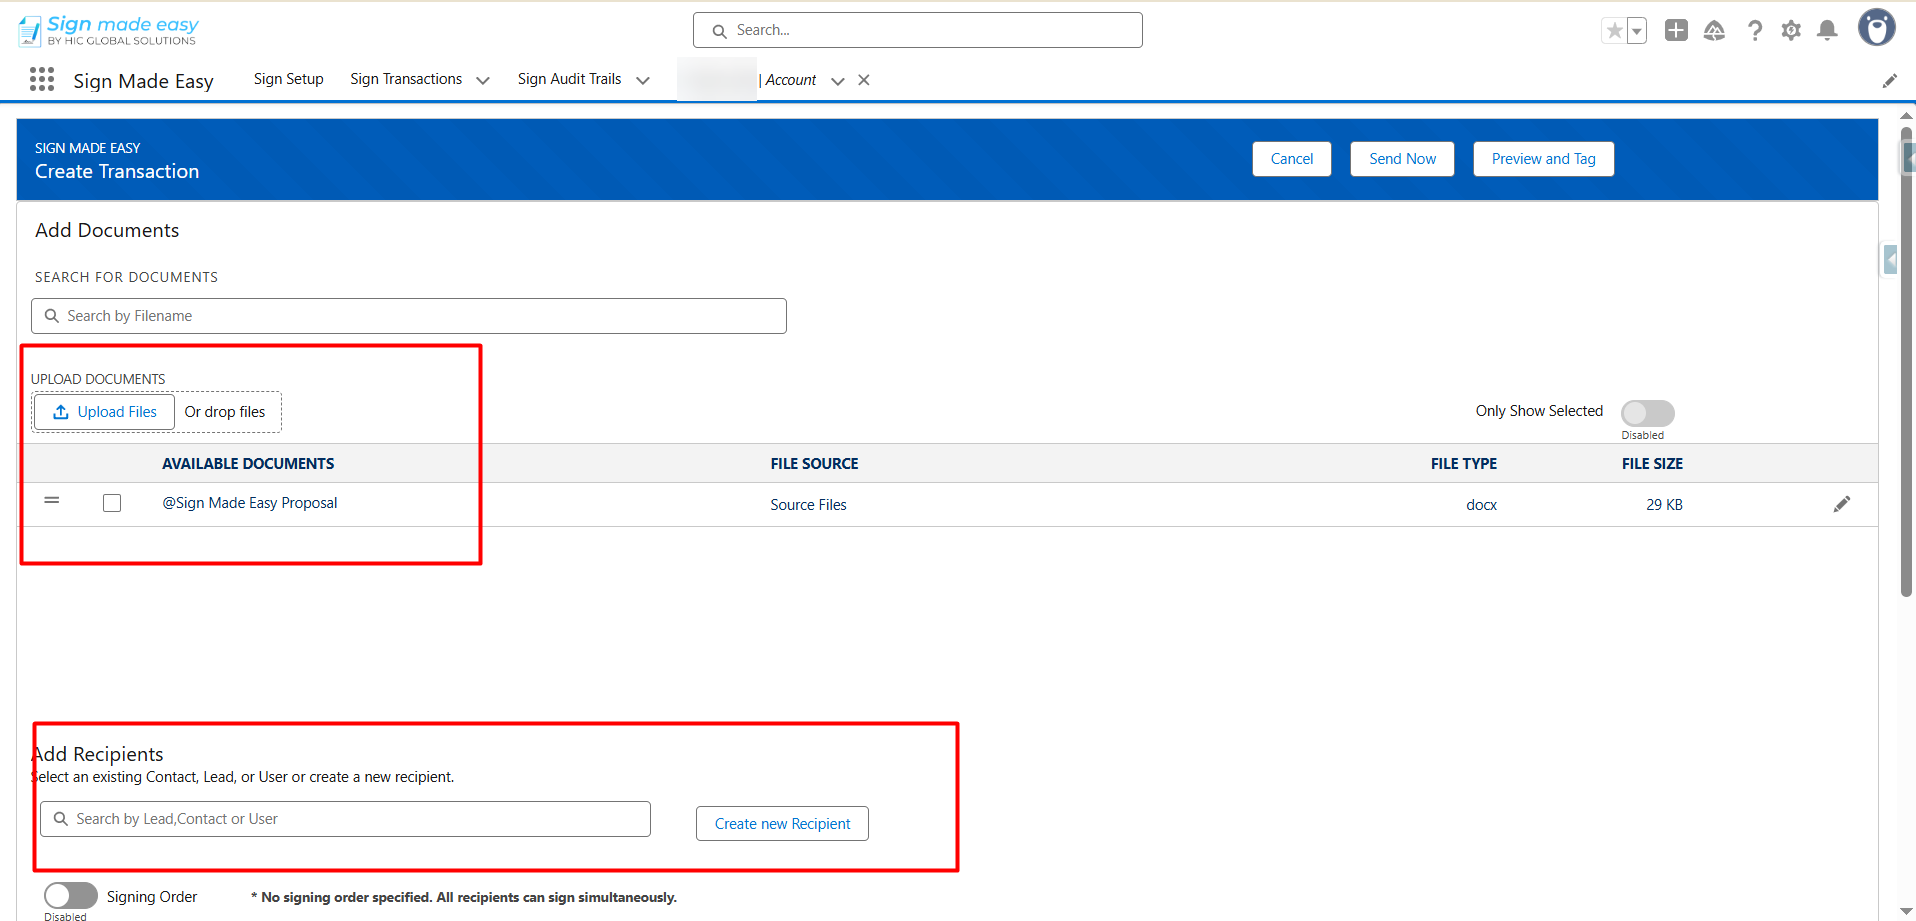
- Now, from the Choose Business Unit picklists, you can select any Business Unit.
- Furthermore, click on the Send Now button to send the email directly to the recipient.
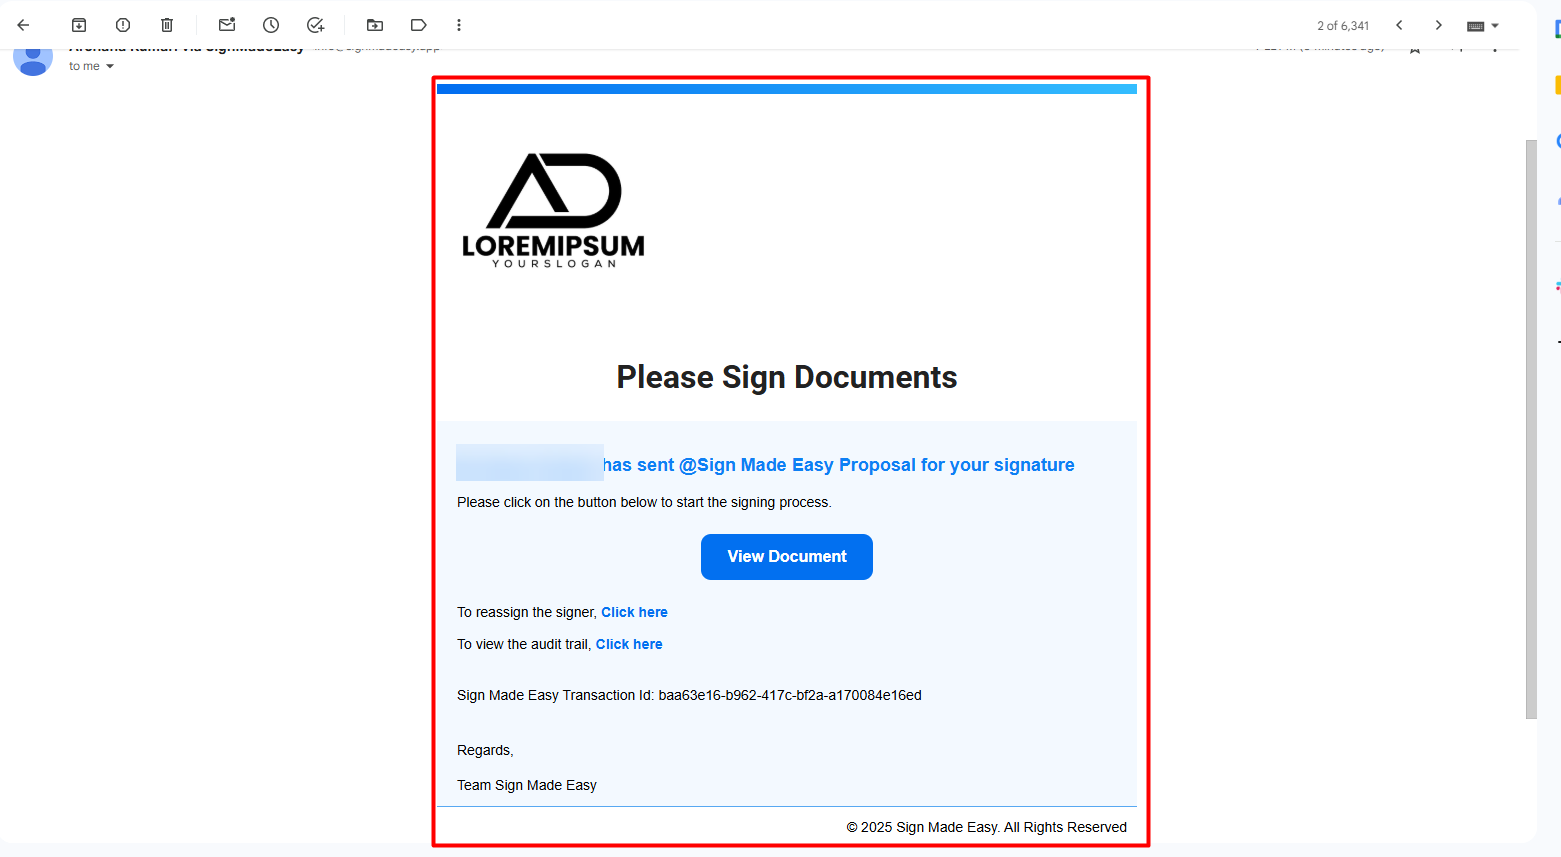
So, your recipients will receive an email asking them to review and sign the document.
- They need to click View Document and check the details.
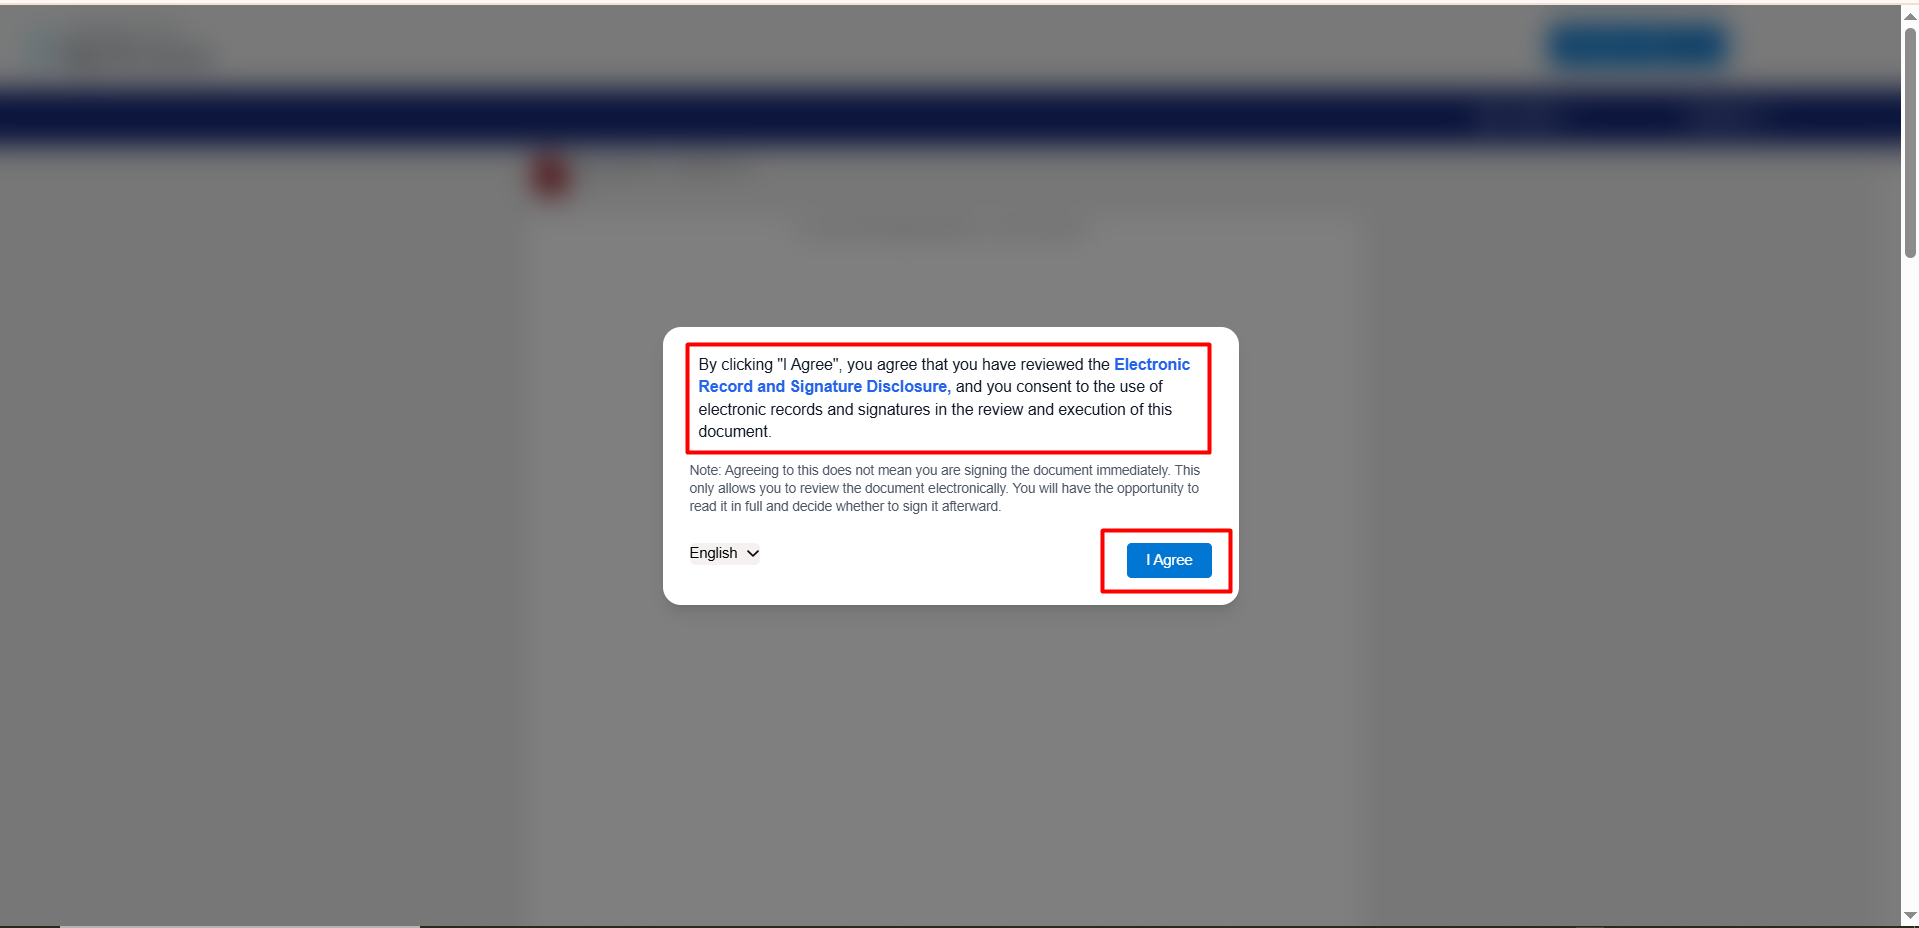
- Next step, you have to click on “I Agree” to confirm that you’ve read and understood the Sign Made Easy terms and conditions.
You also agree to use electronic records and signatures to review and sign this document.
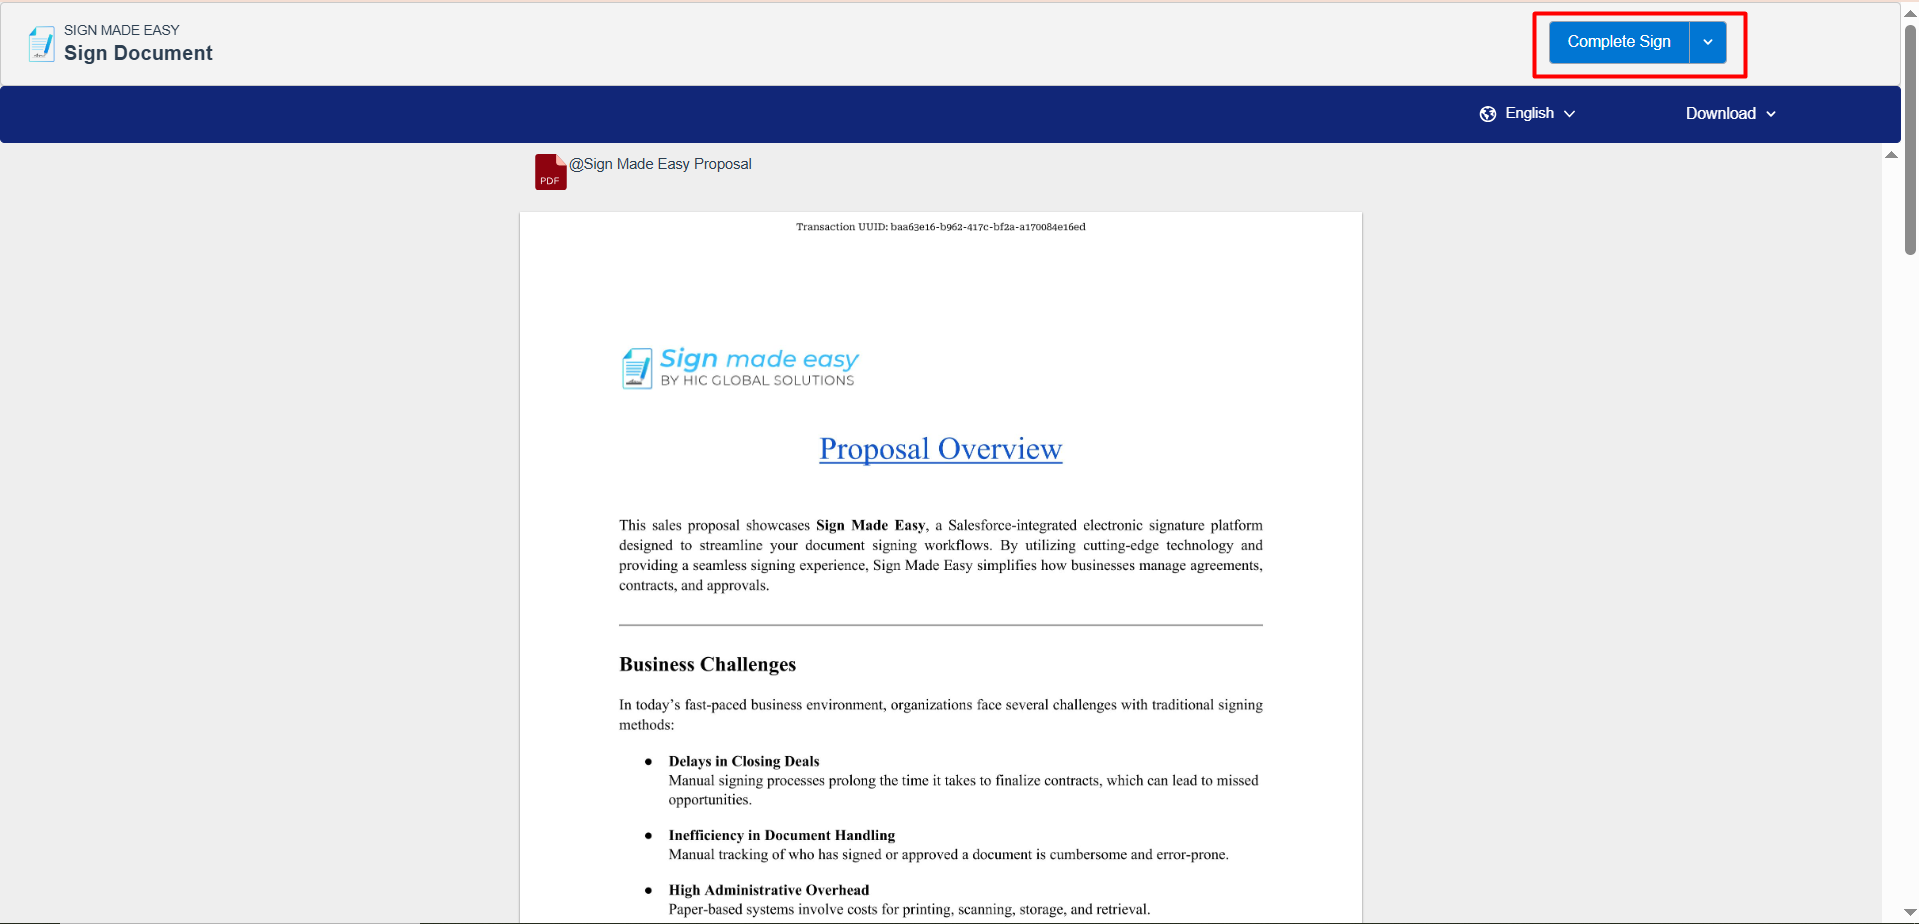
- If you’ve added fillable tags, they can complete those directly in the document. When done, they simply click Complete Sign, and the process is finished.
After everyone signs, the document status automatically updates to Completed, and confirmation emails are sent to all parties. You can also open the Audit Trail link anytime to view all actions related to that transaction.
Thus, these are the simple and quick steps you have to follow to create a Business Unit in Sign Made Easy and send a document to the recipient using that Business Unit.
Final Thoughts
Sign Made Easy brings simplicity and control to your eSignature process right inside Salesforce. Without switching to another app, you can add customization to your email. With its Business Unit feature, you no longer have to repeat the same setup for every transaction – everything from branding to sender details stays consistent and professional.
This guide explains how to streamline the process of adding a logo and multiple functions with audit trail control in your eSign document, utilizing Sign Made Easy, powered by Adobe Approved Trust List (AATL). If you also want to personalize your brand touch in every signature – from logo to business-specific details, this solution is for you.
With Sign Made Easy’s Business Unit feature, you can craft documents that truly reflect your organization’s identity while maintaining compliance and efficiency. Get ready to turn every eSign into a professional, on-brand experience that speaks volumes about your business.
Ensure Accurate Signatures Across Global Time Zones