






Adding recipients manually every time you send a document for signatures can take extra time and often leads to mistakes. When working with multiple records, finding and entering the right recipient details becomes a repetitive task.
With Salesforce eSignature, you can simplify this process by pulling recipient information directly from Salesforce records. Using the Record Detail Recipient option in a Sign Template helps you automate recipient selection and makes document sending faster and easier.
Here are the steps to configure a Record Detail Recipient in your Sign Template.
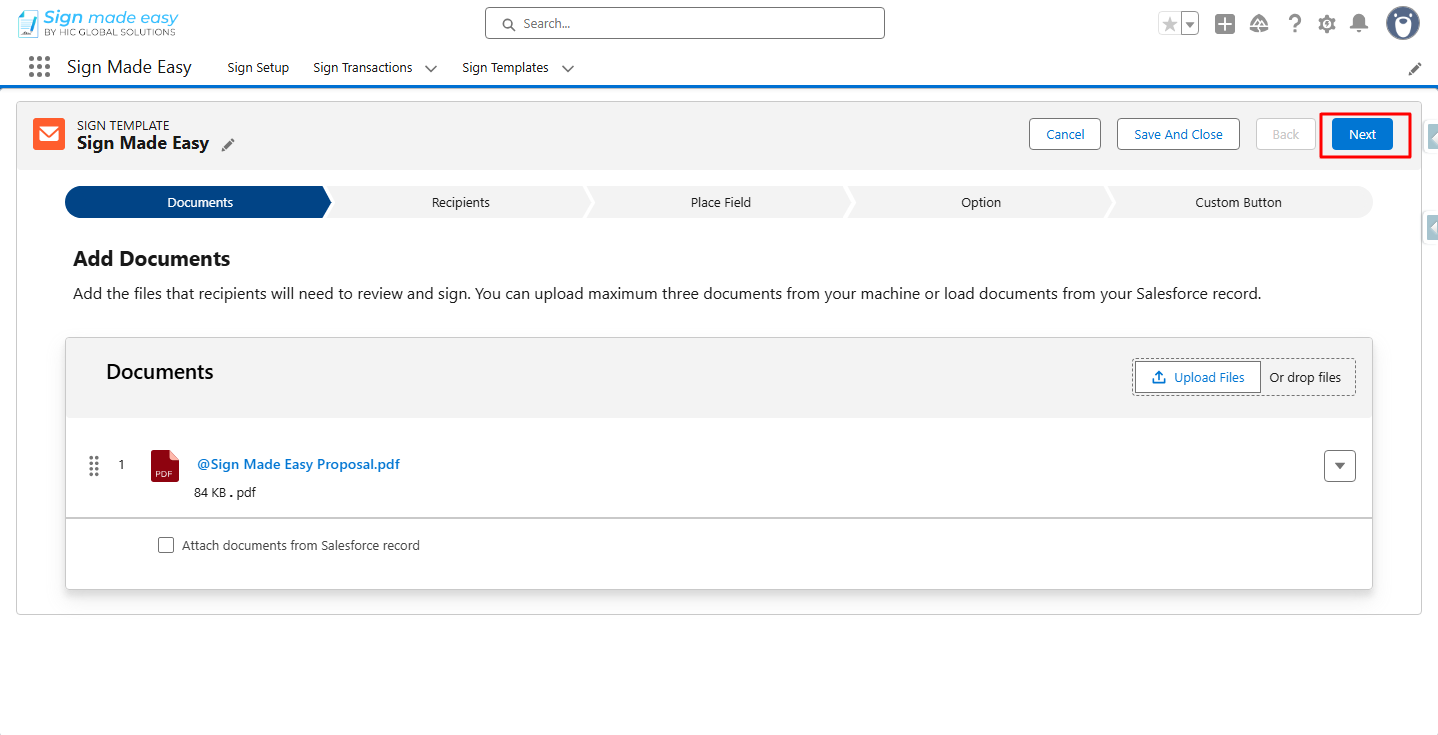
Step 1: Navigate to the App Launcher and open the Sign Template tab. Create a new Sign Template, upload the required document, and click Next to continue.
Step 2: Click the Add Recipient button to add a recipient to your Sign Template.
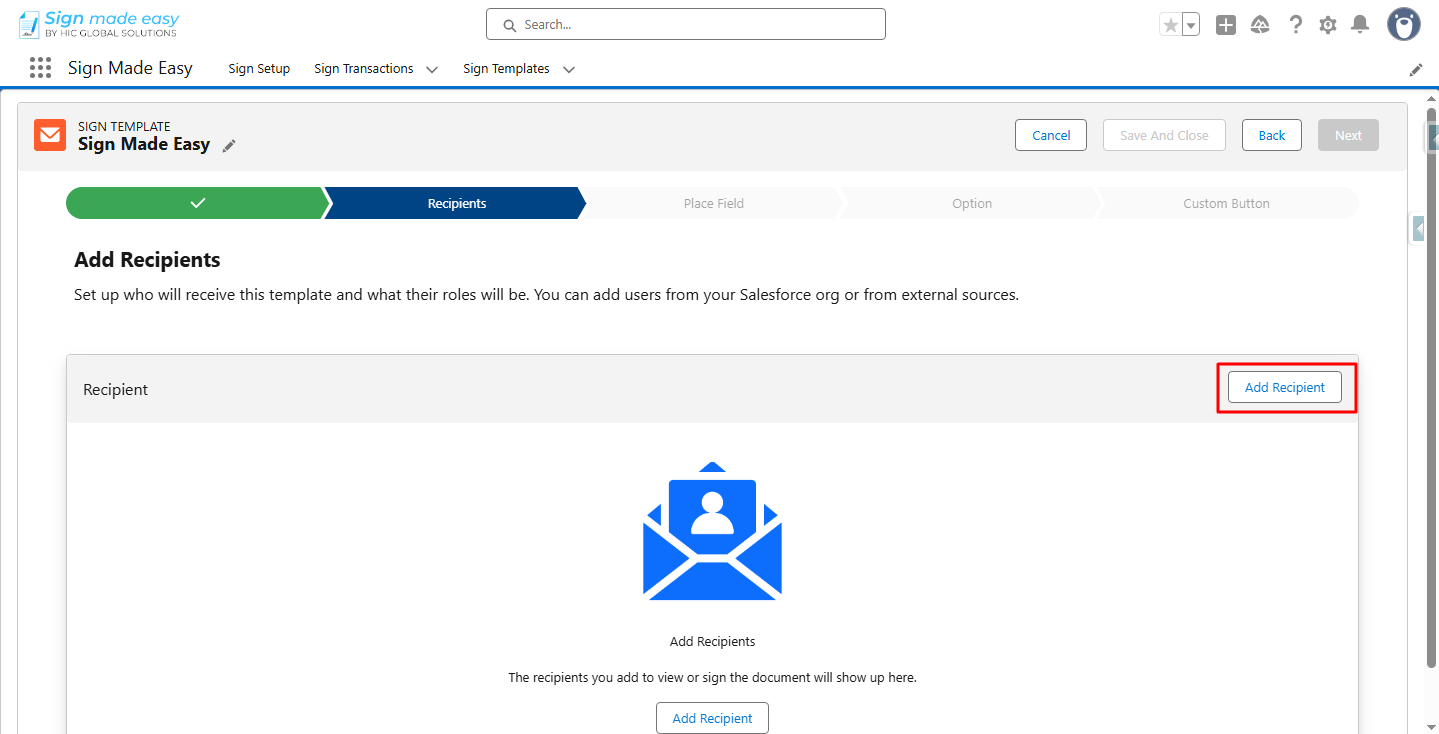
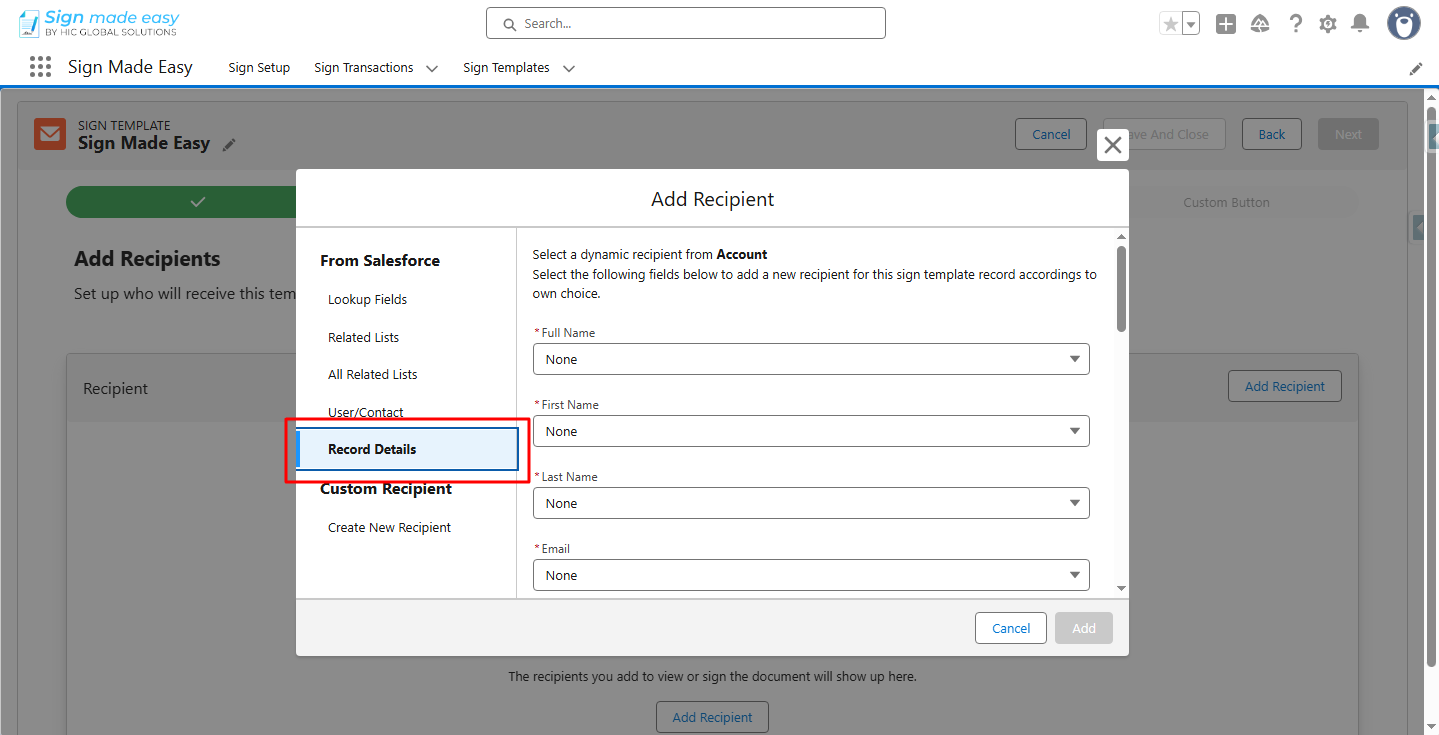
Note: The Record Details option allows you to select a recipient directly from the Salesforce record of the object where the Sign Template button is created.
Step 3: Select the Record Details option under From Salesforce and choose the required field values to configure the recipient based on your business needs.
Step 4: Scroll down and enter the recipient details in the Full Name (or First Name and Last Name) and Email Address fields.
These fields are required, and once the information is added, the Add button will become active. Click Add to save the recipient.
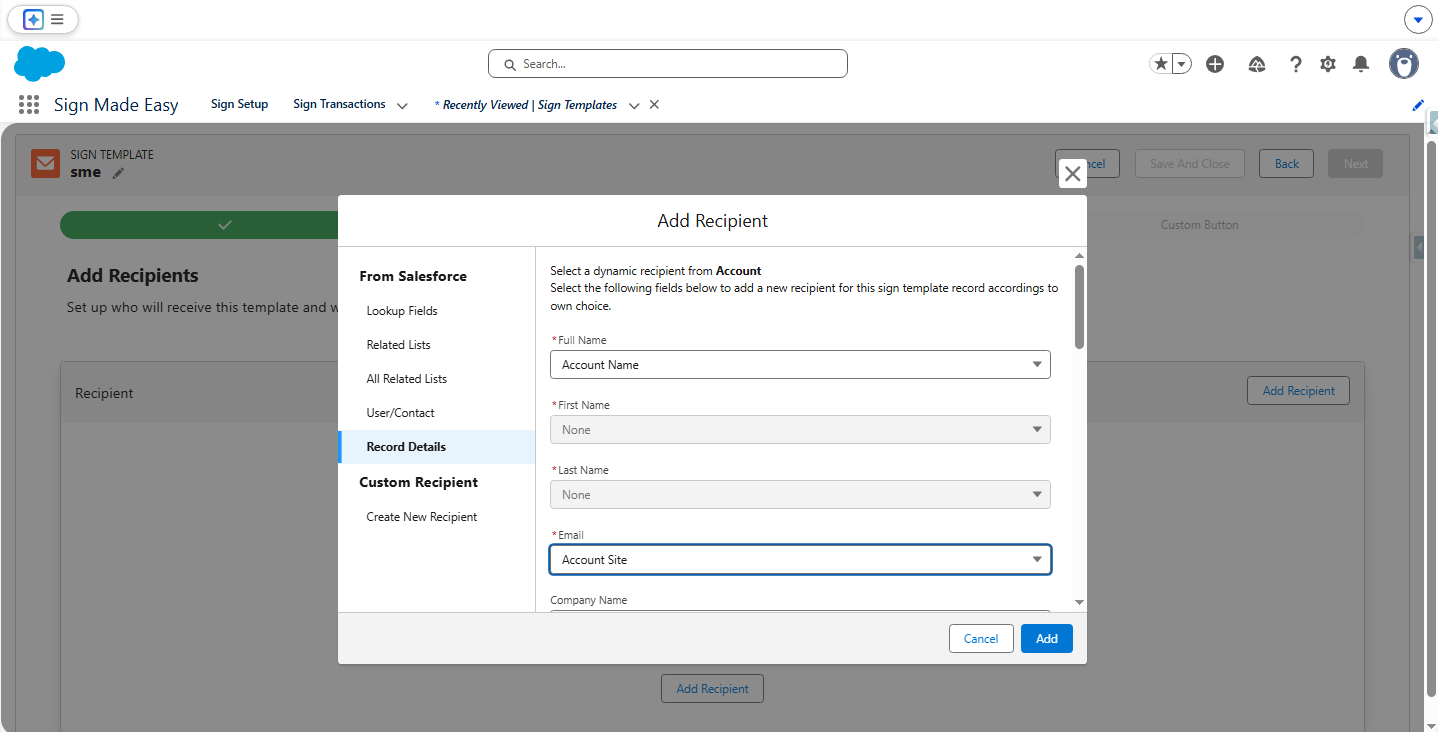
Note: Select the Assign Form Field checkbox if you want the detected form fields from the uploaded PDF to be automatically assigned to this recipient. If you do not want to assign fields automatically, leave this option unchecked.
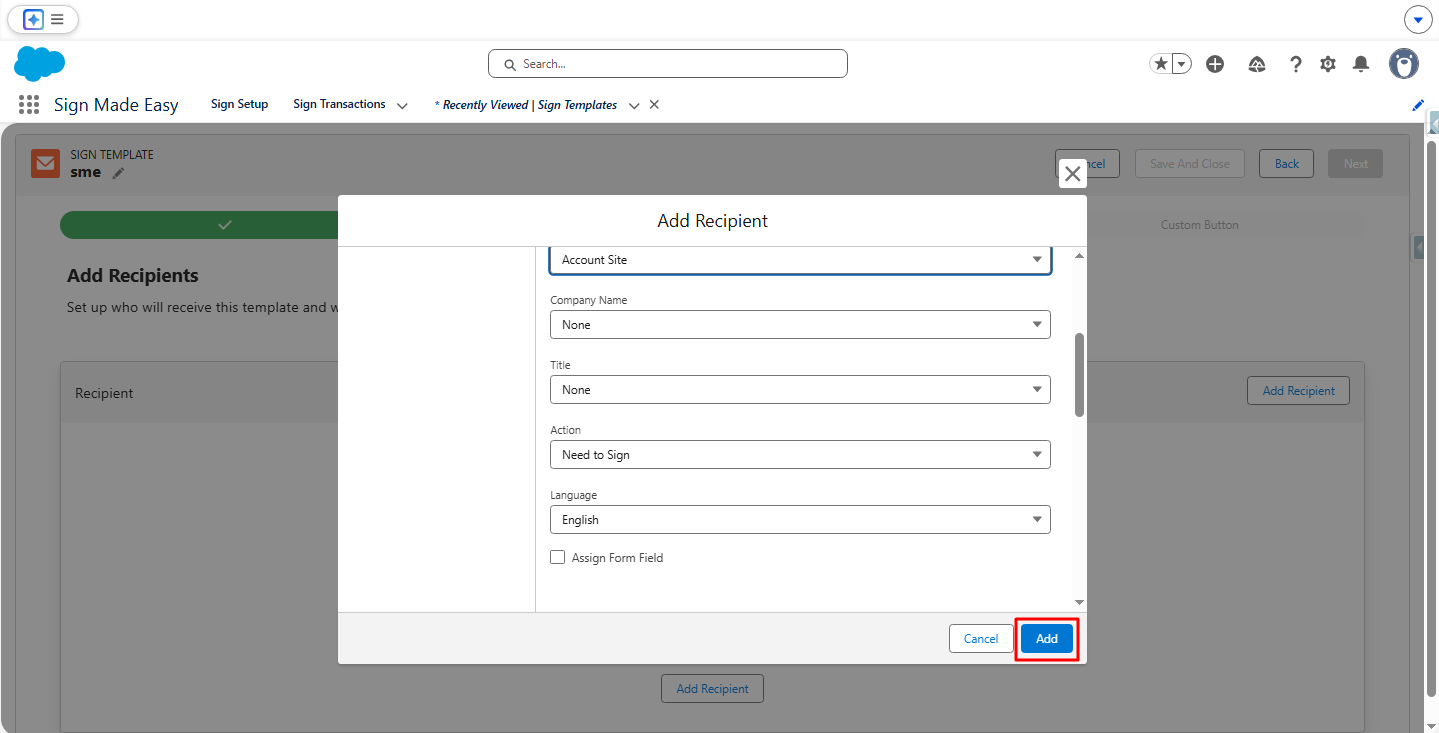
The Record Detail Recipient is now added successfully. If you need to add more Record Detail Recipients, simply repeat the same process from Step 2 to Step 4.
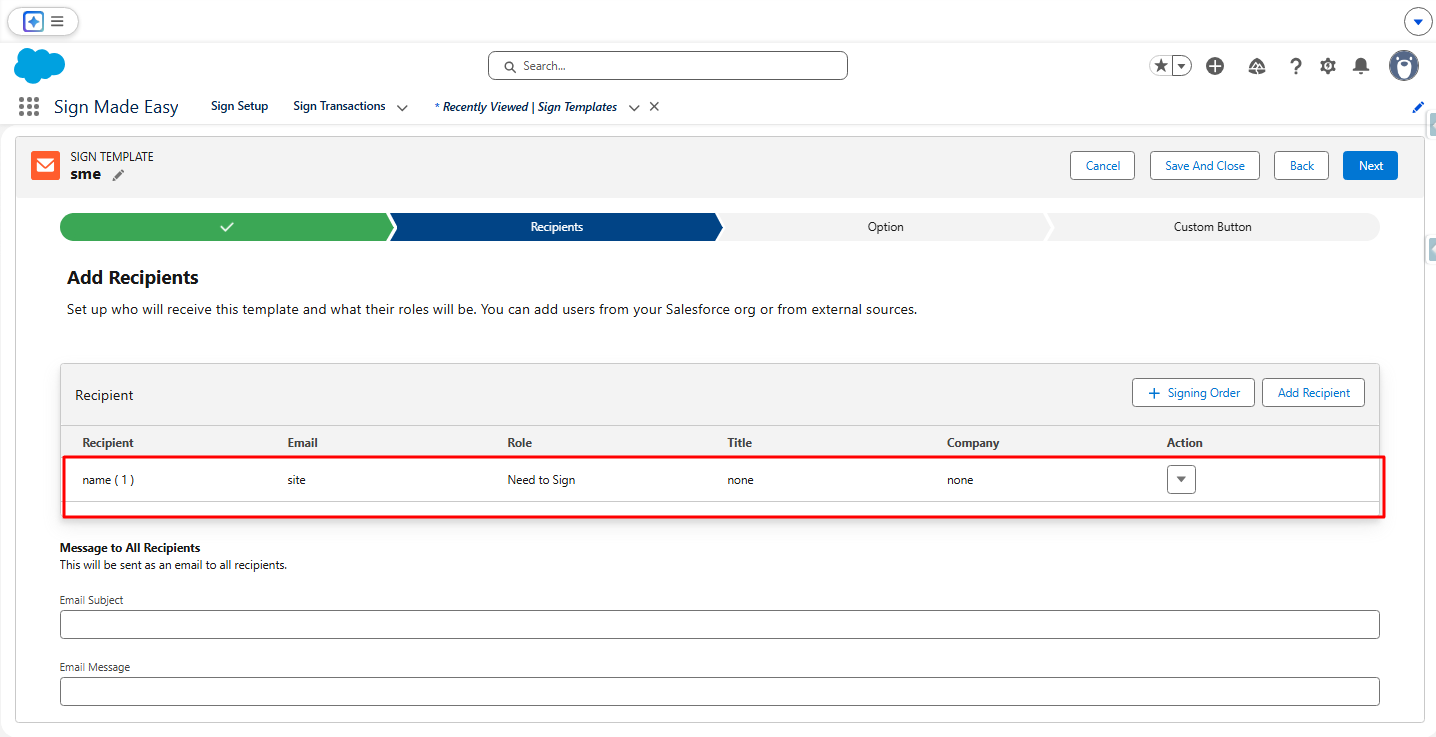
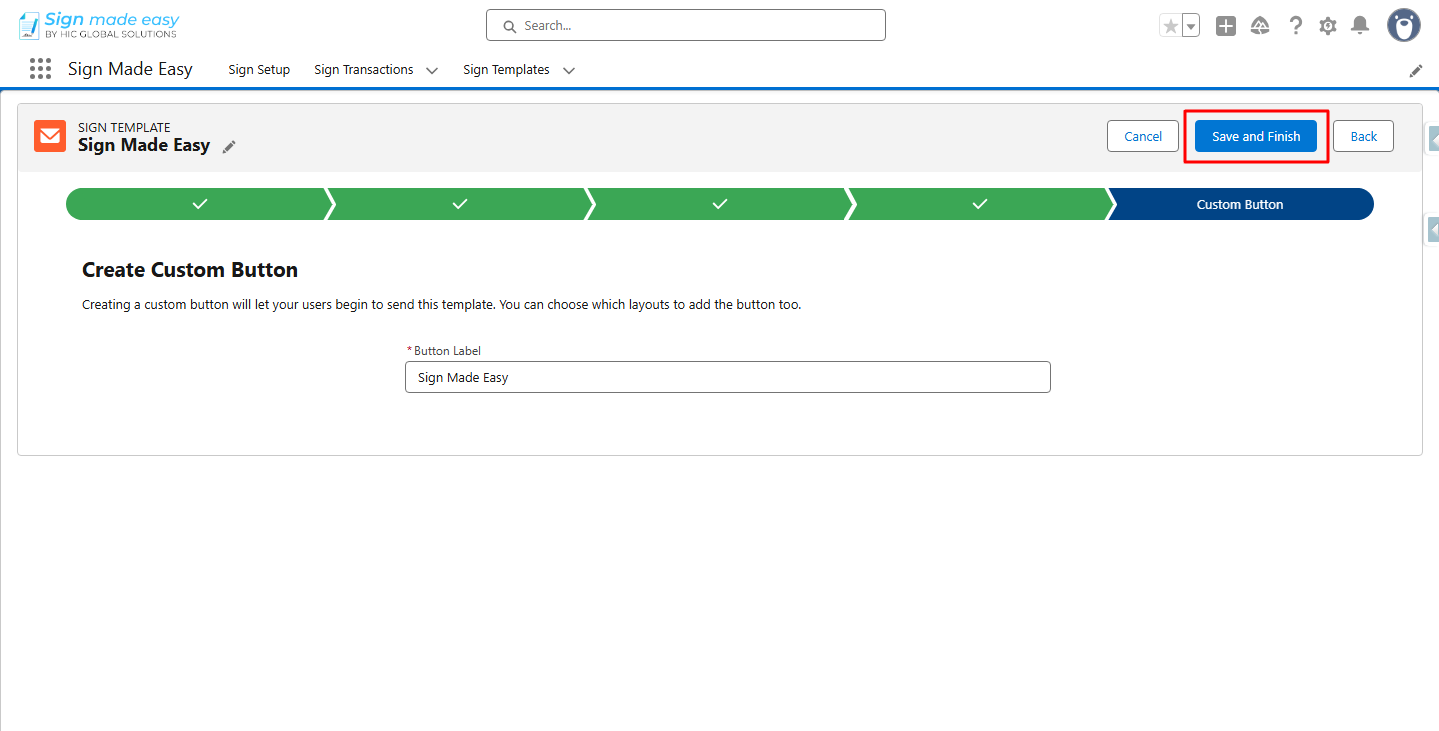
Step 5: Click the Custom Button option to configure the button for your Sign Template.
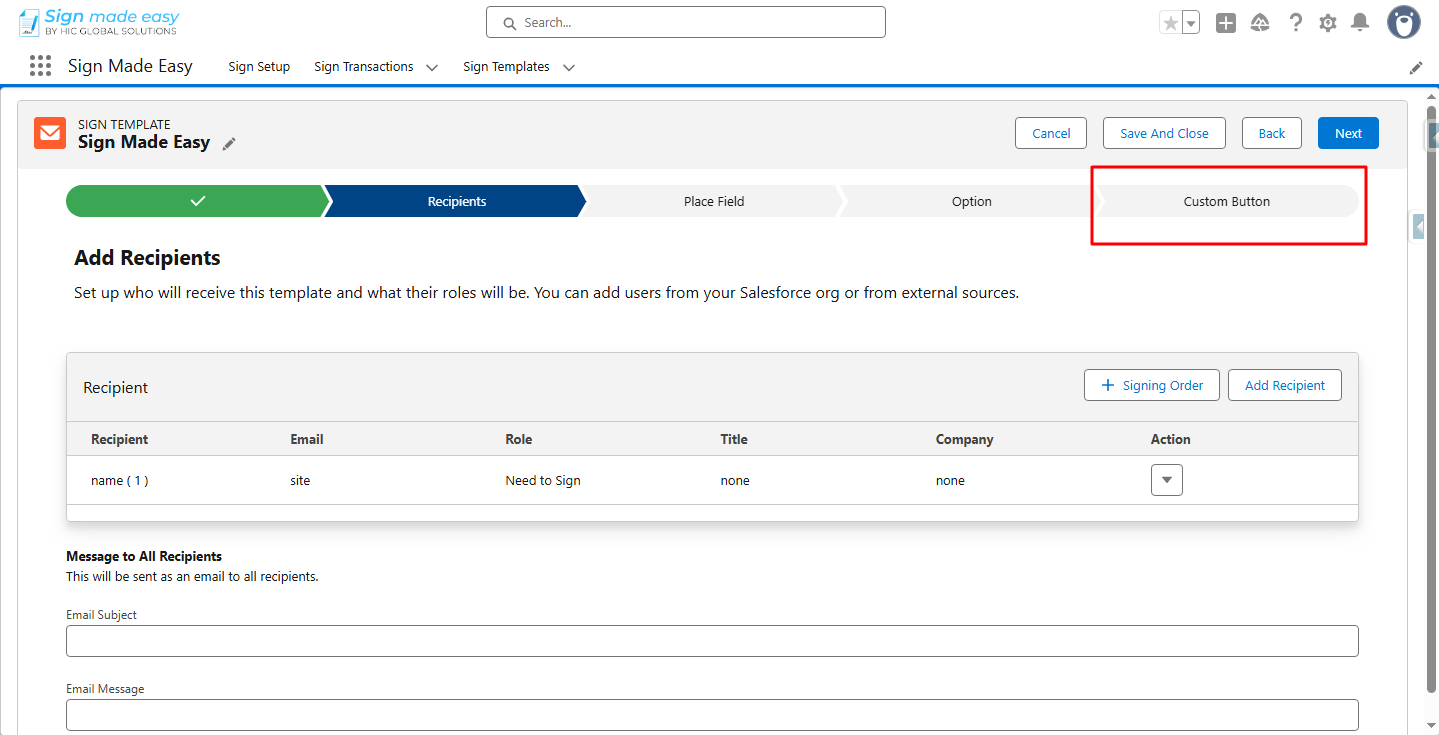
The Sign Template name will automatically appear in the Button Label field.
Step 6: Click Save And Finish to complete the Sign Template setup.
Step 7: Add the created button to the Page Layout of the Salesforce object where the Sign Template was created.
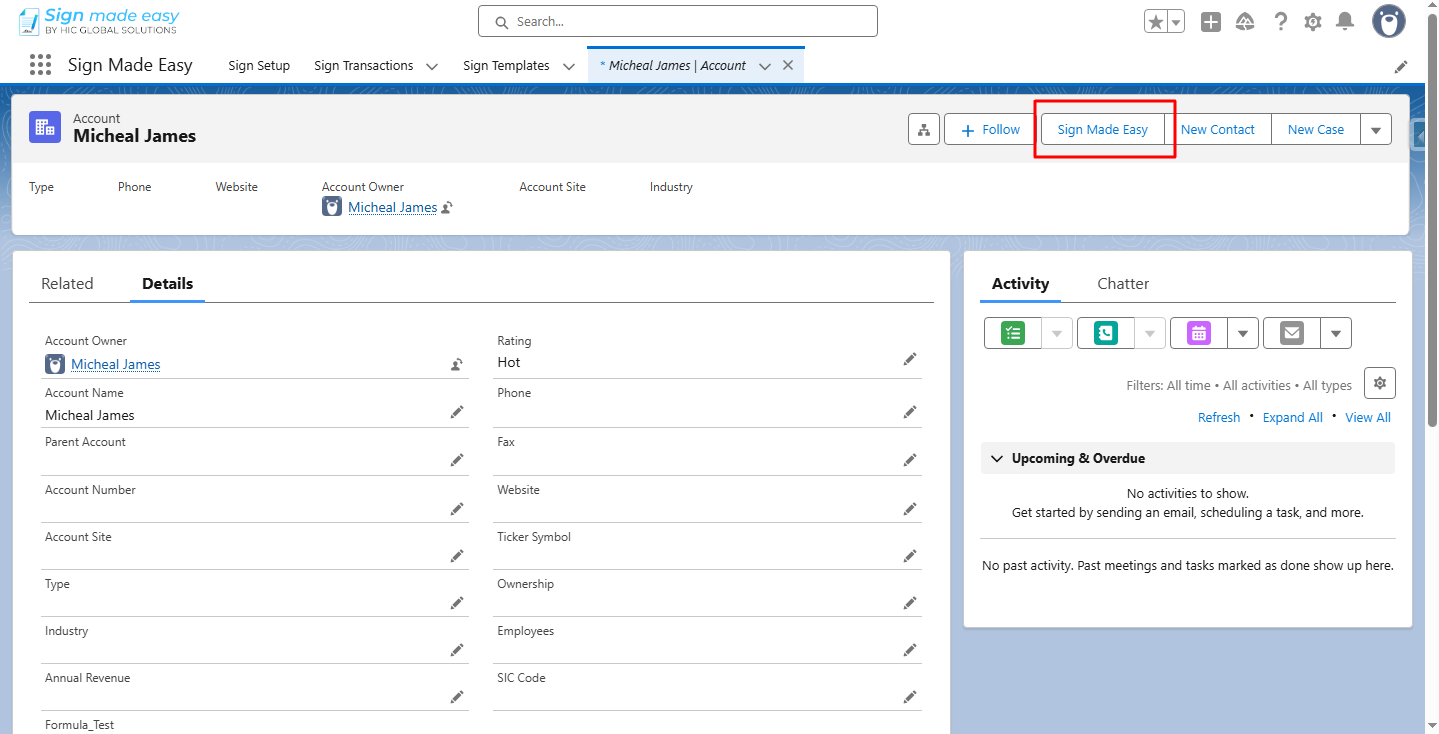
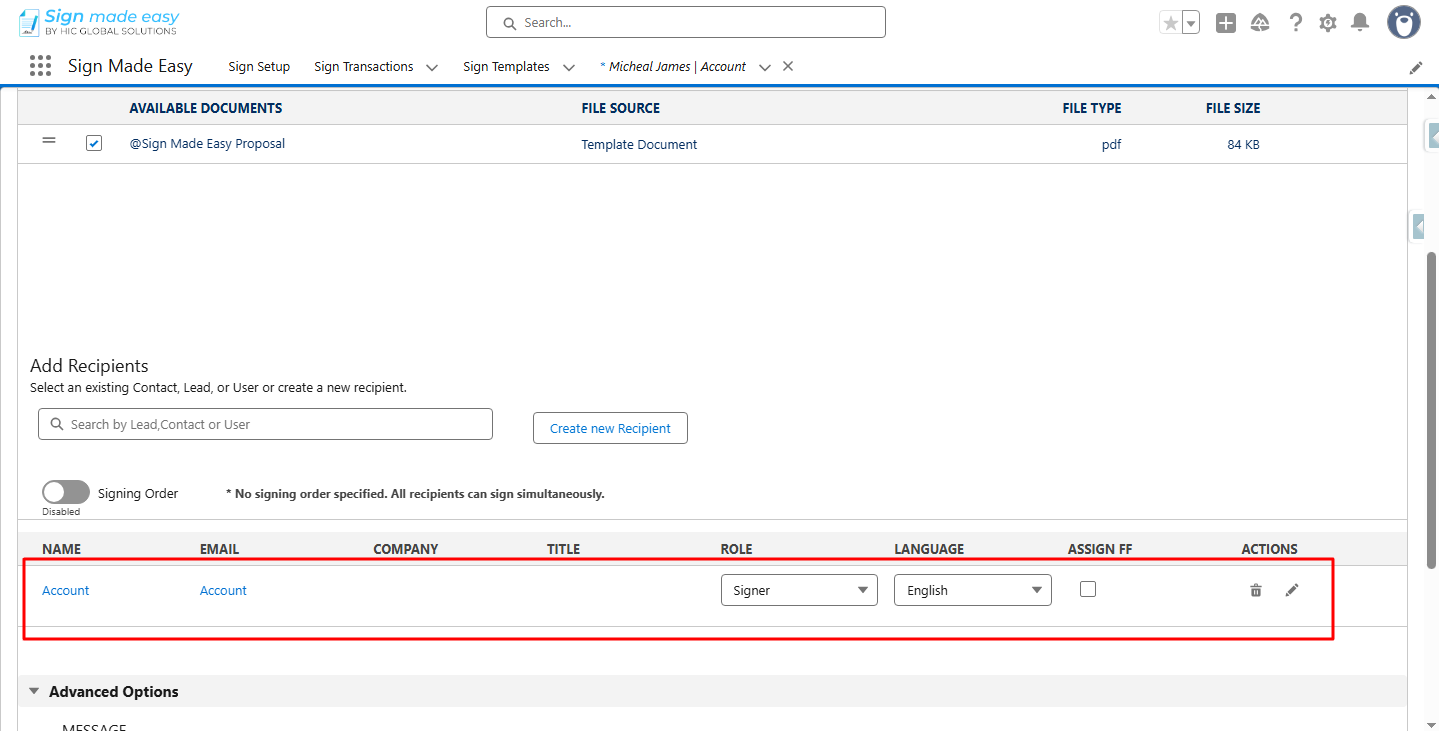
After adding the button, open the record detail page of the same object and click the Sign Template button. The Create Transaction interface will open with the Record Detail Recipient already selected in the Sign Template.
Conclusion
Configuring a Record Detail Recipient removes the extra steps of manually adding recipient information every time you send a document. By connecting recipient details directly with Salesforce records, teams can create a faster and more reliable signing workflow.
With a properly configured sign template, businesses can automate recipient selection, reduce manual effort, and make their eSignature for Salesforce process more efficient. This simple setup helps you get more value from your Salesforce workflow while making every document transaction smoother.